Keep a presentation in the room for repeated use
You can keep a presentation file in your virtual room. You do not need to upload it again every time you open the room, and you do not wait for it to upload inside the room.
Steps to keep a presentation
-
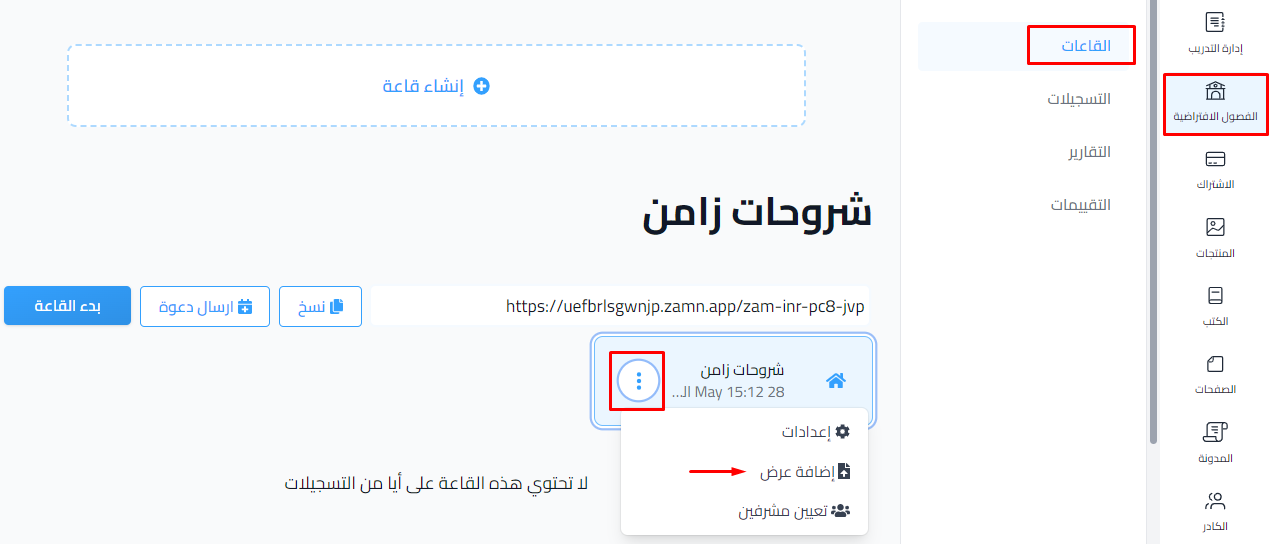
From the dashboard, click Virtual Classes, then choose Rooms.
-
Create a new room or choose an existing one, then click the ⋯ (Actions) button at the end of its row.
-
Choose Add presentation. This option shows for Zamn Rooms only. It does not show for Zoom rooms.
-
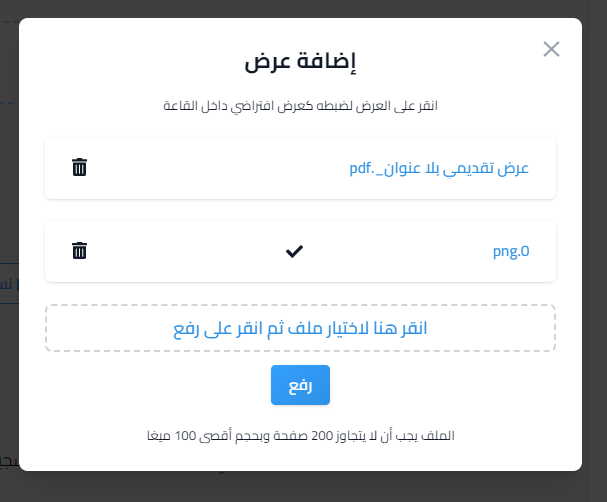
Click Choose and upload, then choose the file.
-
Click Upload.

The file can be a PDF or an image (JPG or PNG). It must not be more than 200 pages and 100 MB.
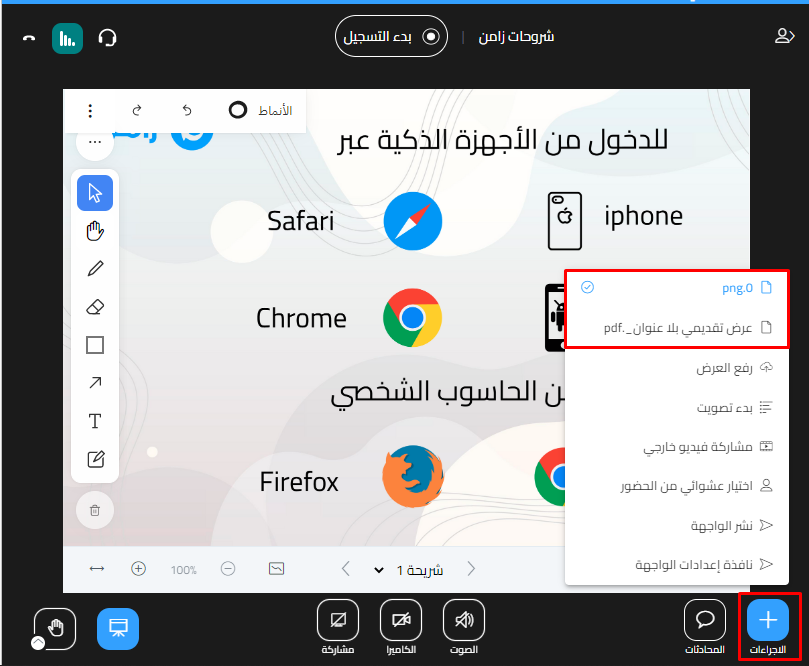
You can add more than one file to the room. The last file you upload becomes the default presentation that opens in the room. To choose another file, click its name in the list, and a check mark shows next to it.
Switch between files inside the room
When you add more than one file to the room, you can switch between them inside the room from the Actions button. Click the file you want to switch to it.