Create an online room (virtual classroom)
This article shows how to create an online room (a virtual classroom) on your platform, and how to share its link with attendees.
Steps to create an online room
-
From the dashboard, click Virtual Classes.
-
Choose Rooms.
-
Click Create room.

-
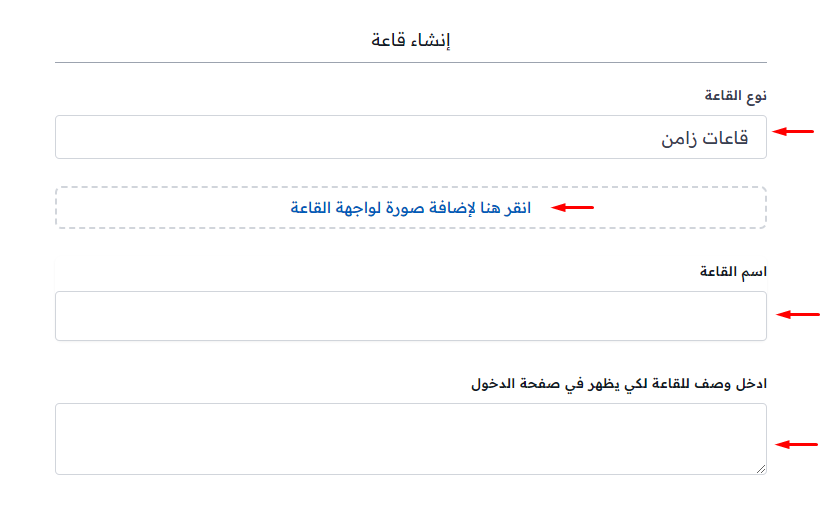
Choose the Room Type.
-
You can add an image that shows on the room's page.
-
Enter the Room Name.
-
If you see the Subscription field (it shows when you have more than one virtual room subscription), choose the subscription this room uses, or keep Use default subscription.
-
Enter a description for the room.
-
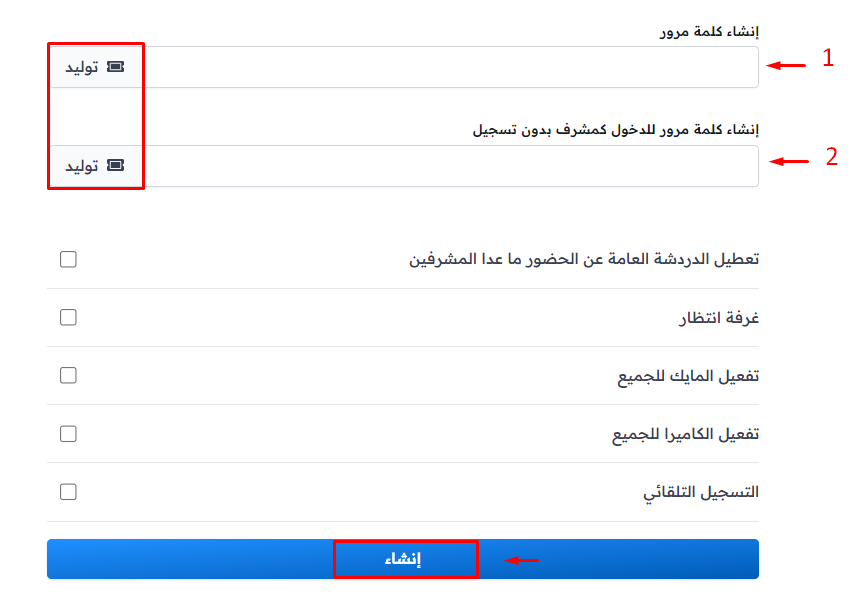
You can type passwords or create them with the Generate button:
- A password for trainees and attendees.
- A password for the room's moderators.
-
Choose the settings you want:
- Disable public chat except for moderators.
- Waiting Room: a room where attendees wait for the moderator to approve them before they can enter.
- Enable mic for all, Enable webcam for all, or both.
- Auto recording: recording starts as soon as you enter the room.
- Hide subscription usage from moderators: this option shows only when you can choose a subscription. It hides the subscription usage panel from moderators inside the room.
-
Click Create to save and create the room.
A message at the top of the screen tells you the room was created.
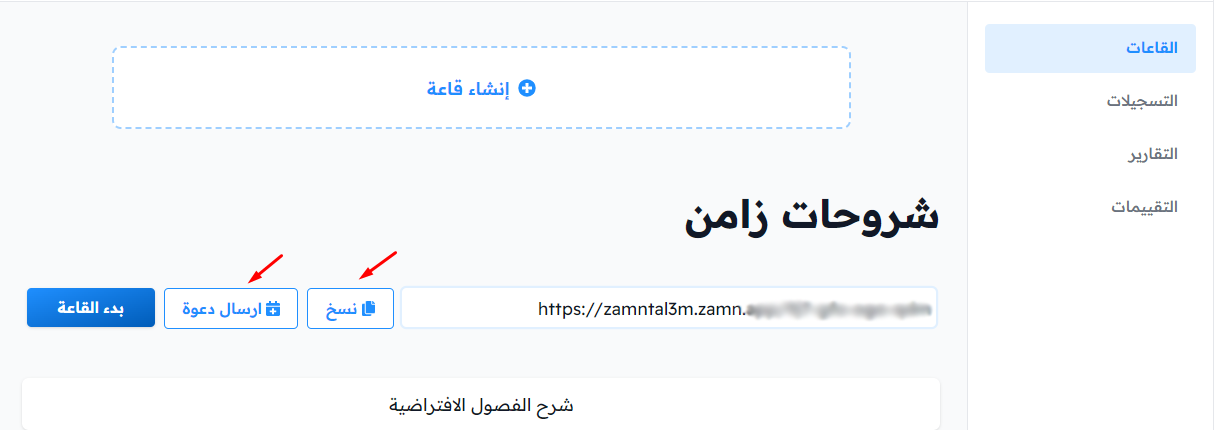
You will find the room link under the room name. Click Copy to copy it and send it to attendees, or click Send invitation to open a new Google Calendar event with the room name and link, then add the attendees to the event so they get it.