Add an image to the room page
You can add an image that shows at the top of the room page, the page attendees use to enter the room.
Add the image when you create the room
You can add the image right when you create the room, by clicking Add cover.
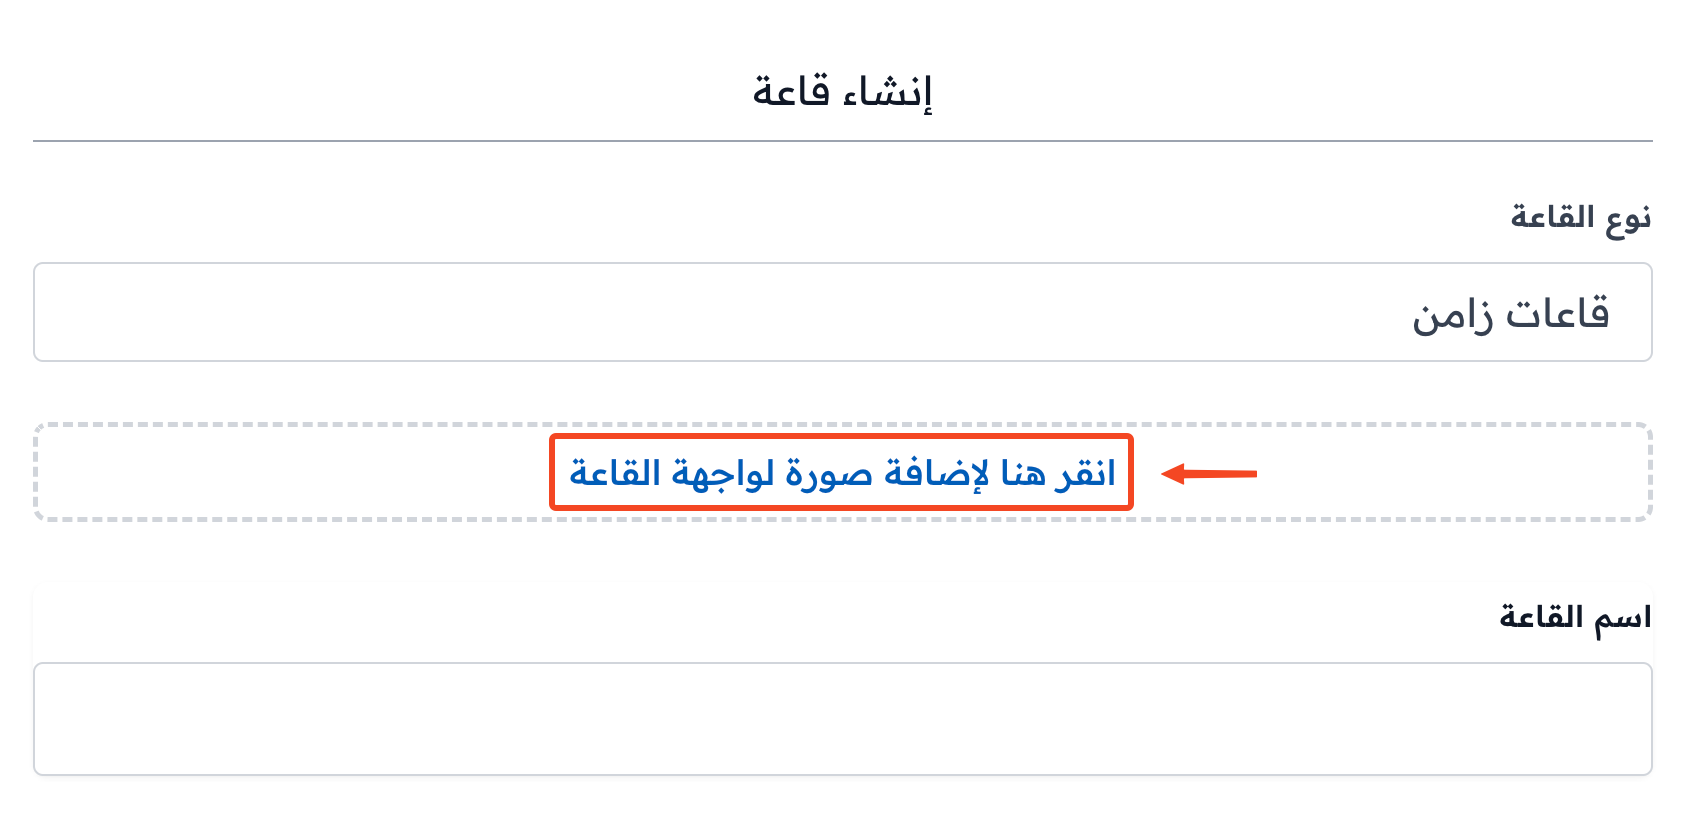
Use a JPG, PNG or GIF image smaller than 2 MB. Images are only for Zamn rooms. The option does not show for Zoom rooms.
Steps to add an image after you create the room
-
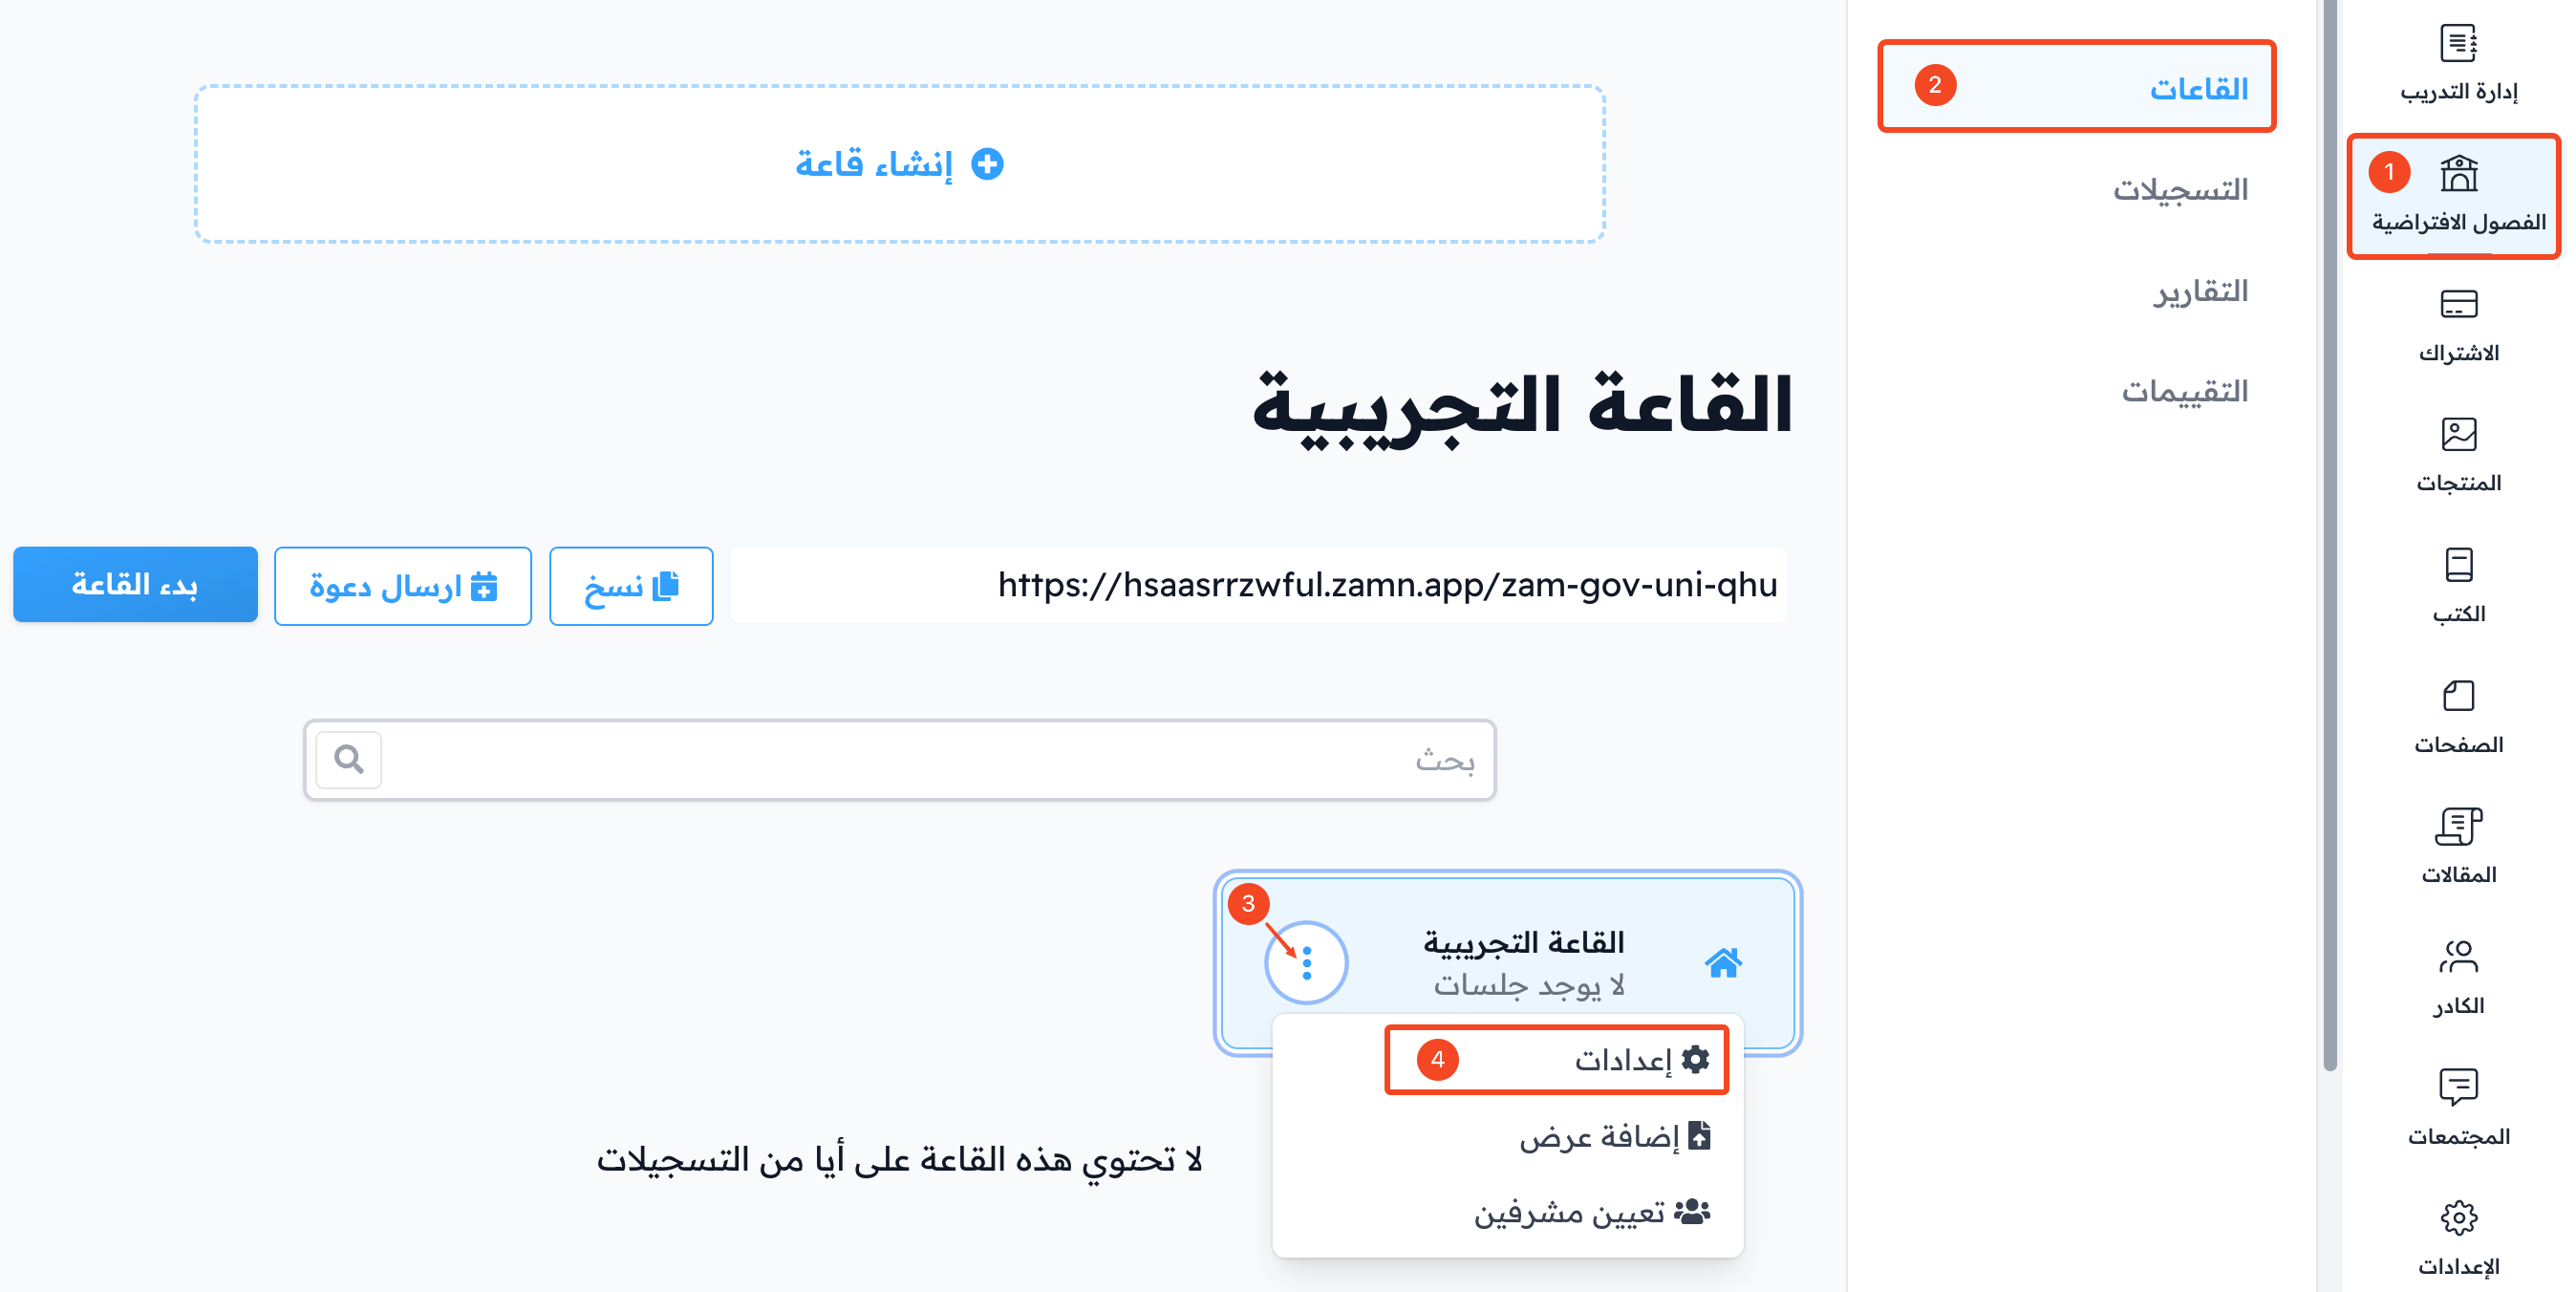
From the dashboard, click Virtual Classes.
-
Choose Rooms, then find the room you want to add an image to.
-
Click the ⋯ (Actions) button at the end of the room row.
-
Choose Settings.
-
Click Add cover.
-
Choose the image, then click Update at the bottom of the window to save.
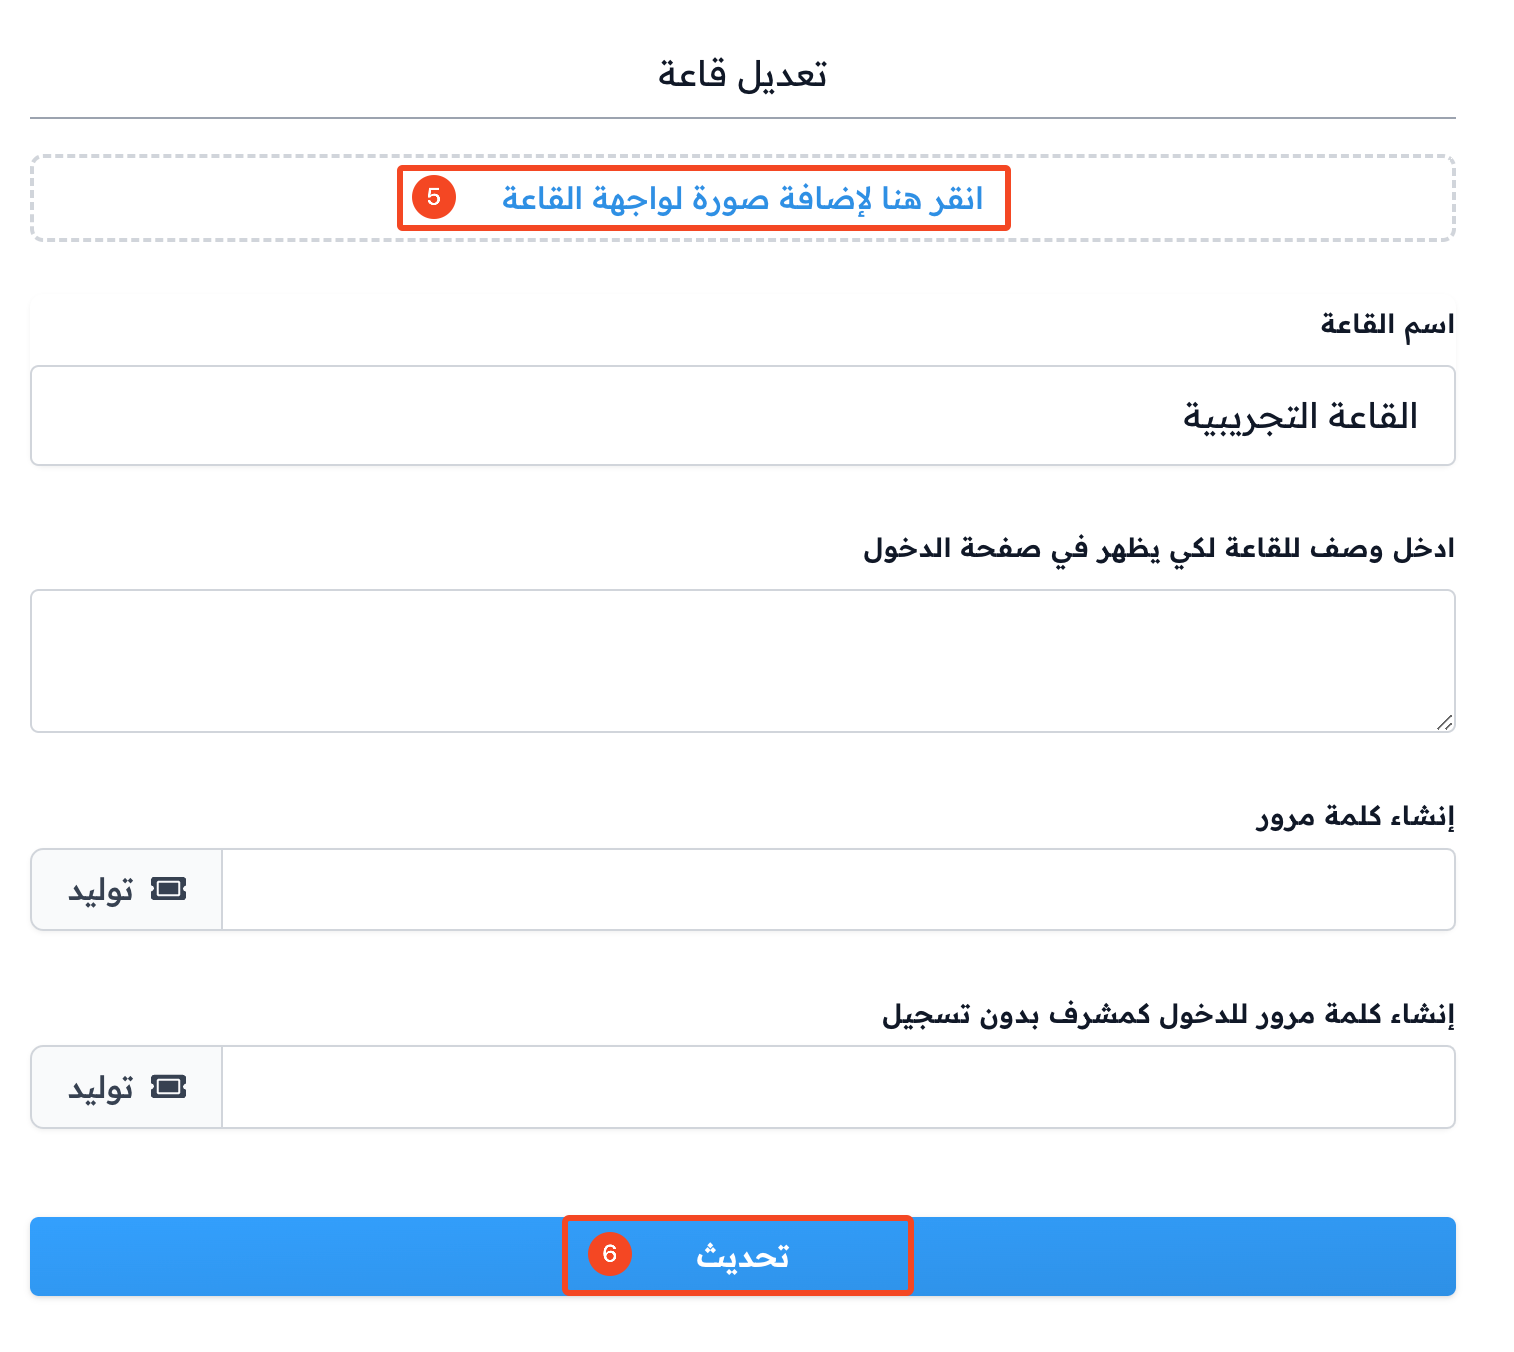
If the room already has an image, you see the image file name instead of the add button. To change it, click the trash icon next to the file name to delete the current image, then open Settings again and add the new image.