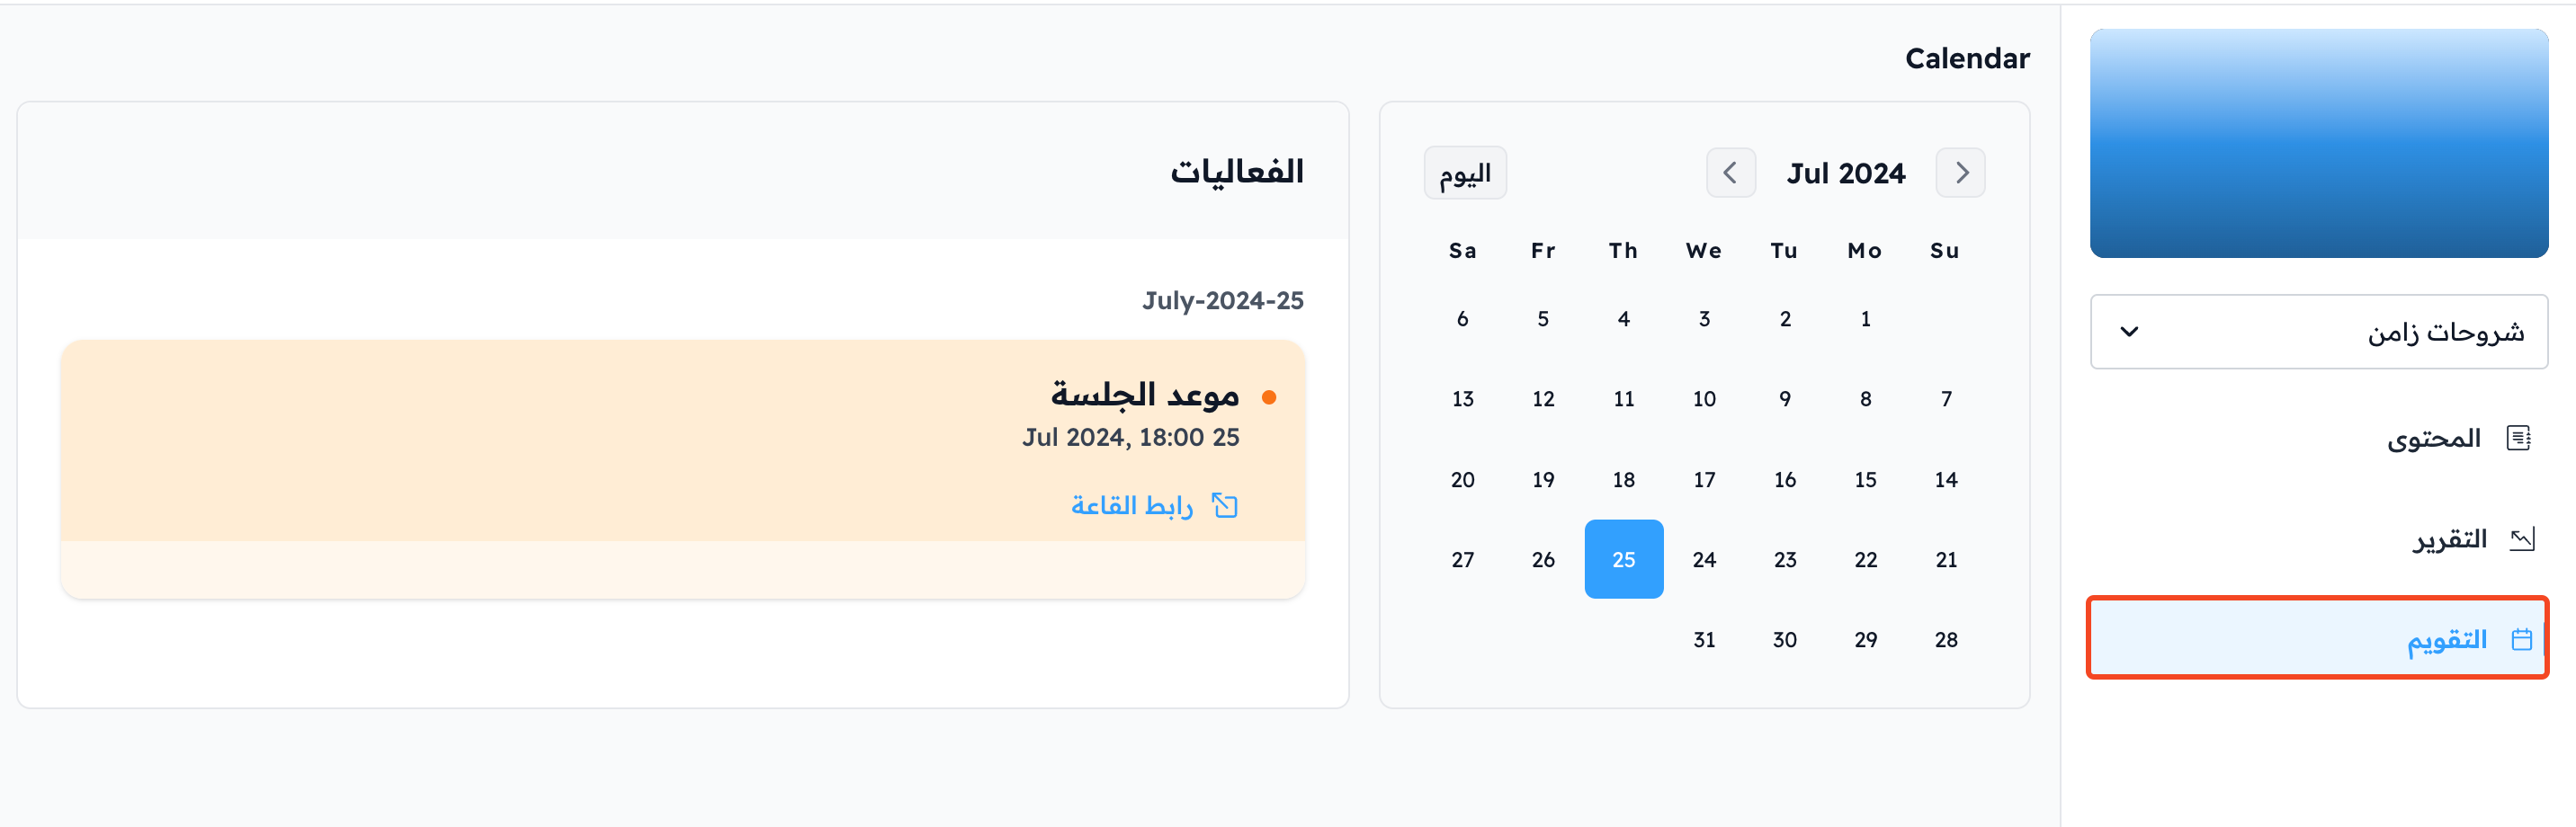
Course calendars (create a study schedule)
A calendar helps you schedule course events, such as meetings and upcoming dates. These steps are for platform admins.
Steps to add a calendar to a course
-
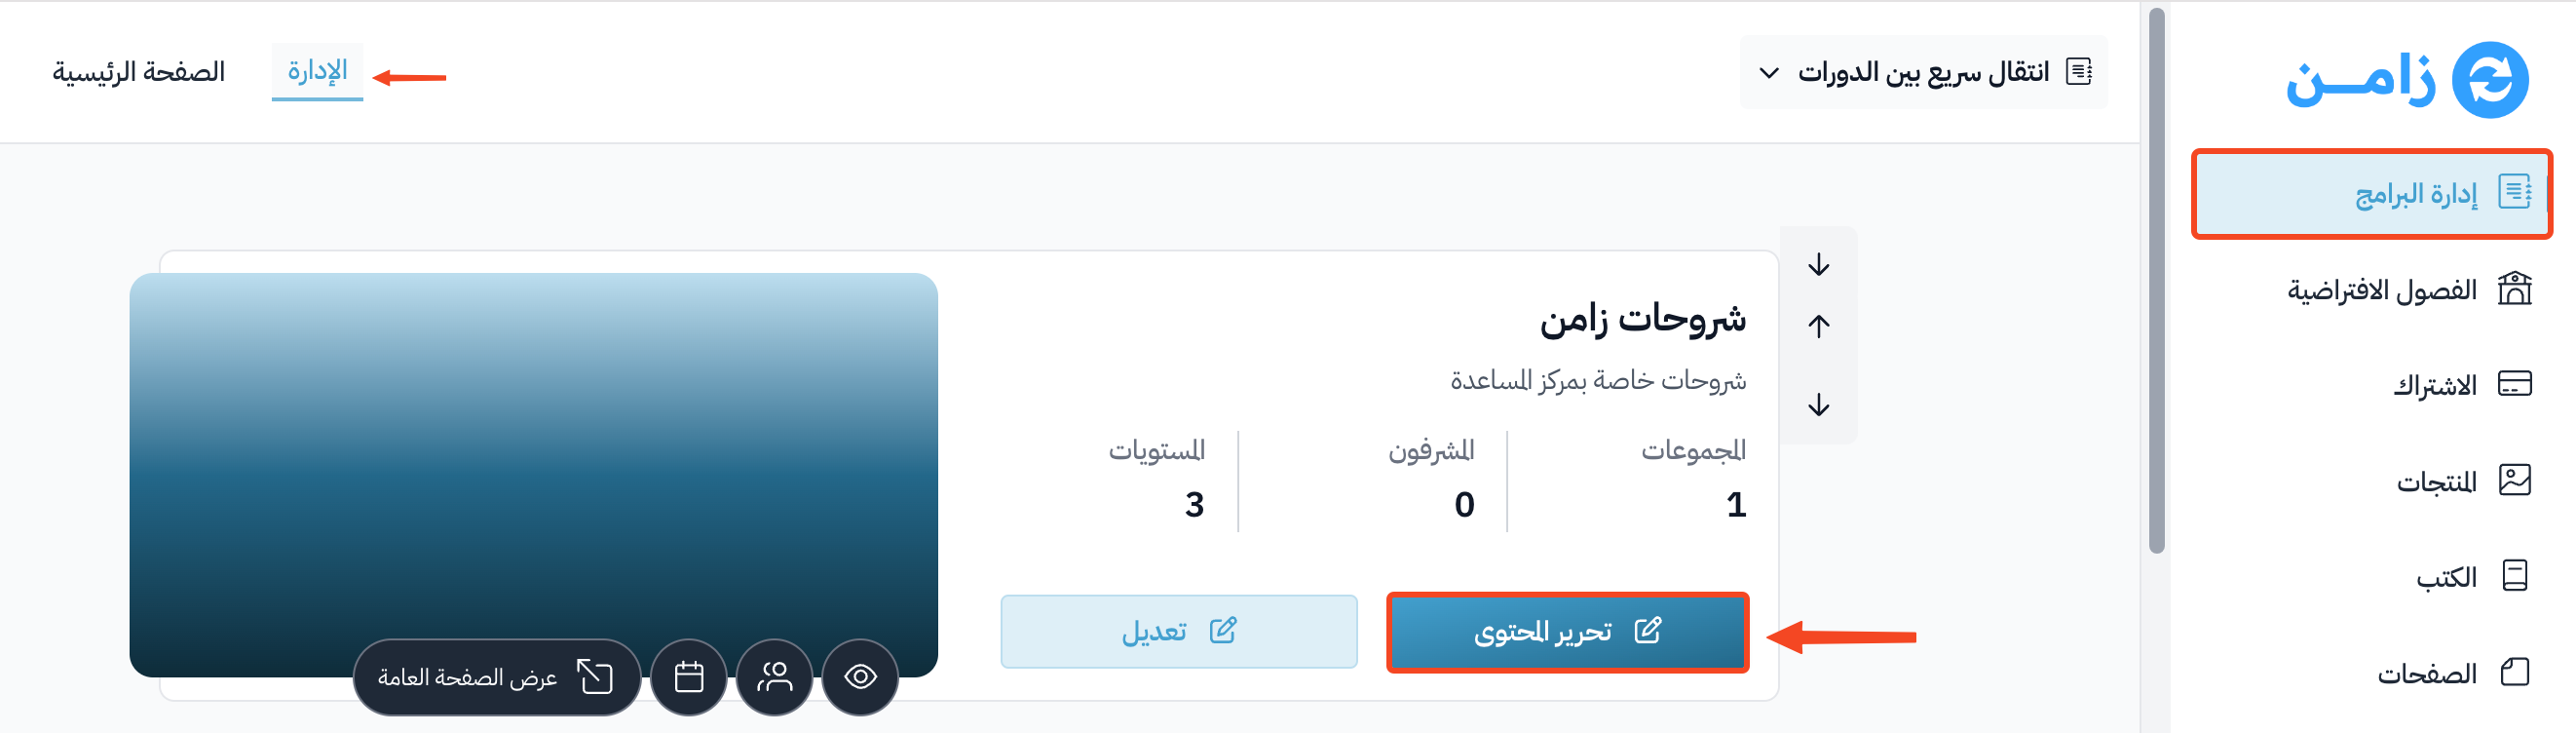
From the dashboard, go to the Courses page.
-
Click Edit Curriculum for the course you want.
-
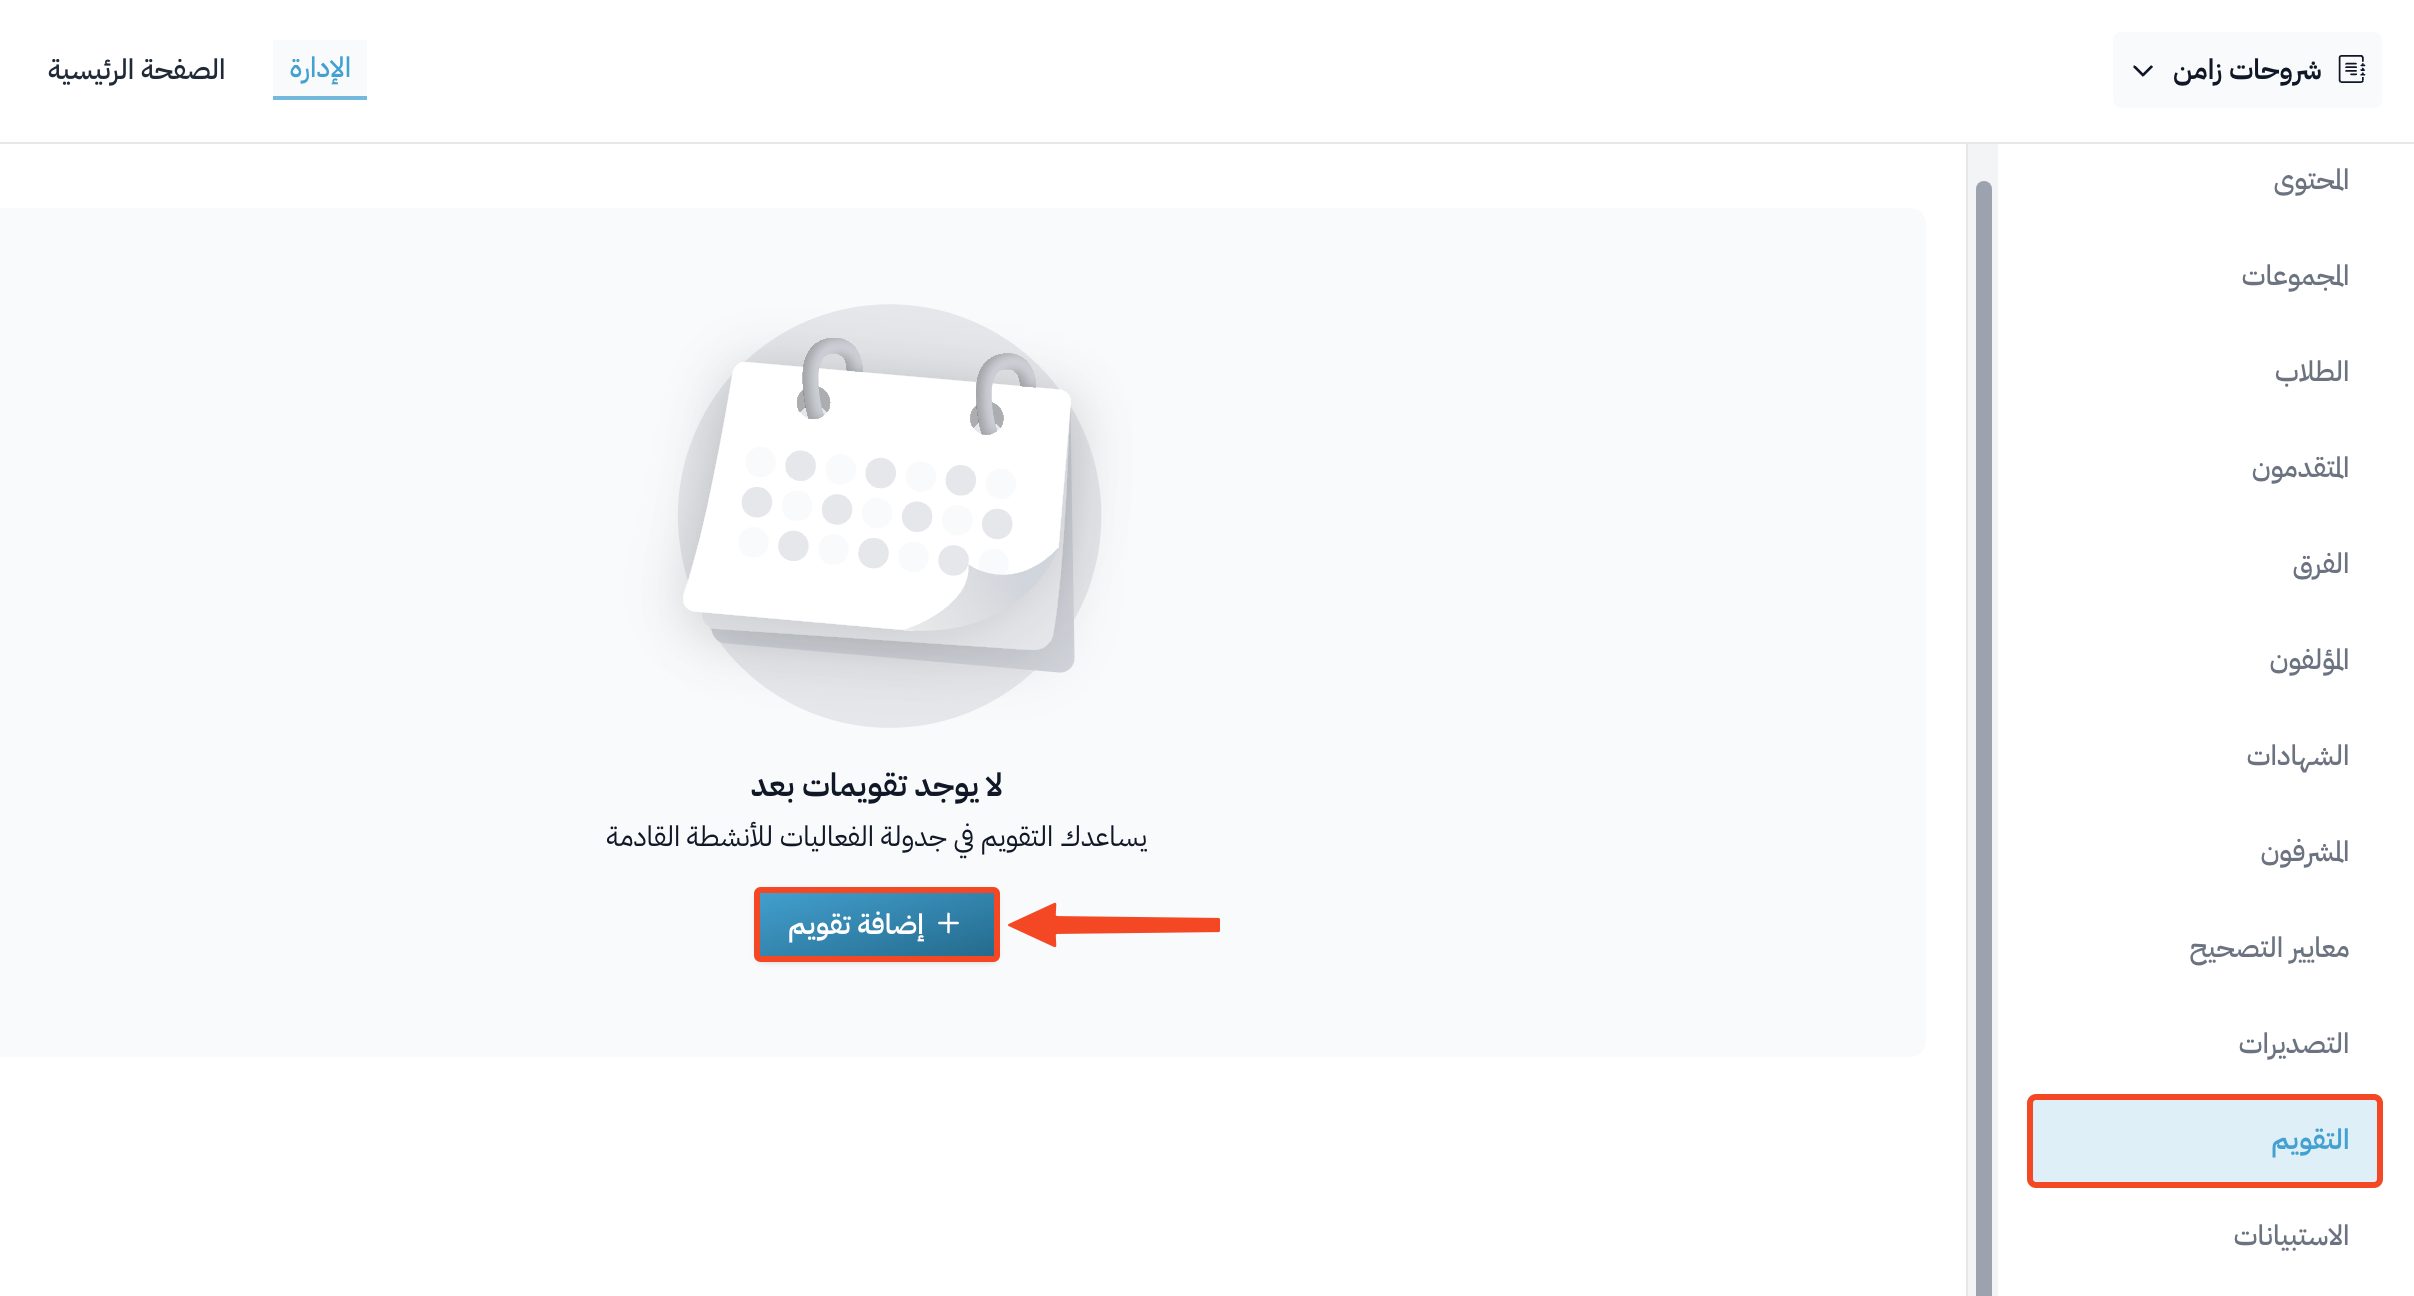
From the course menu, go to the Calendars page.
-
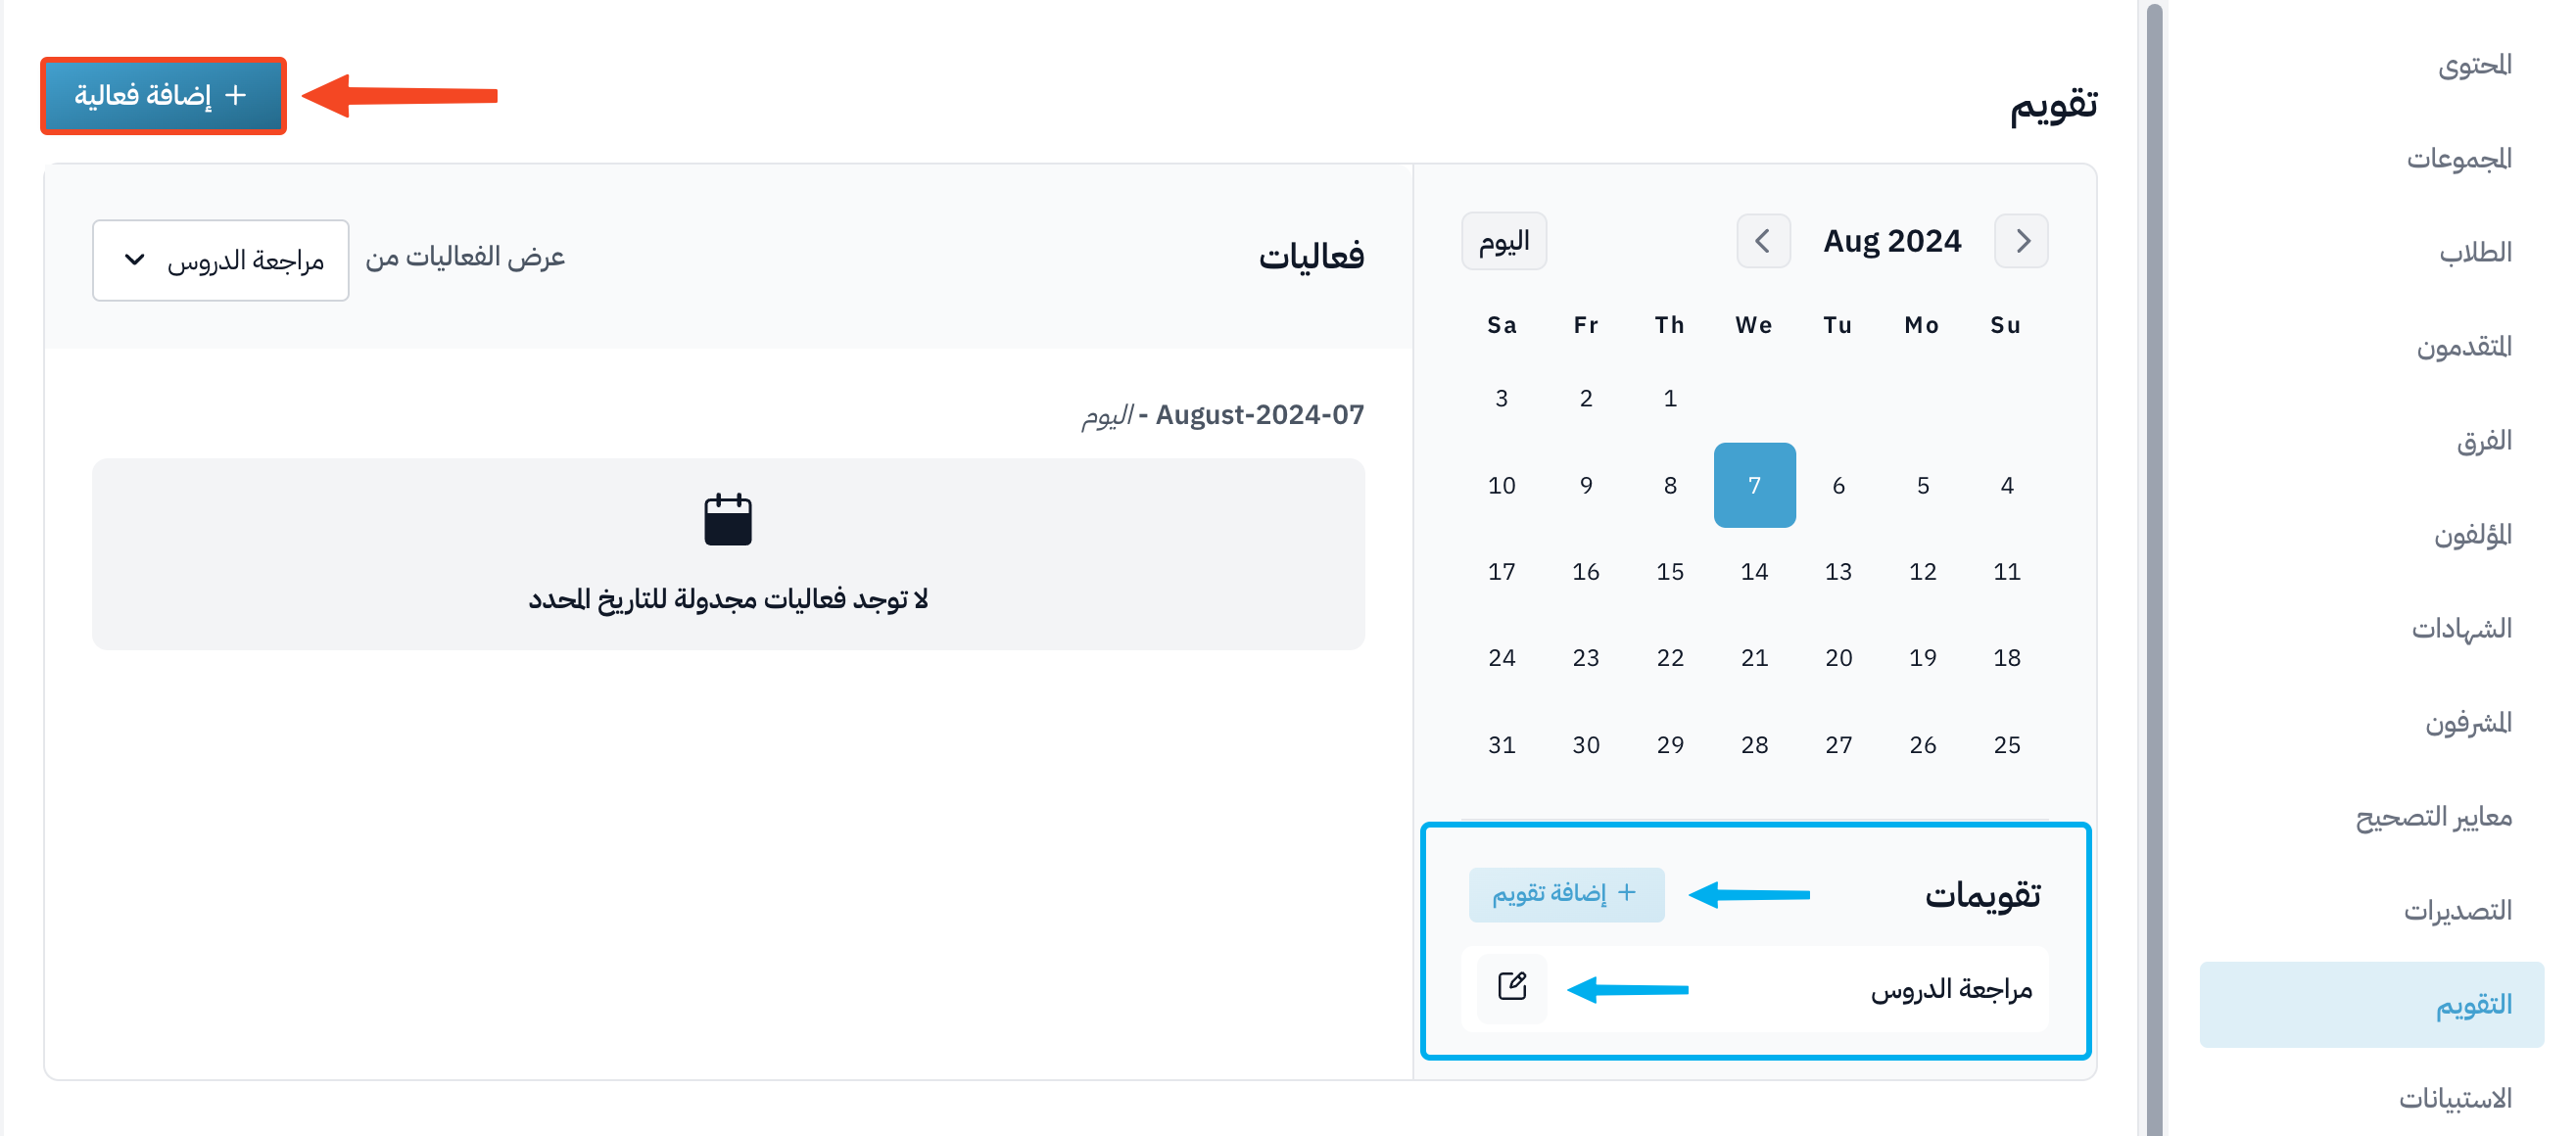
Click Add Calendar.
-
Enter the Calendar name.
-
In Link calendar to cohorts, choose the student cohorts that will see the calendar.
-
Click Add calendar.
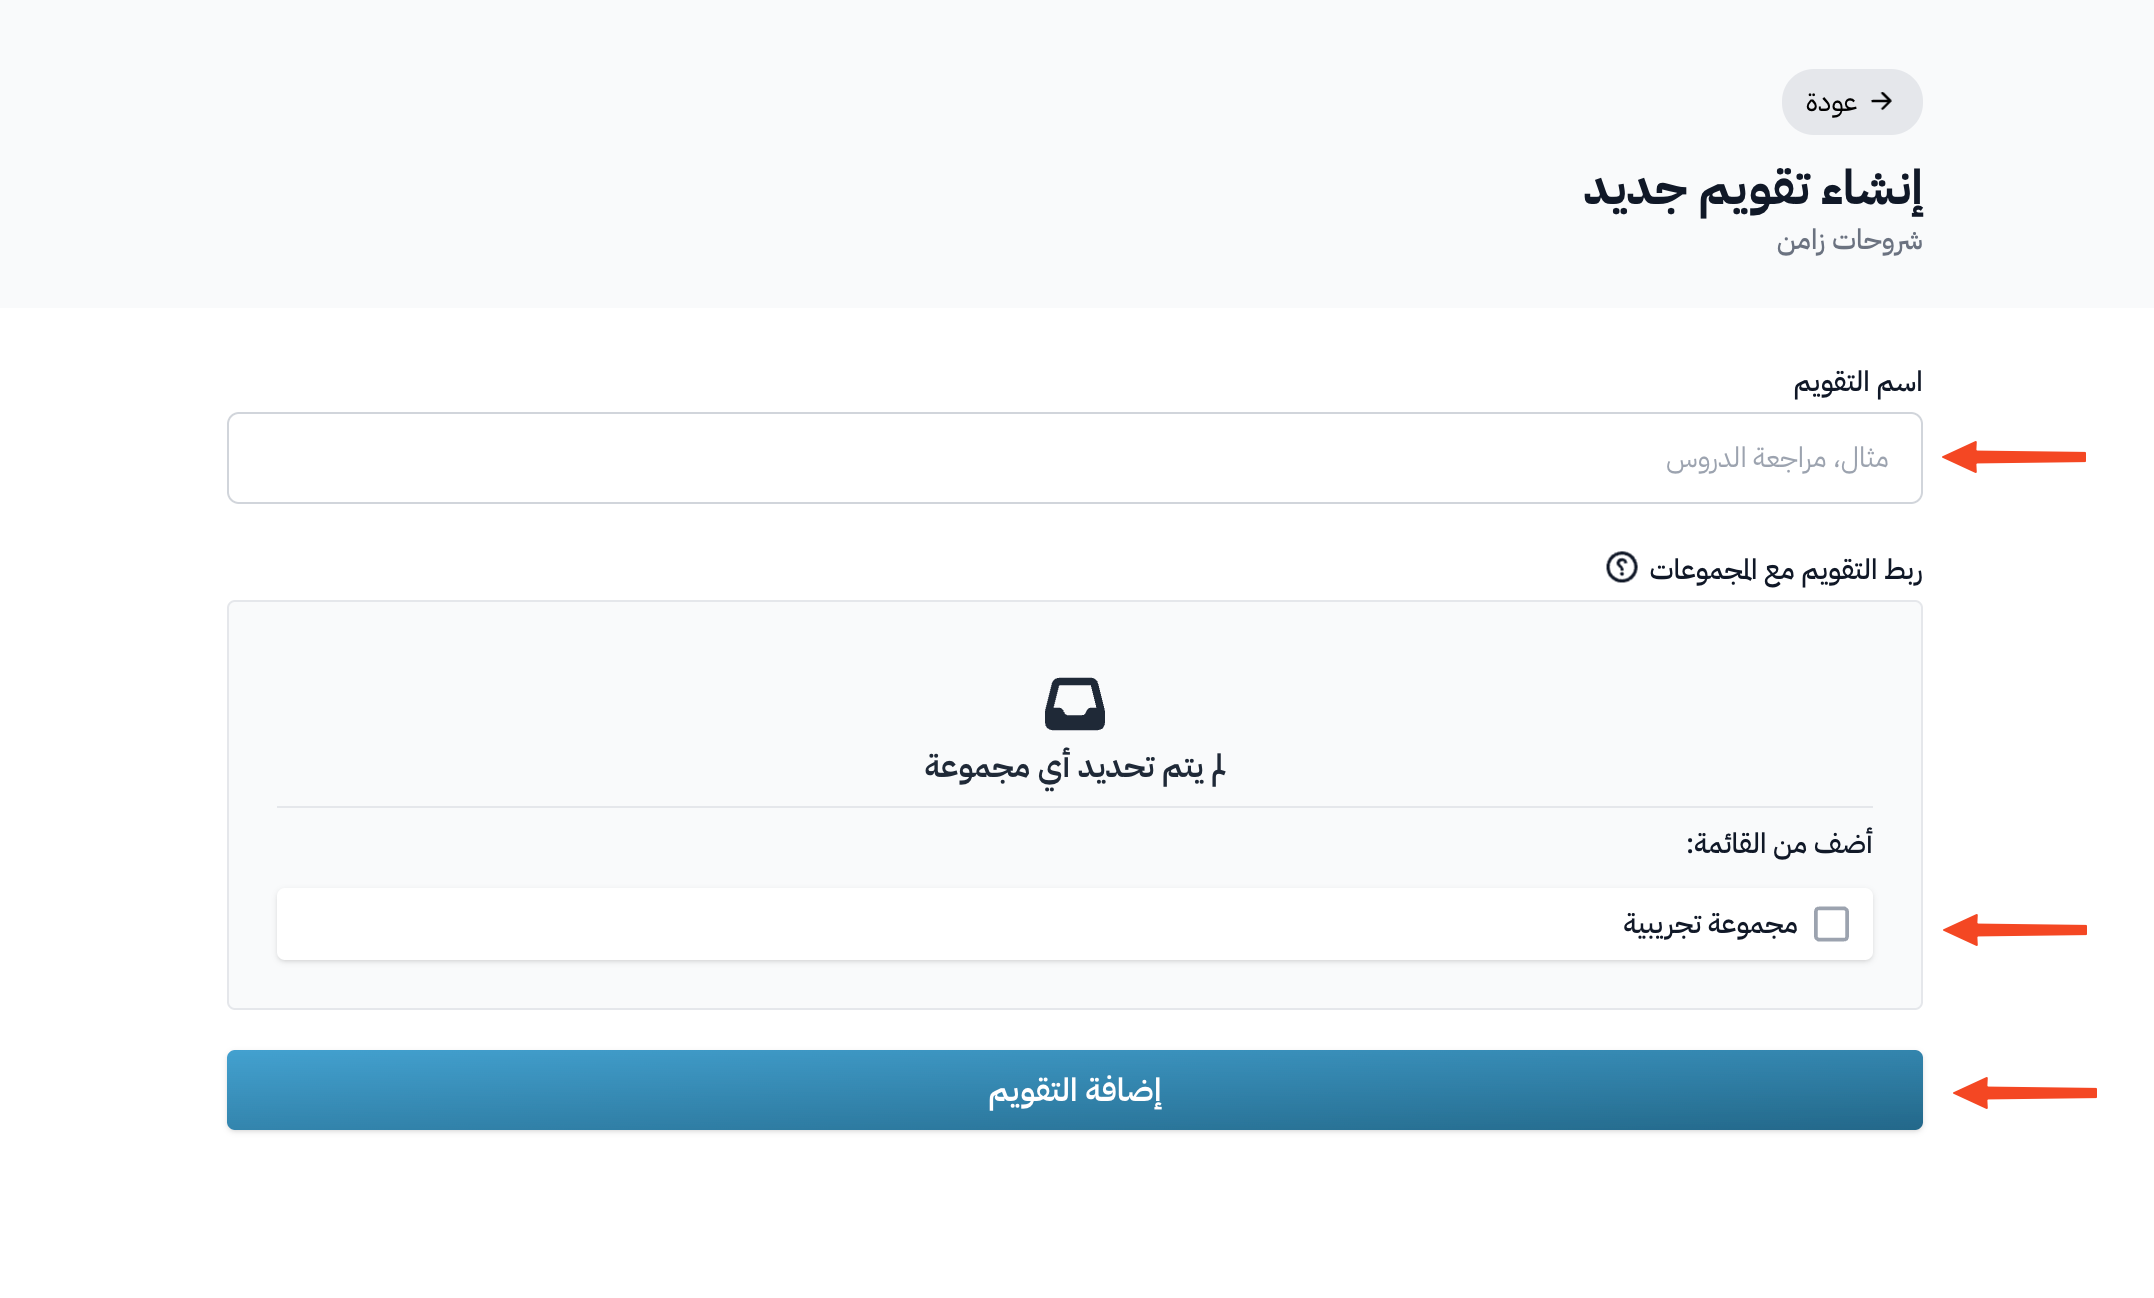
You can add more than one calendar to a course, and you can edit the calendars you created before.
Steps to add an event to the calendar
-
Click Add an event.
-
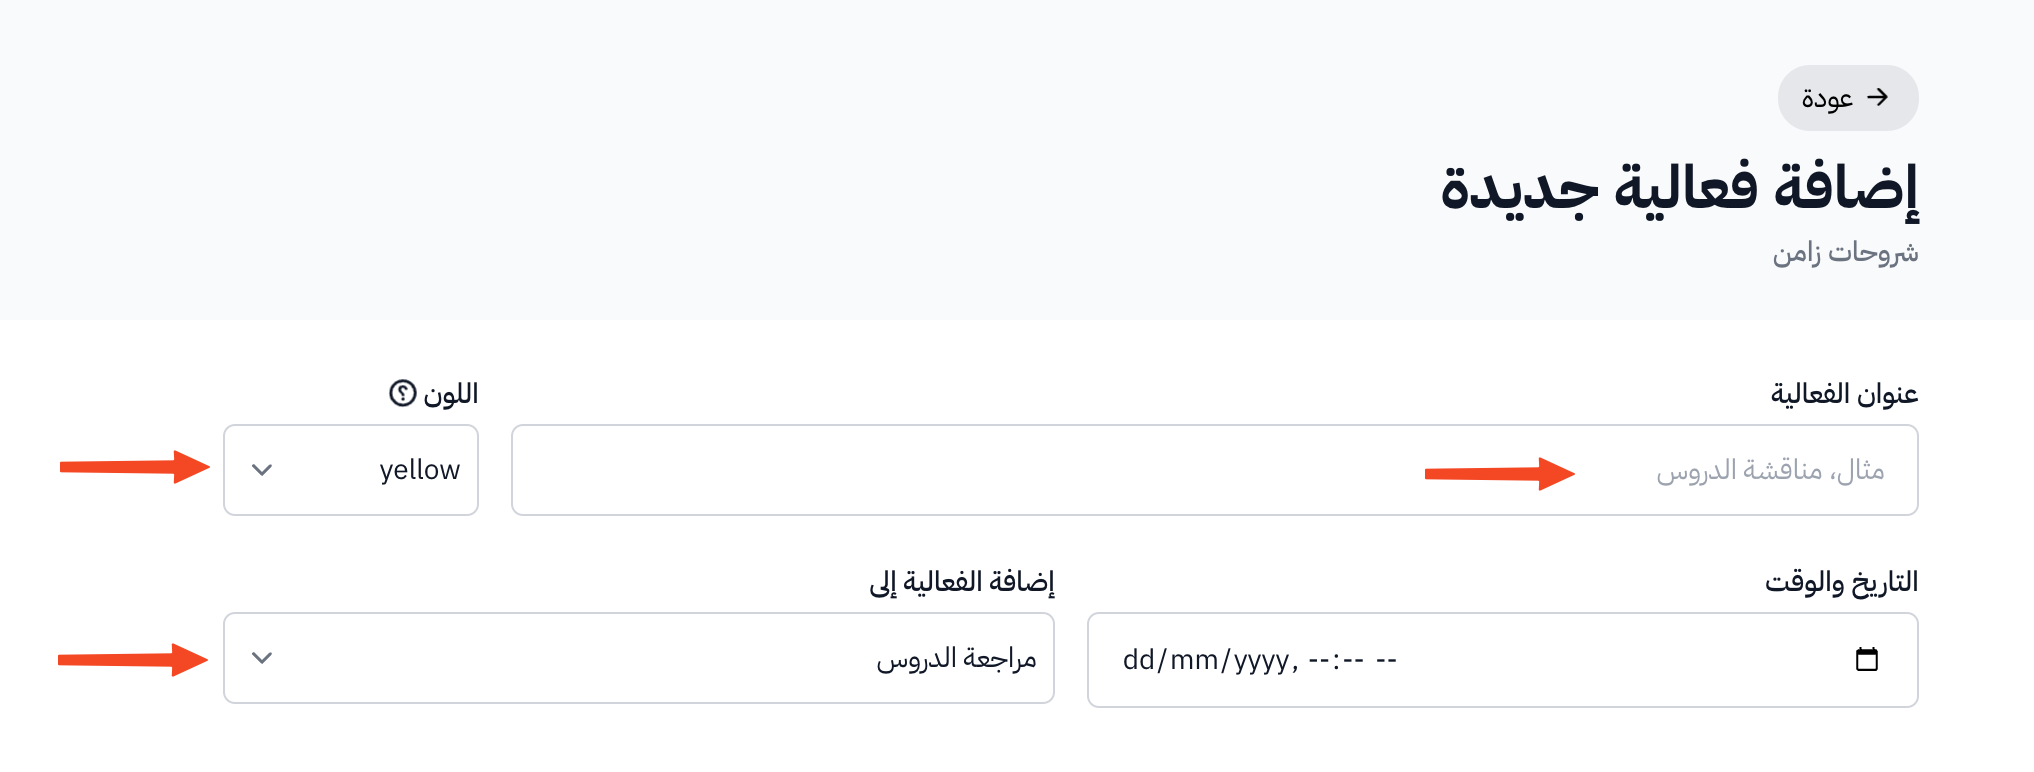
Enter the Event Title.
-
Choose a Color for the event.
-
In Add event to, choose the calendar.
-
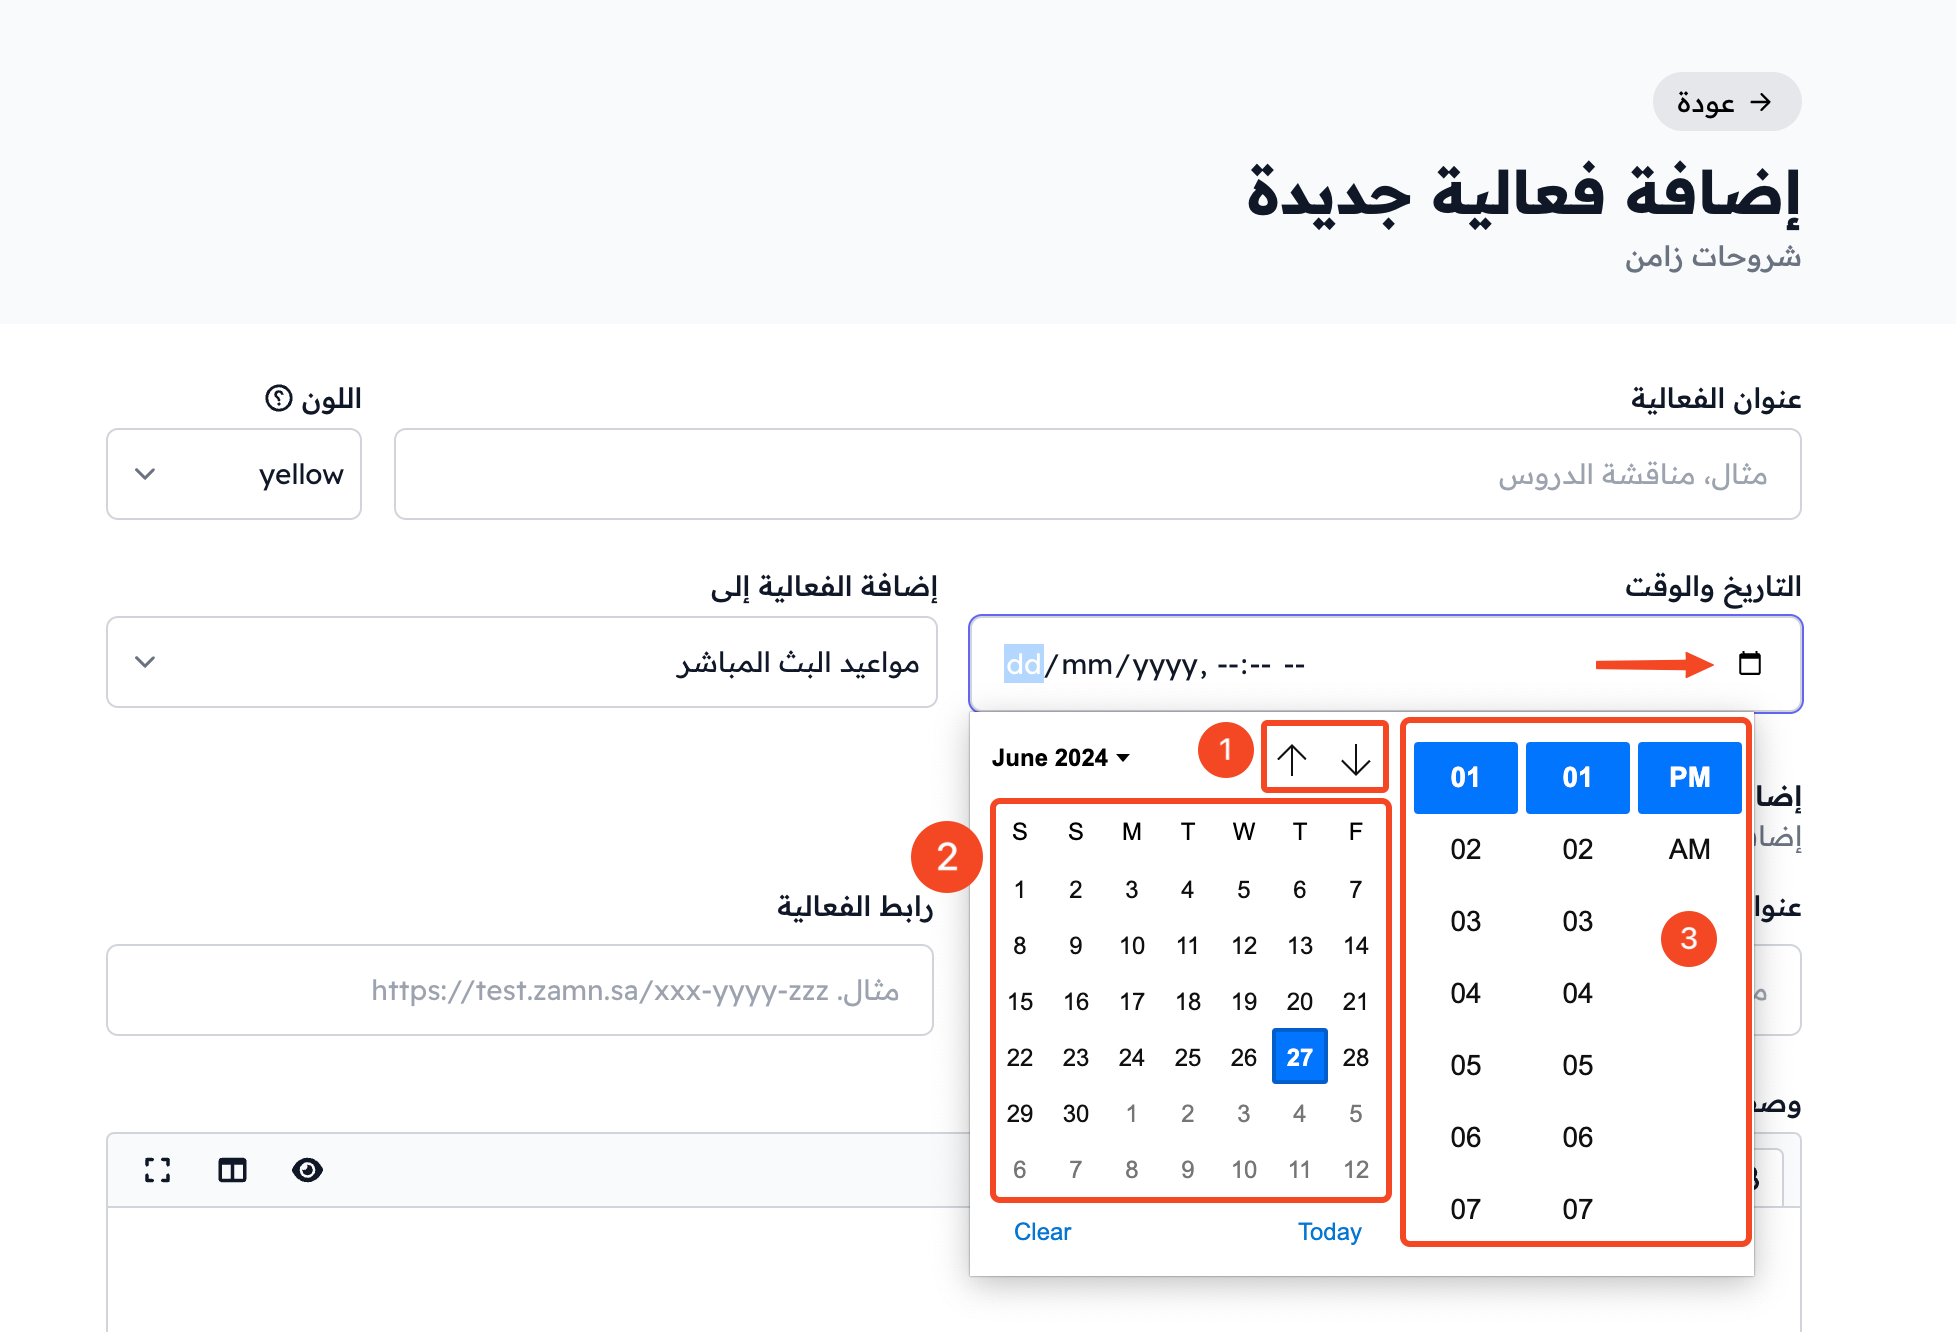
In Date and Time, set the event date and time:
- Choose the month.
- Choose the day.
- Choose the time, with AM or PM.
-
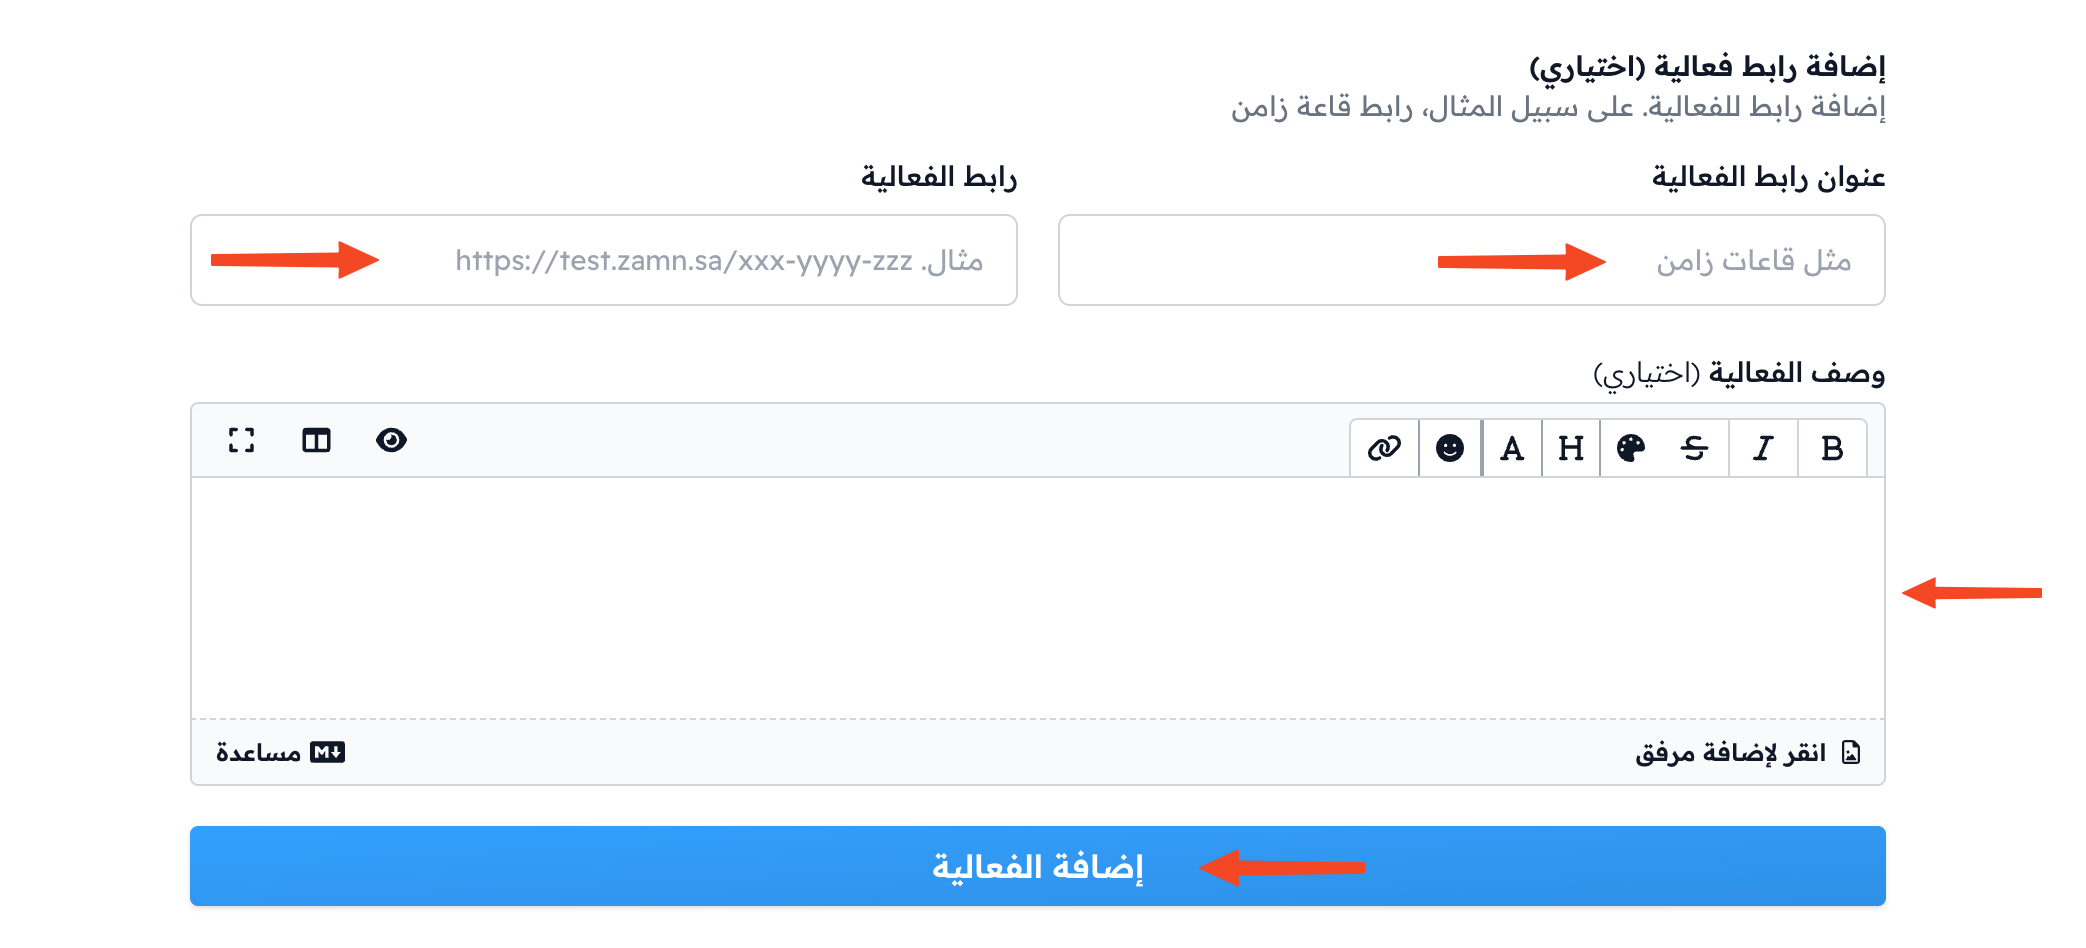
You can add an Event link title and an Event link URL (optional).
-
You can add an Event description (optional).
-
Click Add event.
The event shows to students in the calendar on the date and time you set. If you added a room link, they can open it by clicking the link title.