Extra data fields for students
You can create extra data fields that students must fill in, like date of birth or study level. This feature is for platform admins.
This feature is available on the Growth plan or above, and during the trial period.
Create an extra field
-
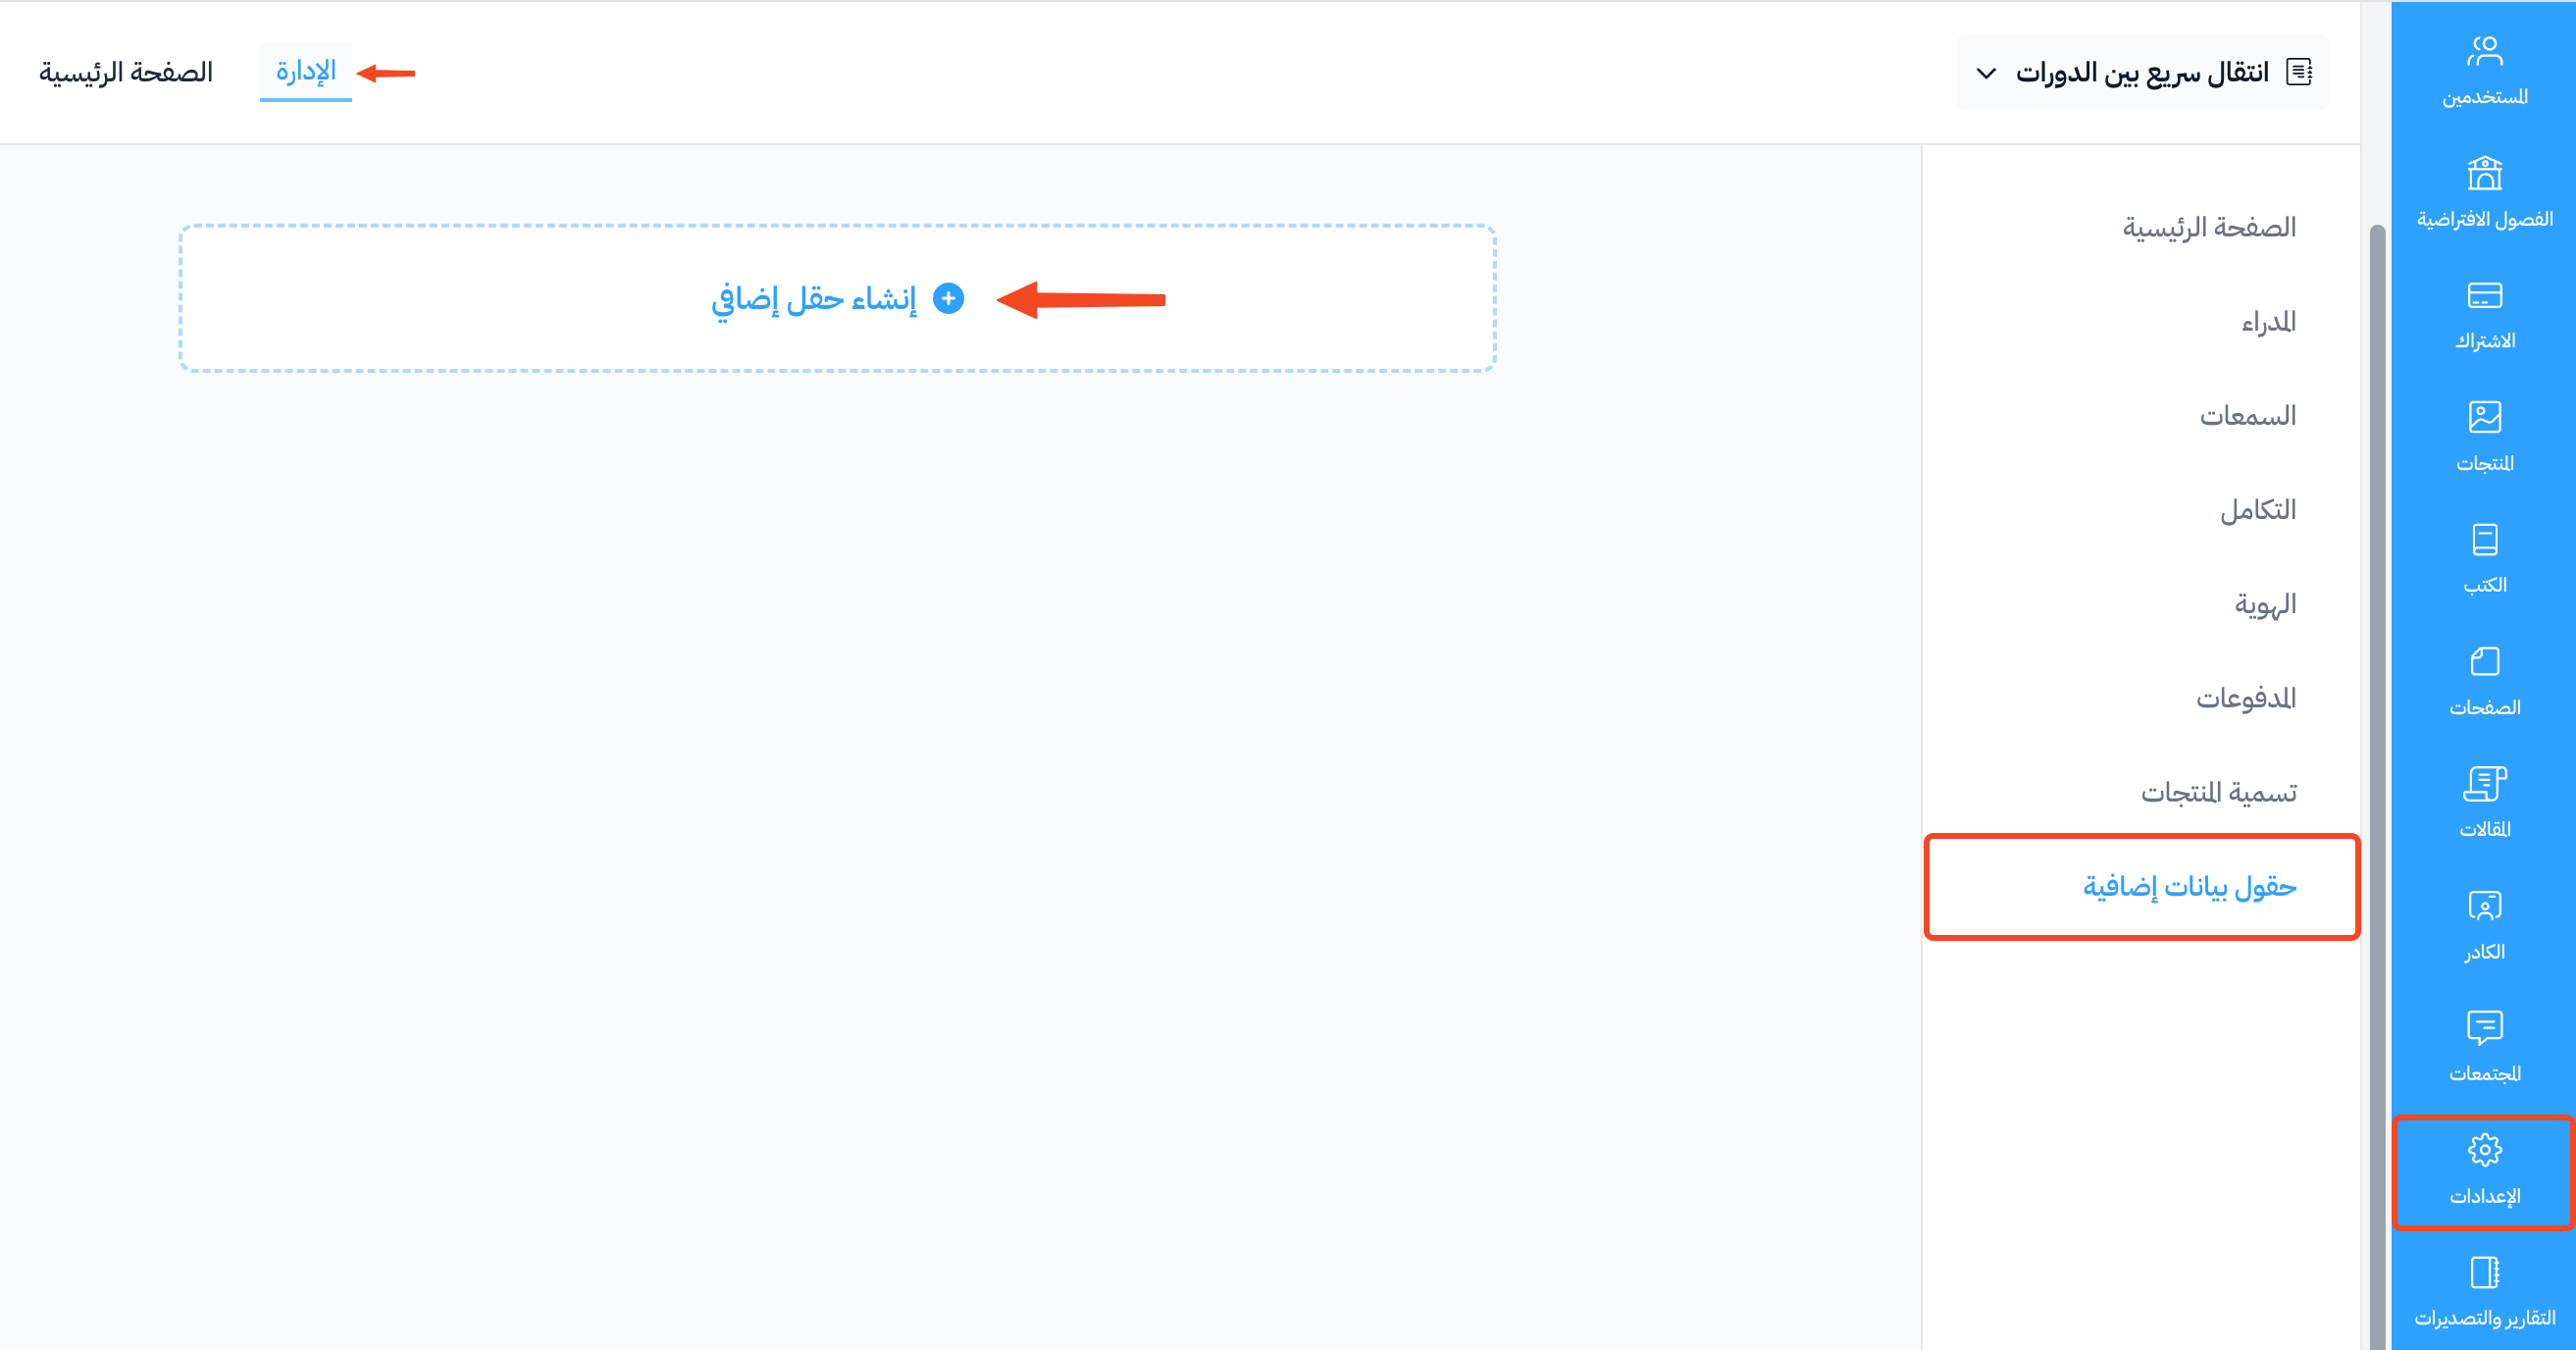
In your platform dashboard, click Settings.
-
Open the Students Data Fields page.
-
Click Create Extra Field.
-
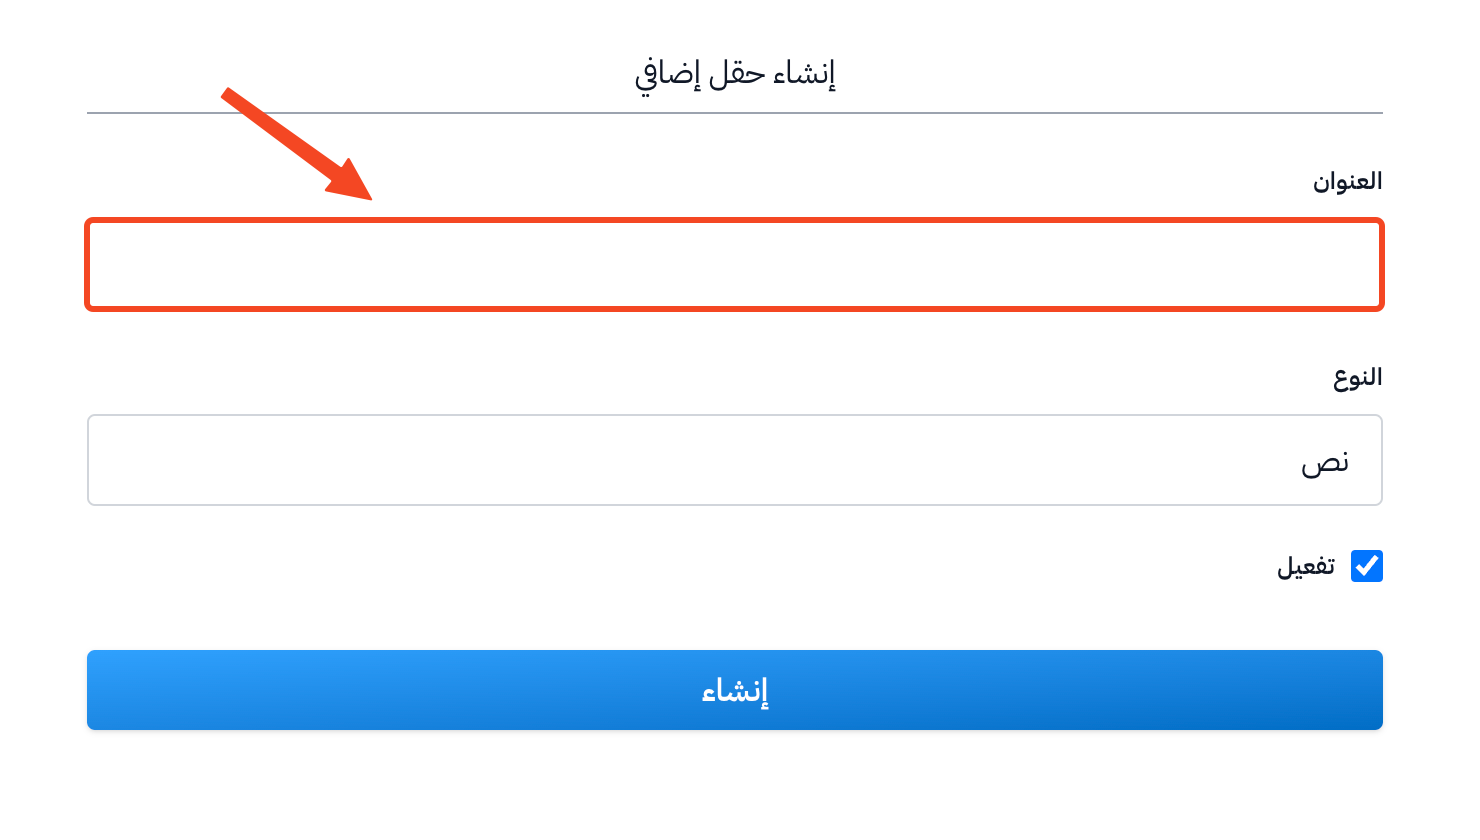
Type the Title. This is the question the student sees.
-
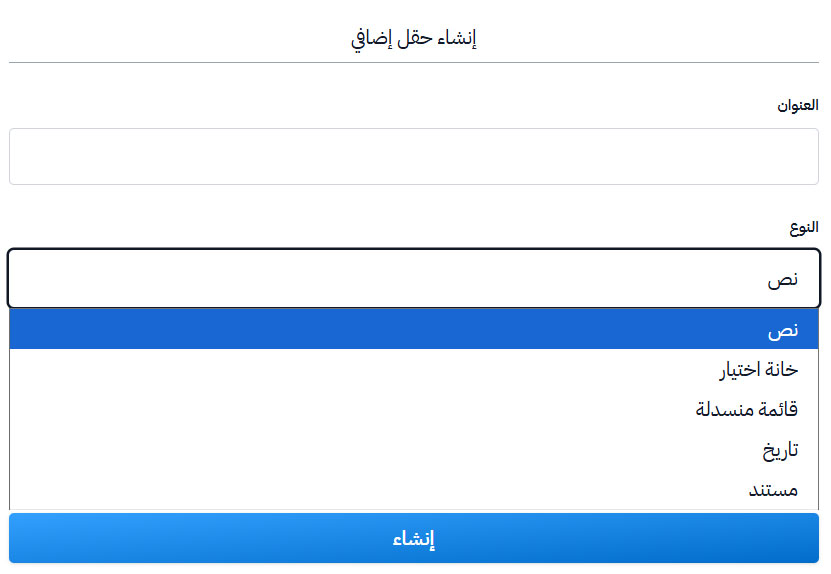
Choose the Type: Text Field, Checkbox, Dropdown, Date or Document.
-
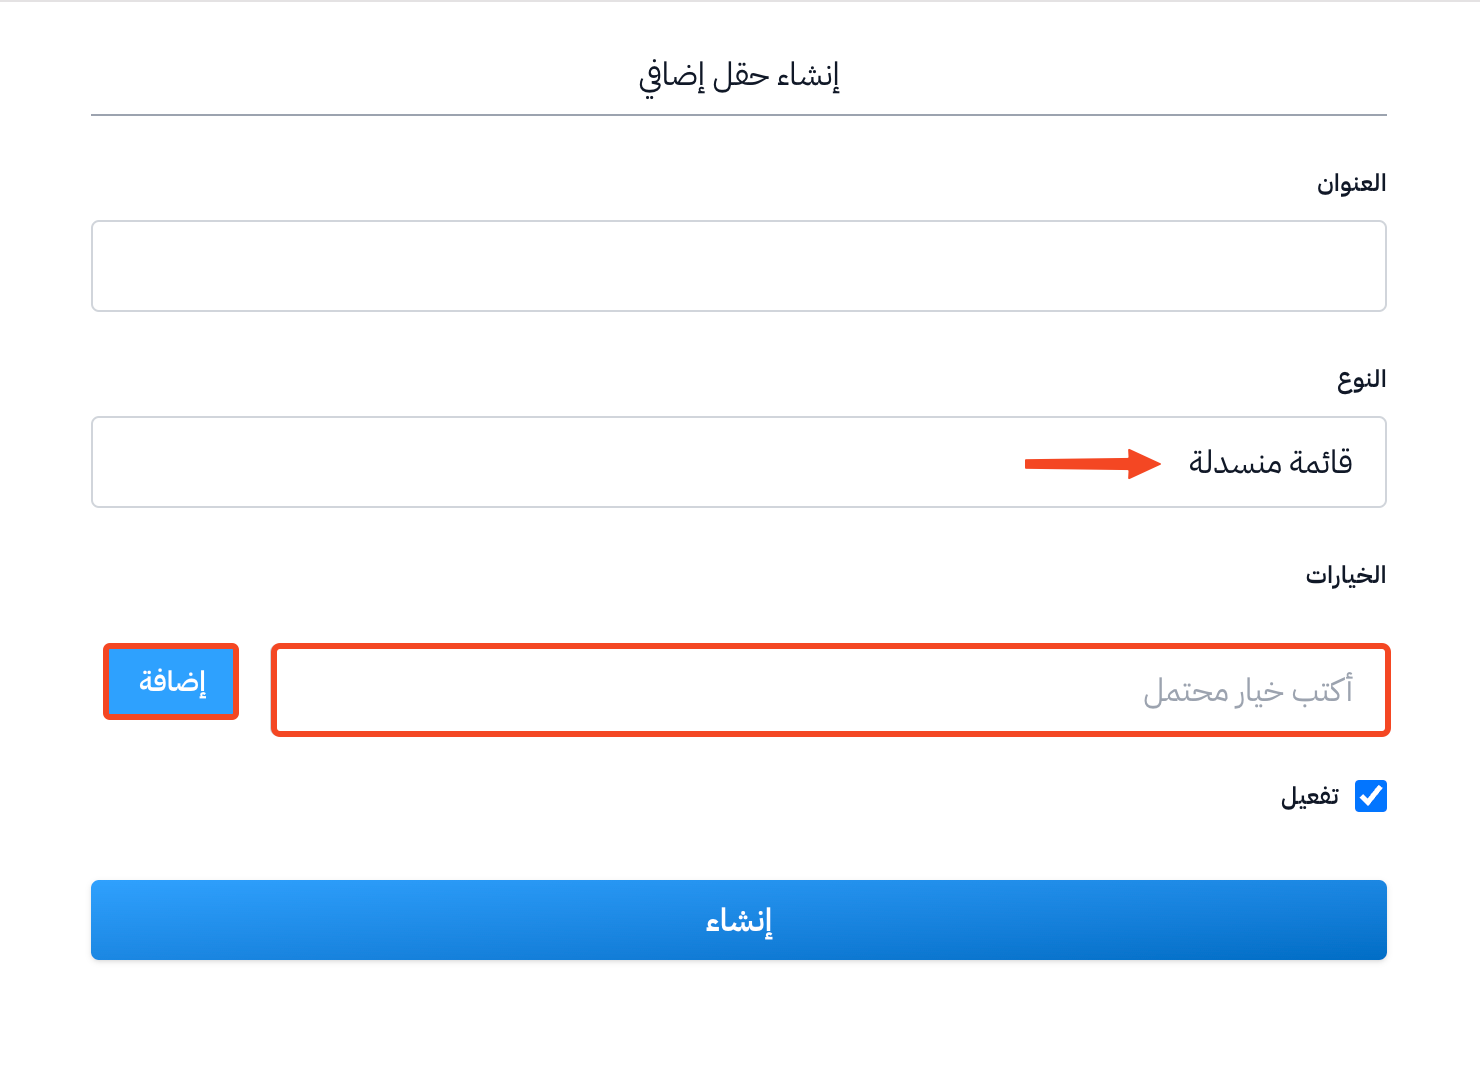
If you chose Dropdown, add the Options: type each option, then click Add.
-
Keep the Enabled switch on so the field shows to students.
-
Under Course Availability, choose the courses where the field shows. If you do not choose any course, the field shows in all courses.
-
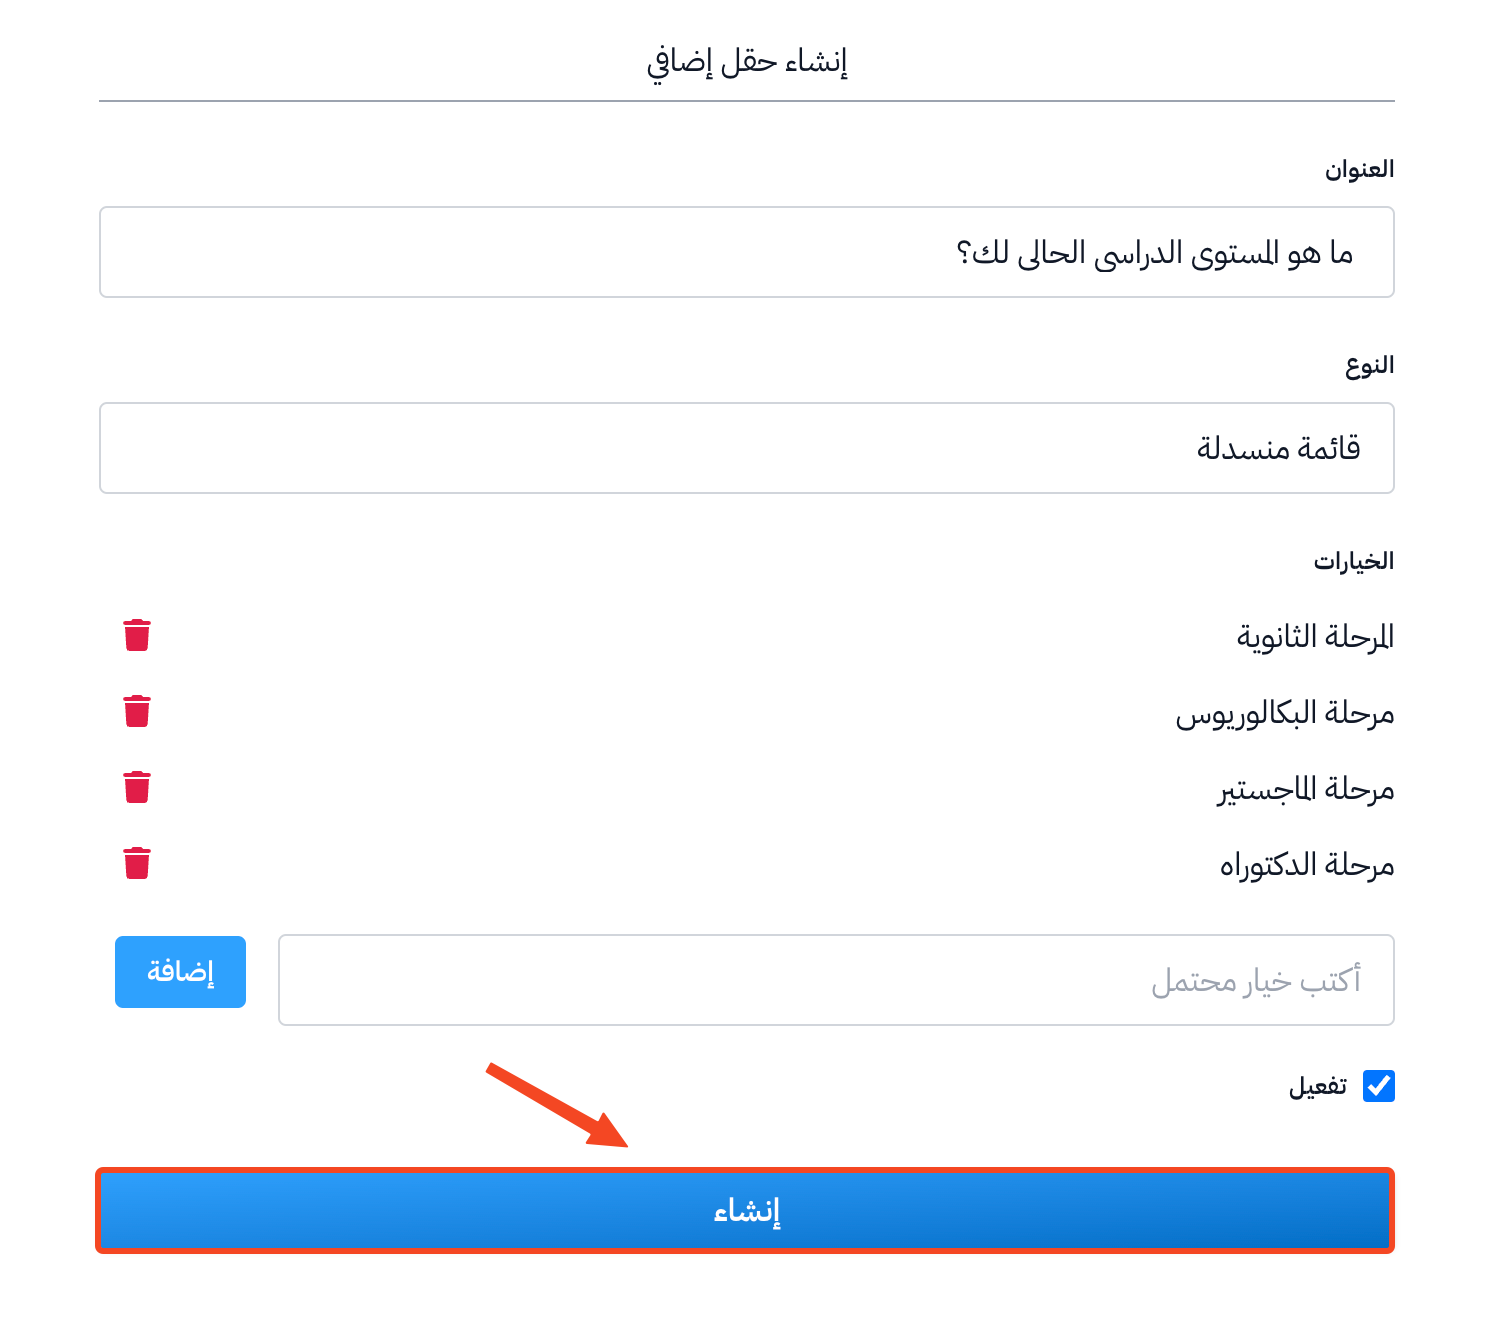
Click Create.
Change the order of the fields
-
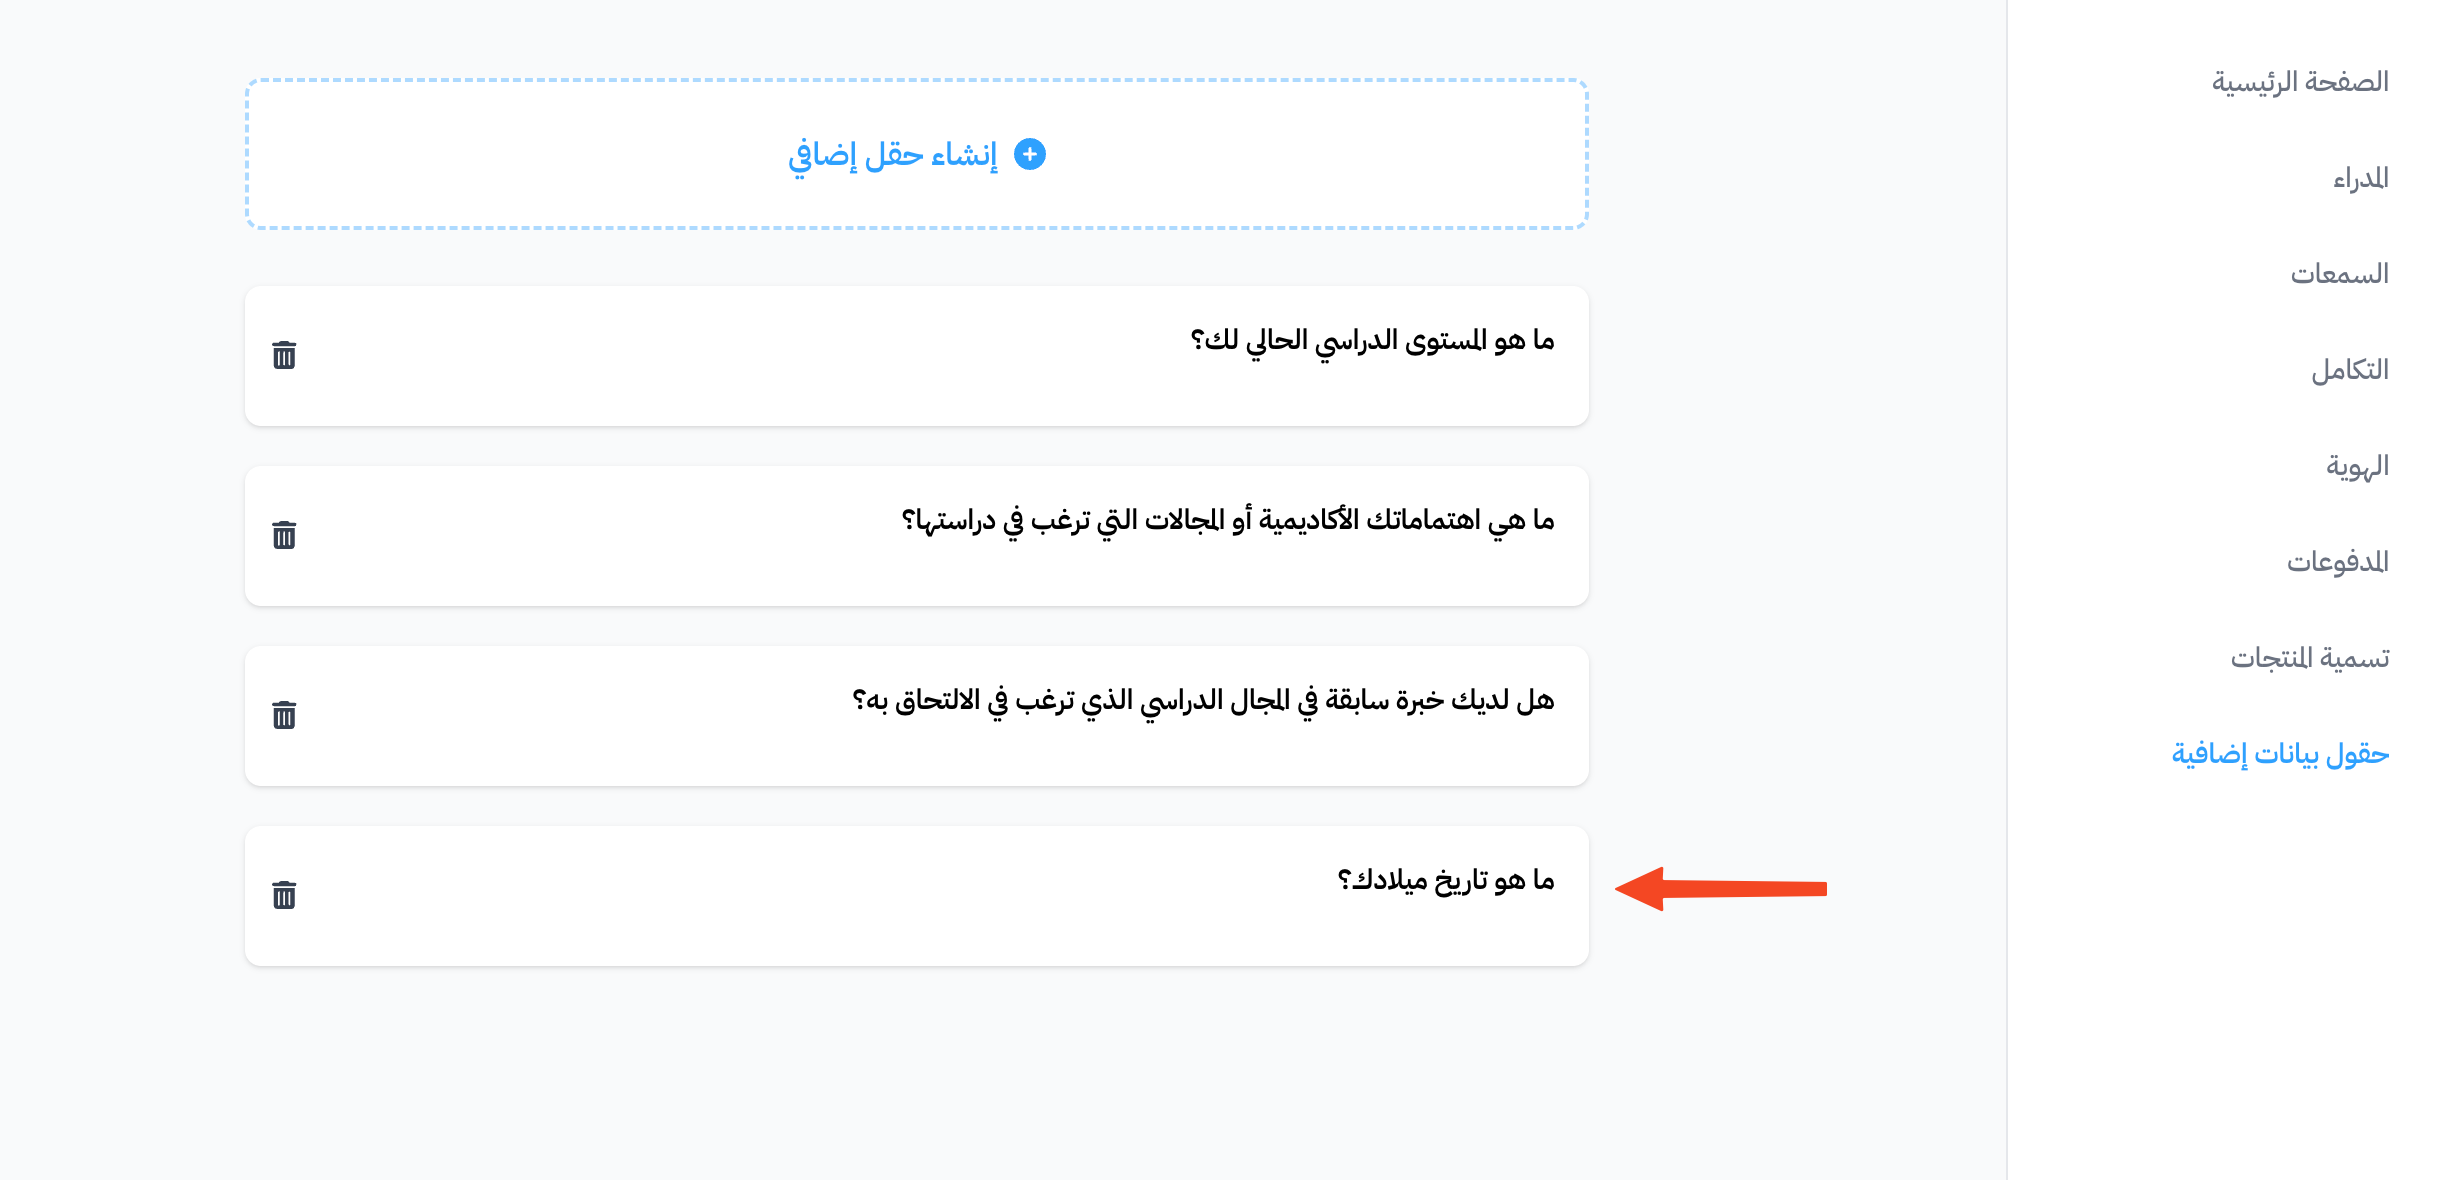
After you create the fields, click the title of the field whose order you want to change.
-
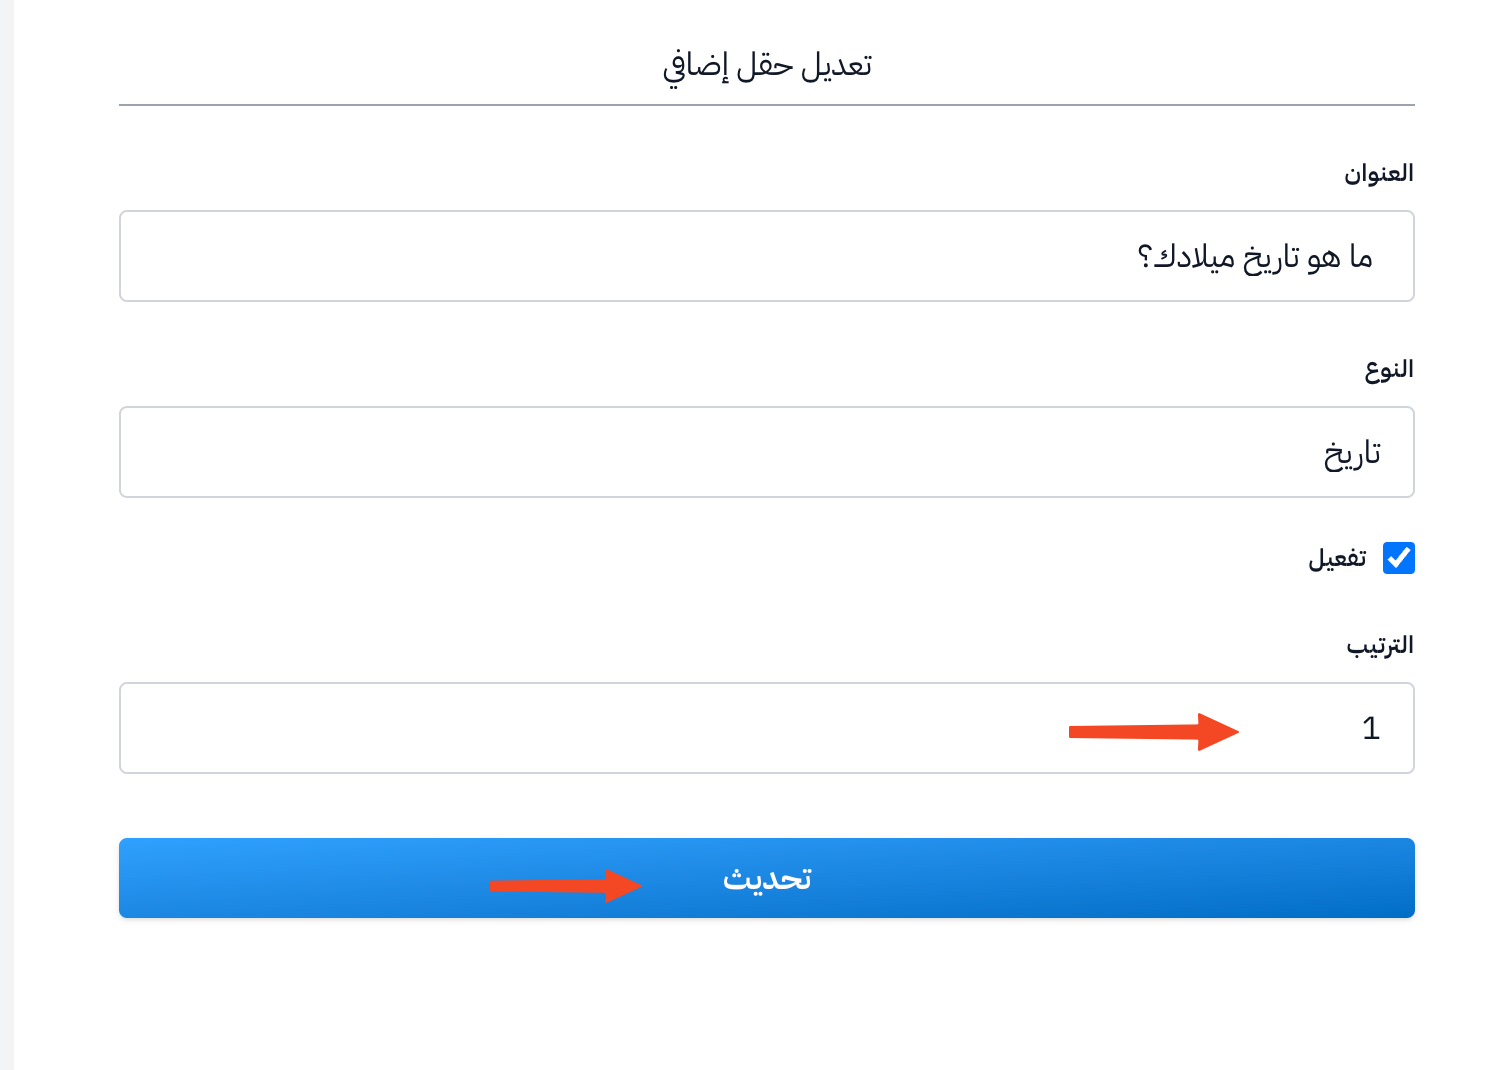
Type the new order in Order, then click Update.
How students see the fields
The student sees the Please, fill in the extra required fields form when they open a course they are enrolled in, or one of its targets, if the course has an enabled field they have not answered yet. This applies to both current and new students. The student cannot continue the course until they fill in all the fields.
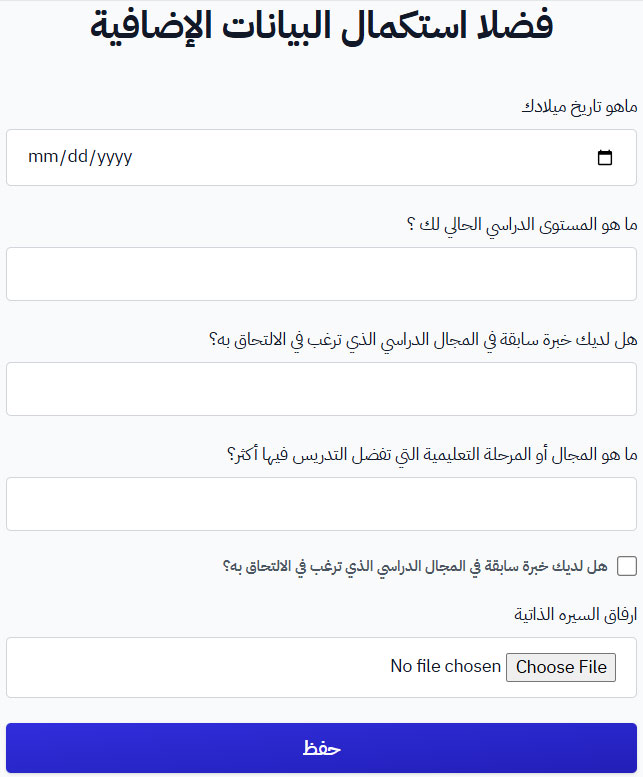
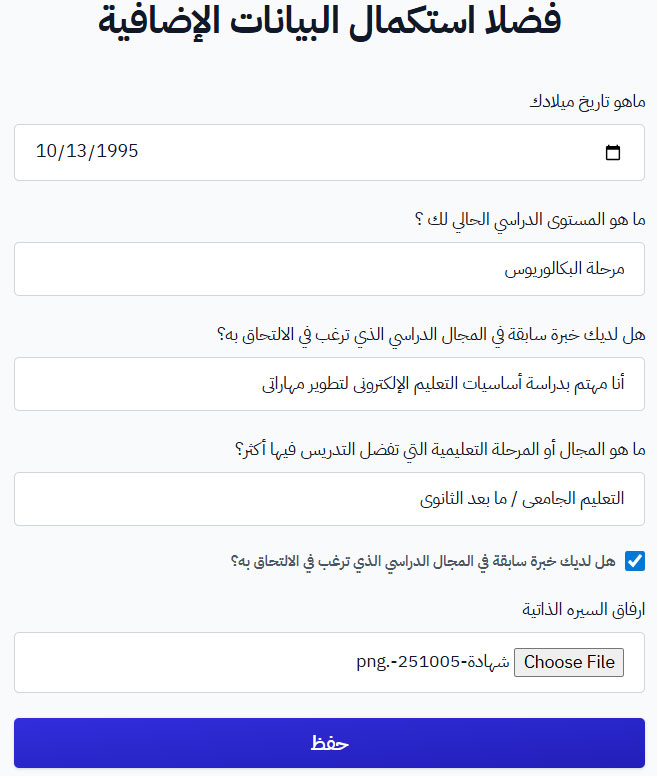
The student types the needed information, then clicks Submit.
See the answers of students
-
From the dashboard, click Users.
-
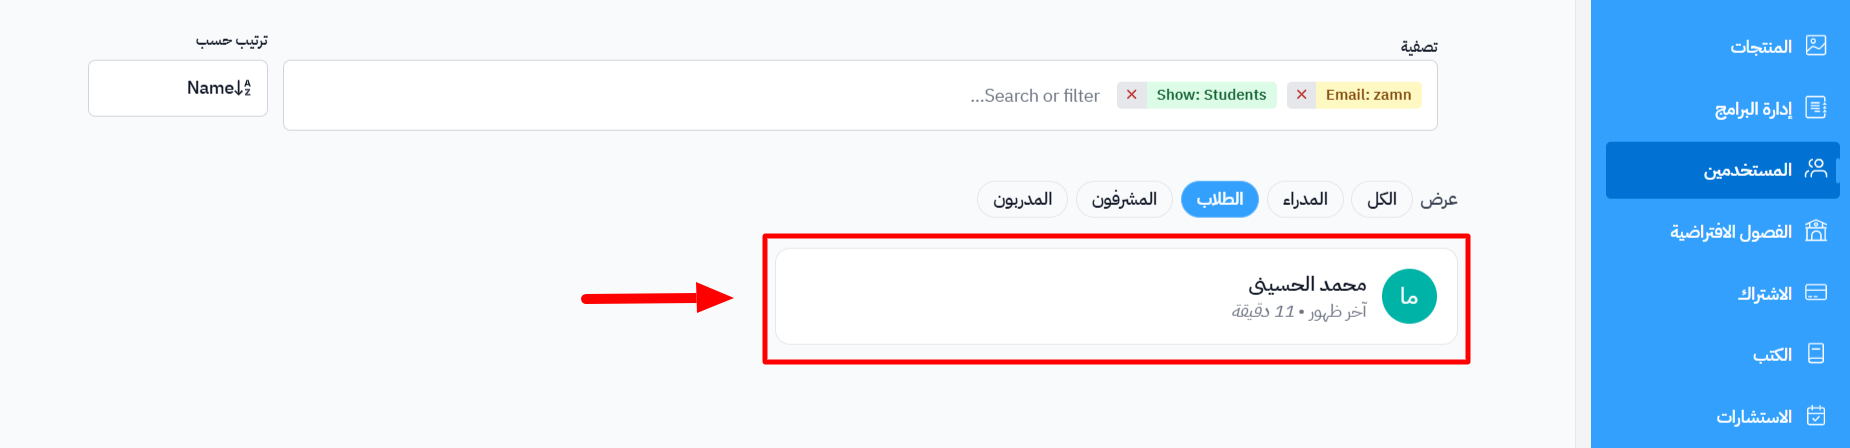
Click the name of the student whose answers you want to see.
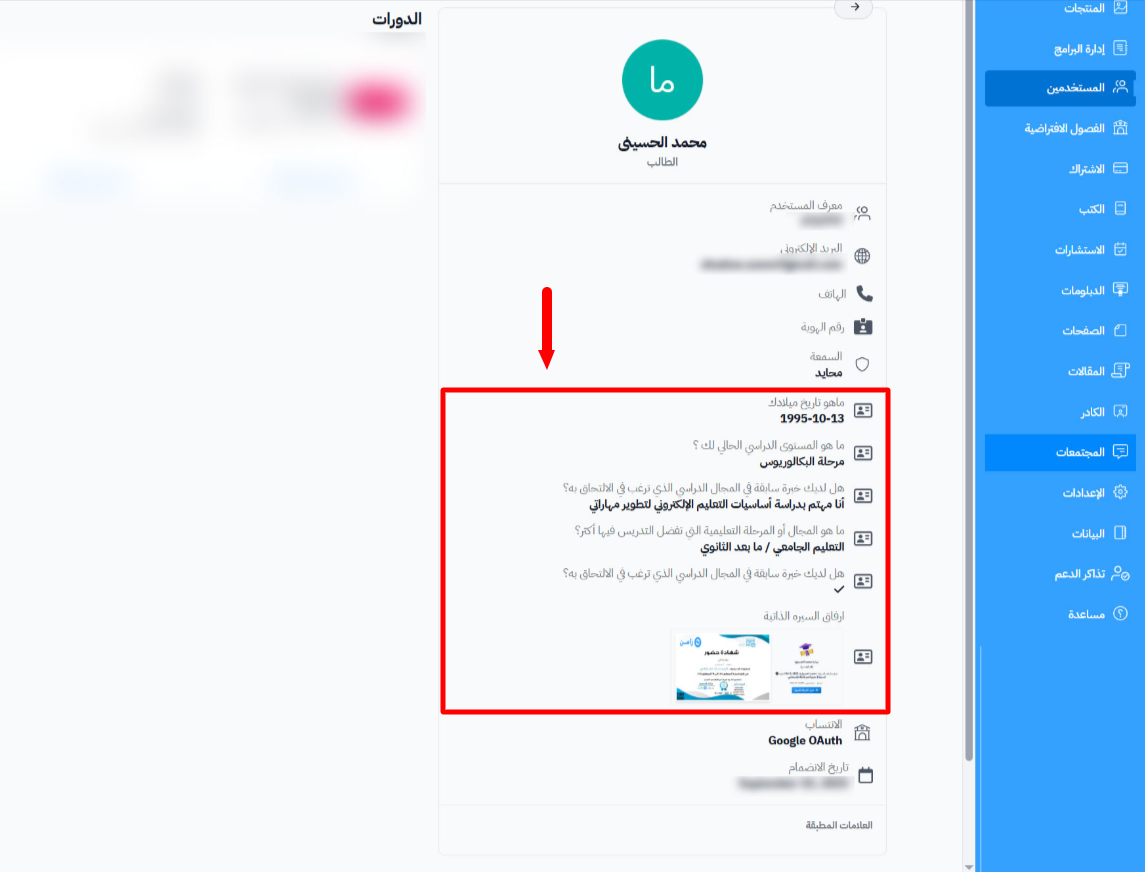
All the student's information and answers show on the page.
Turn off a field
Turning off a field hides it from students without deleting the saved answers. You can turn it on again when you need it.
-
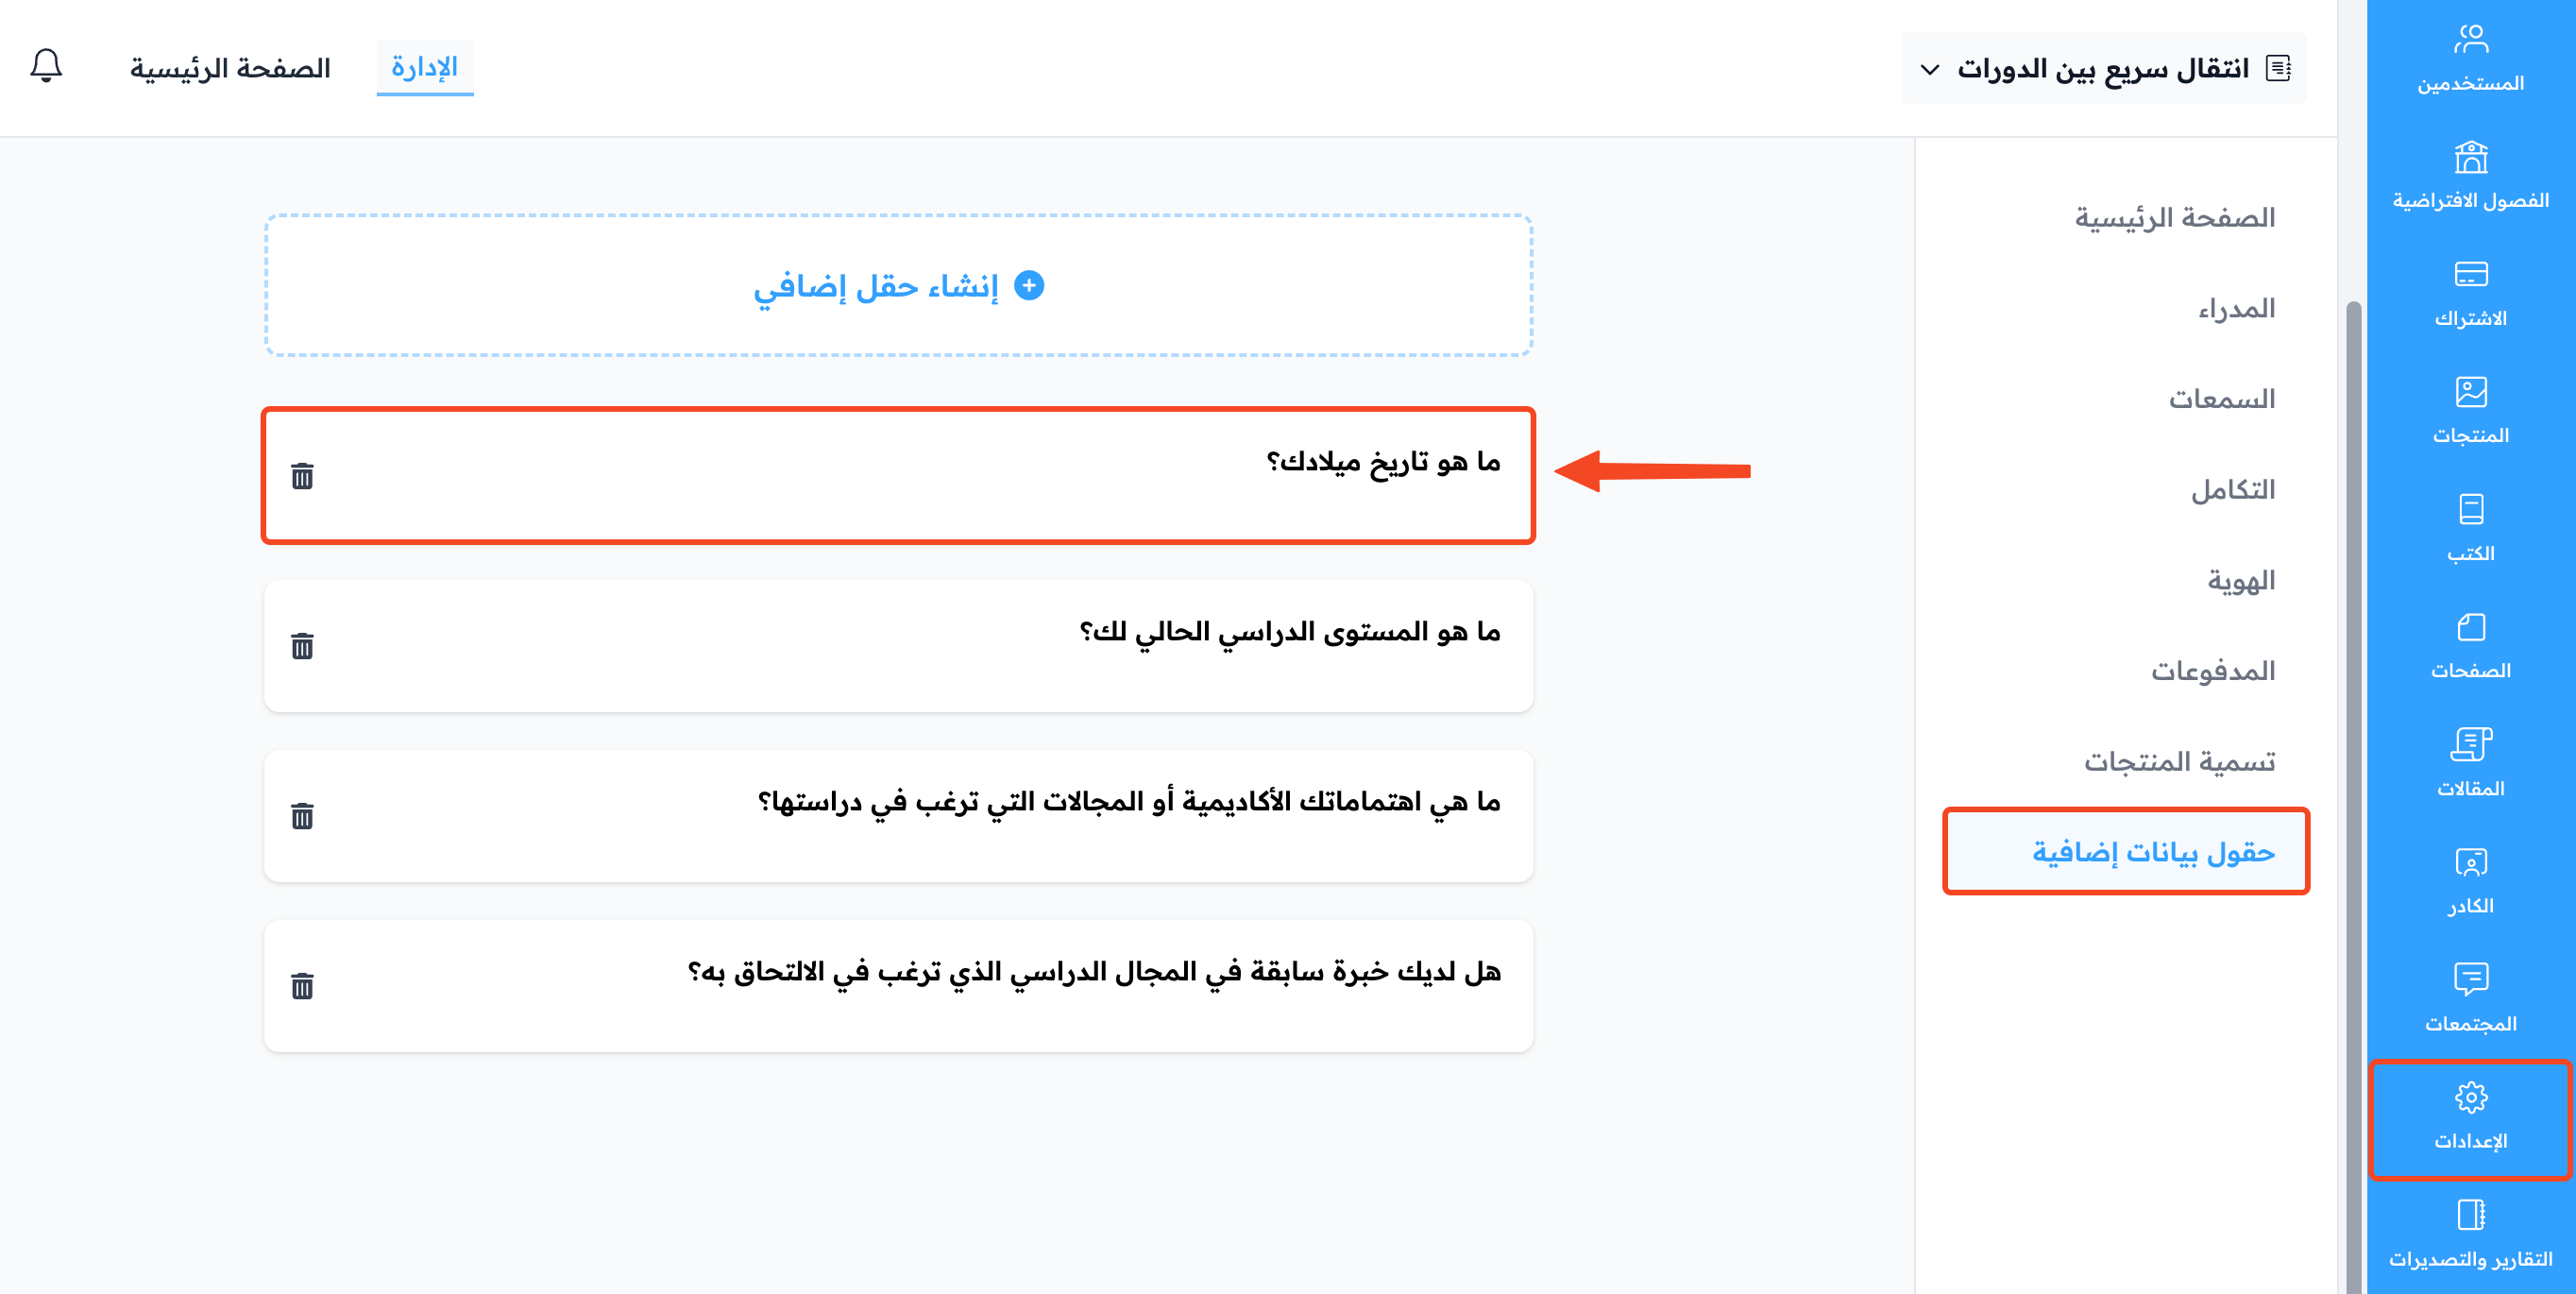
Click the title of the field you want to hide.
-
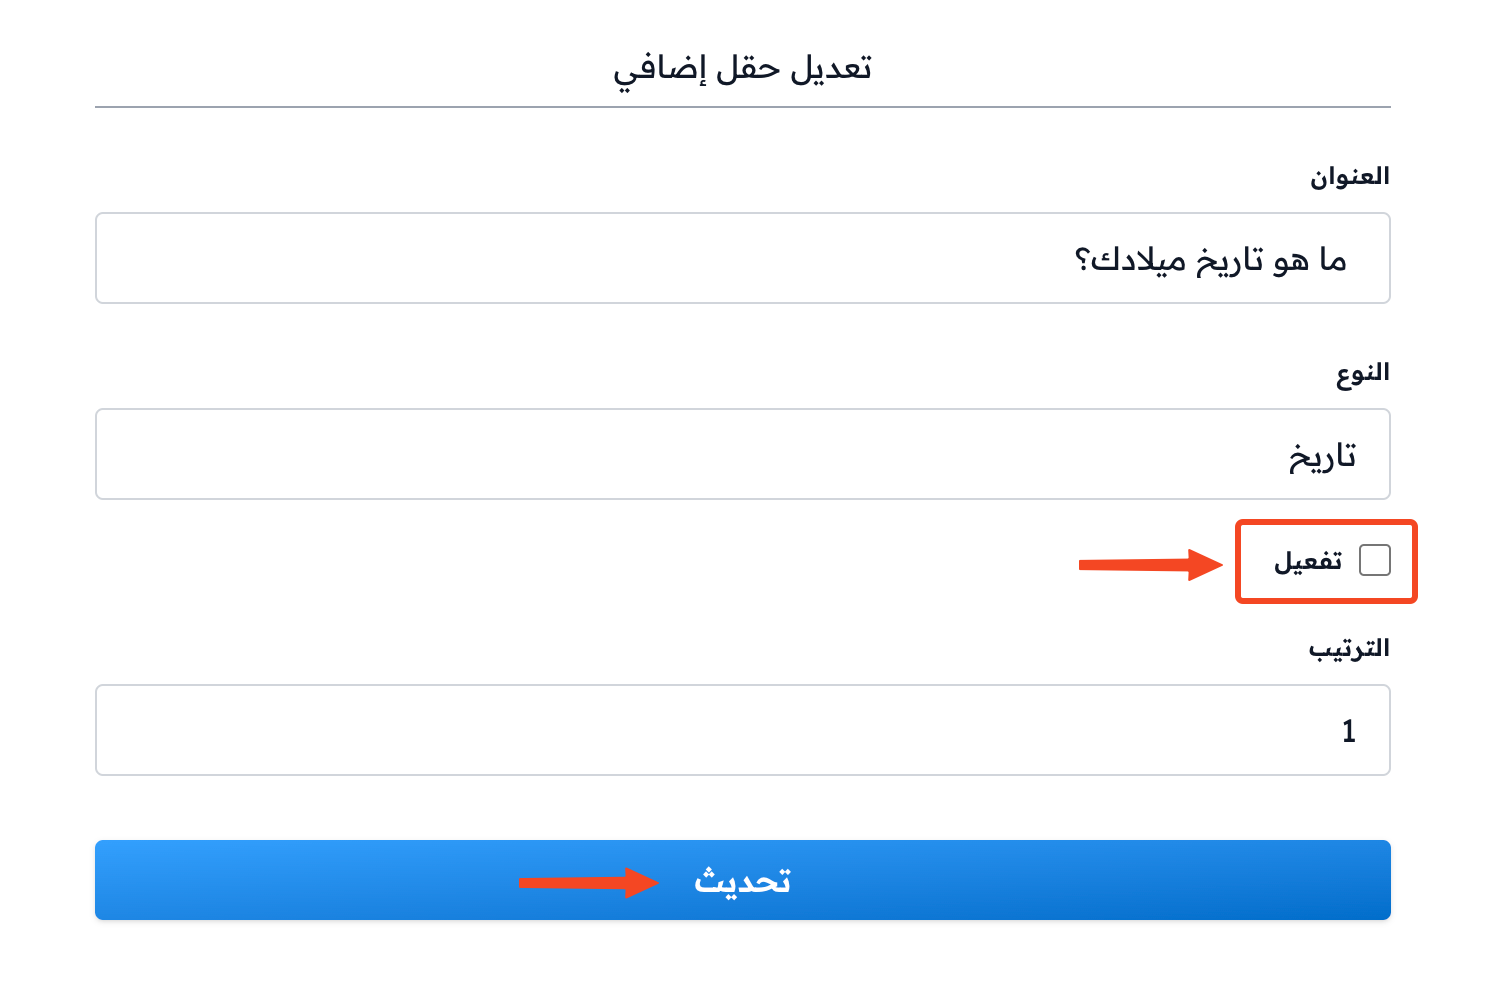
Turn off the Enabled switch, then click Update.
Delete a field
Deleting a field removes it from the data page and deletes all the answers linked to it.
-
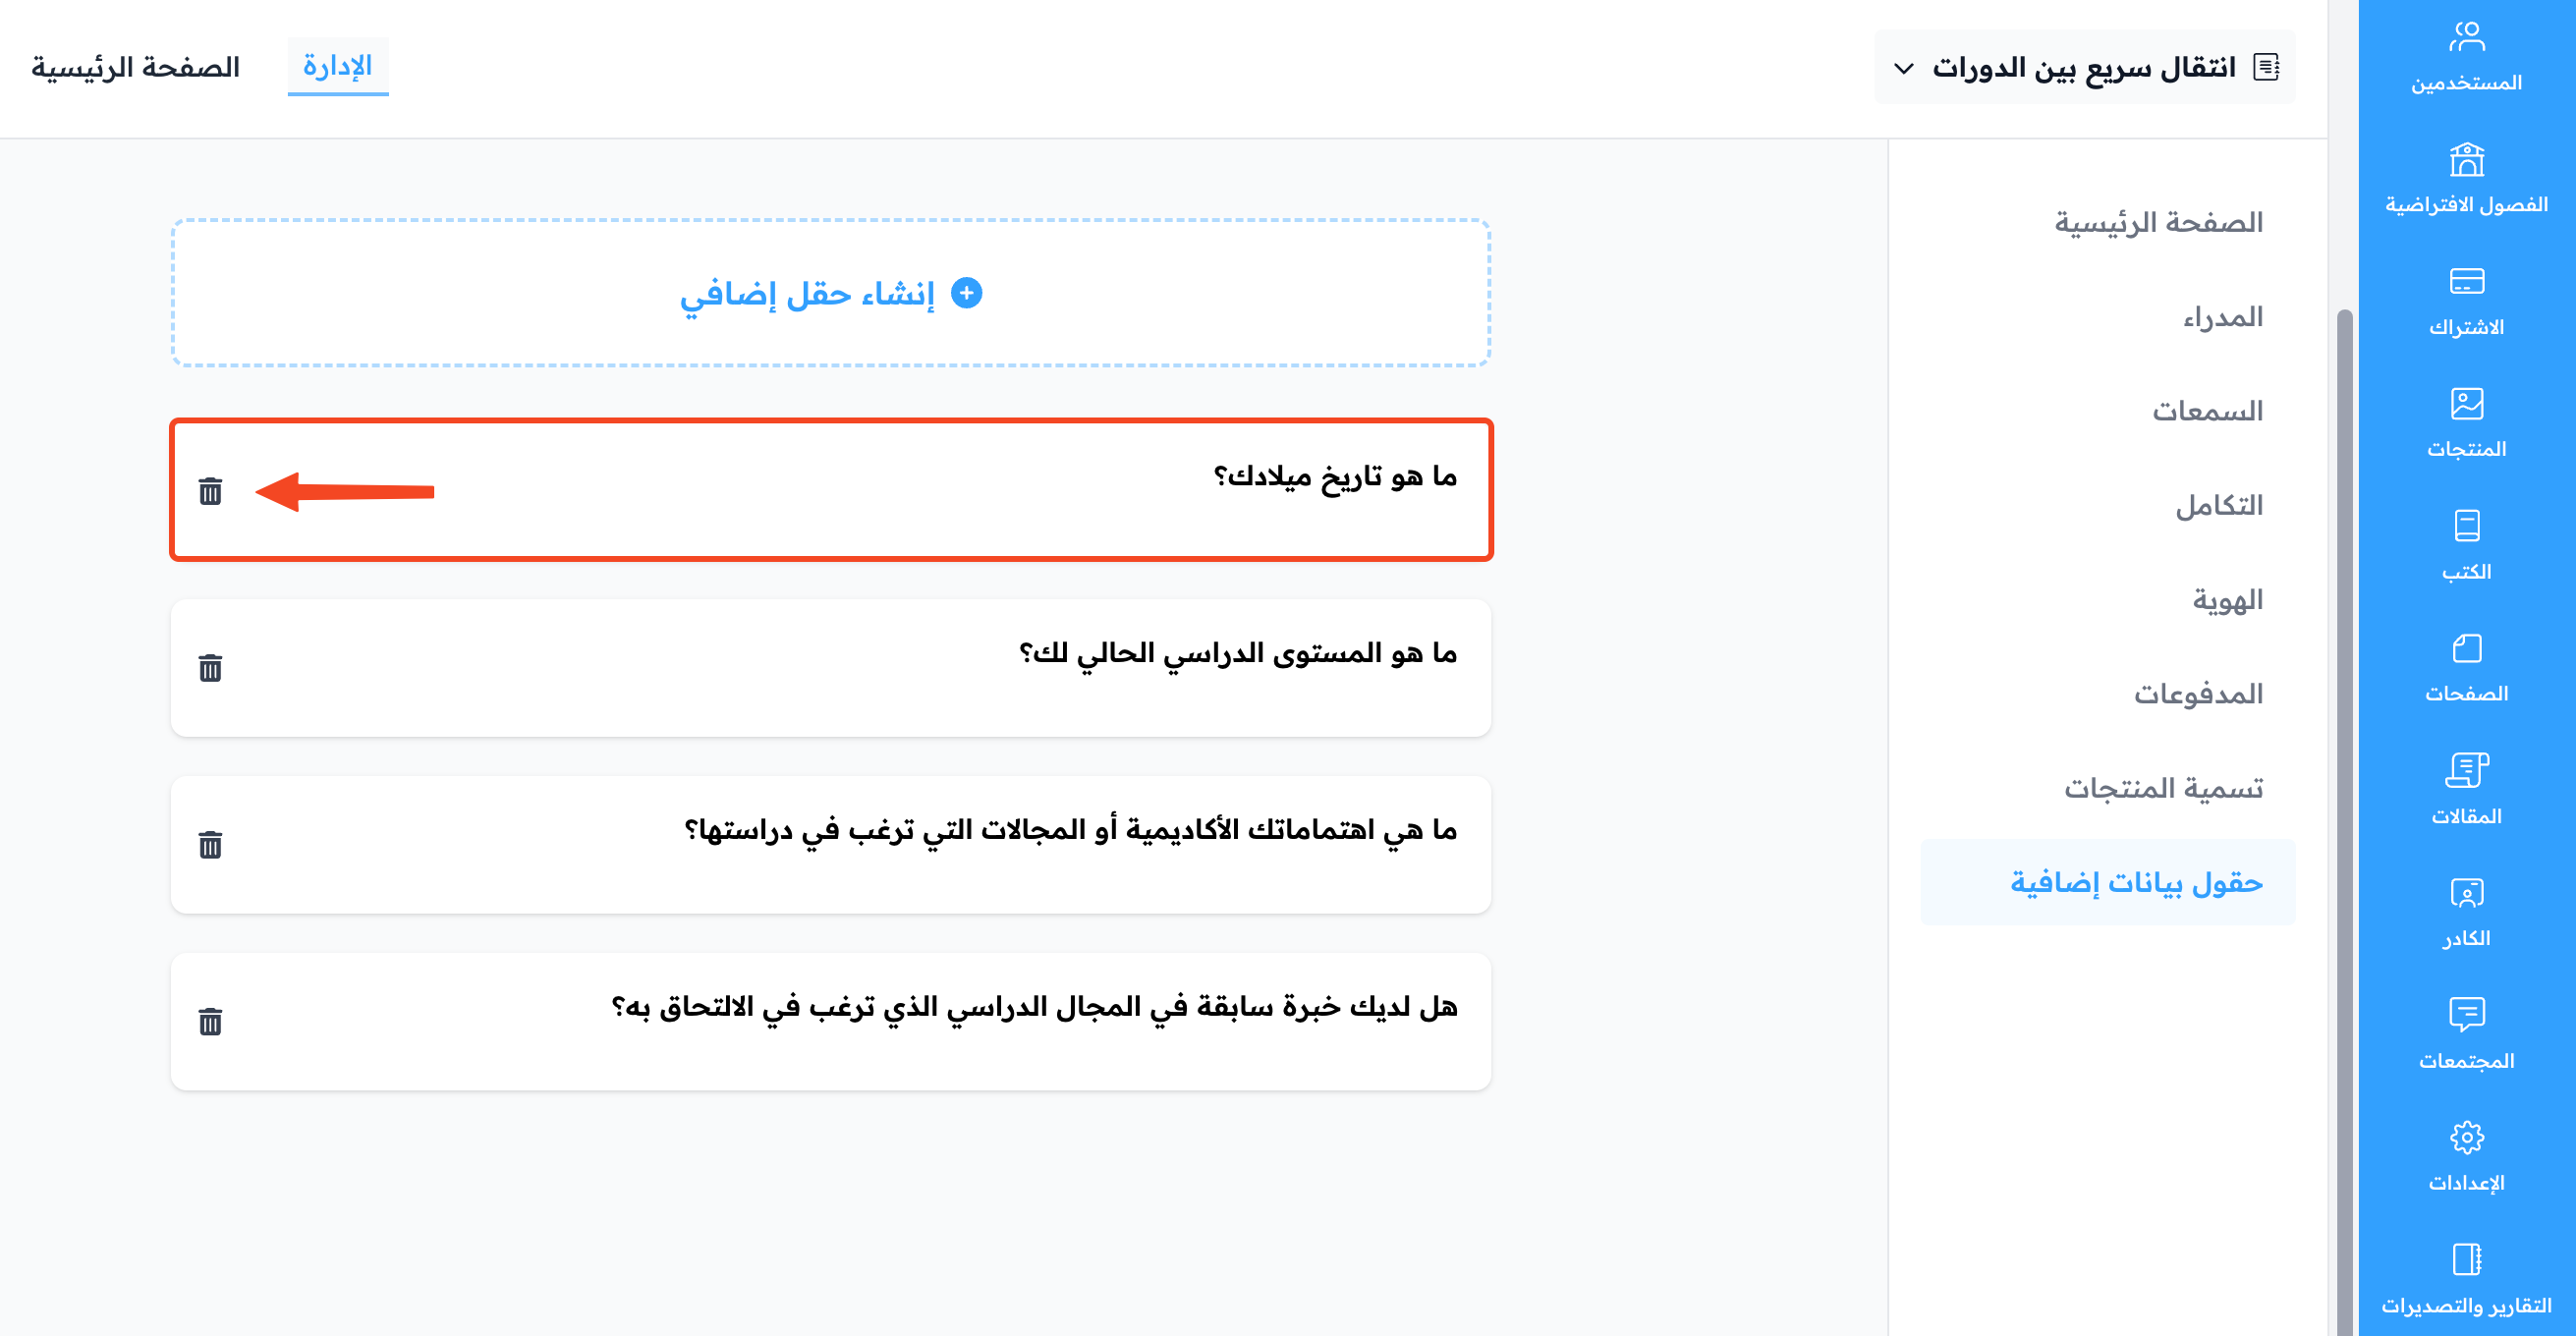
Click the ⋯ (Actions) button at the end of the row of the field you want to delete, then click Delete.
-
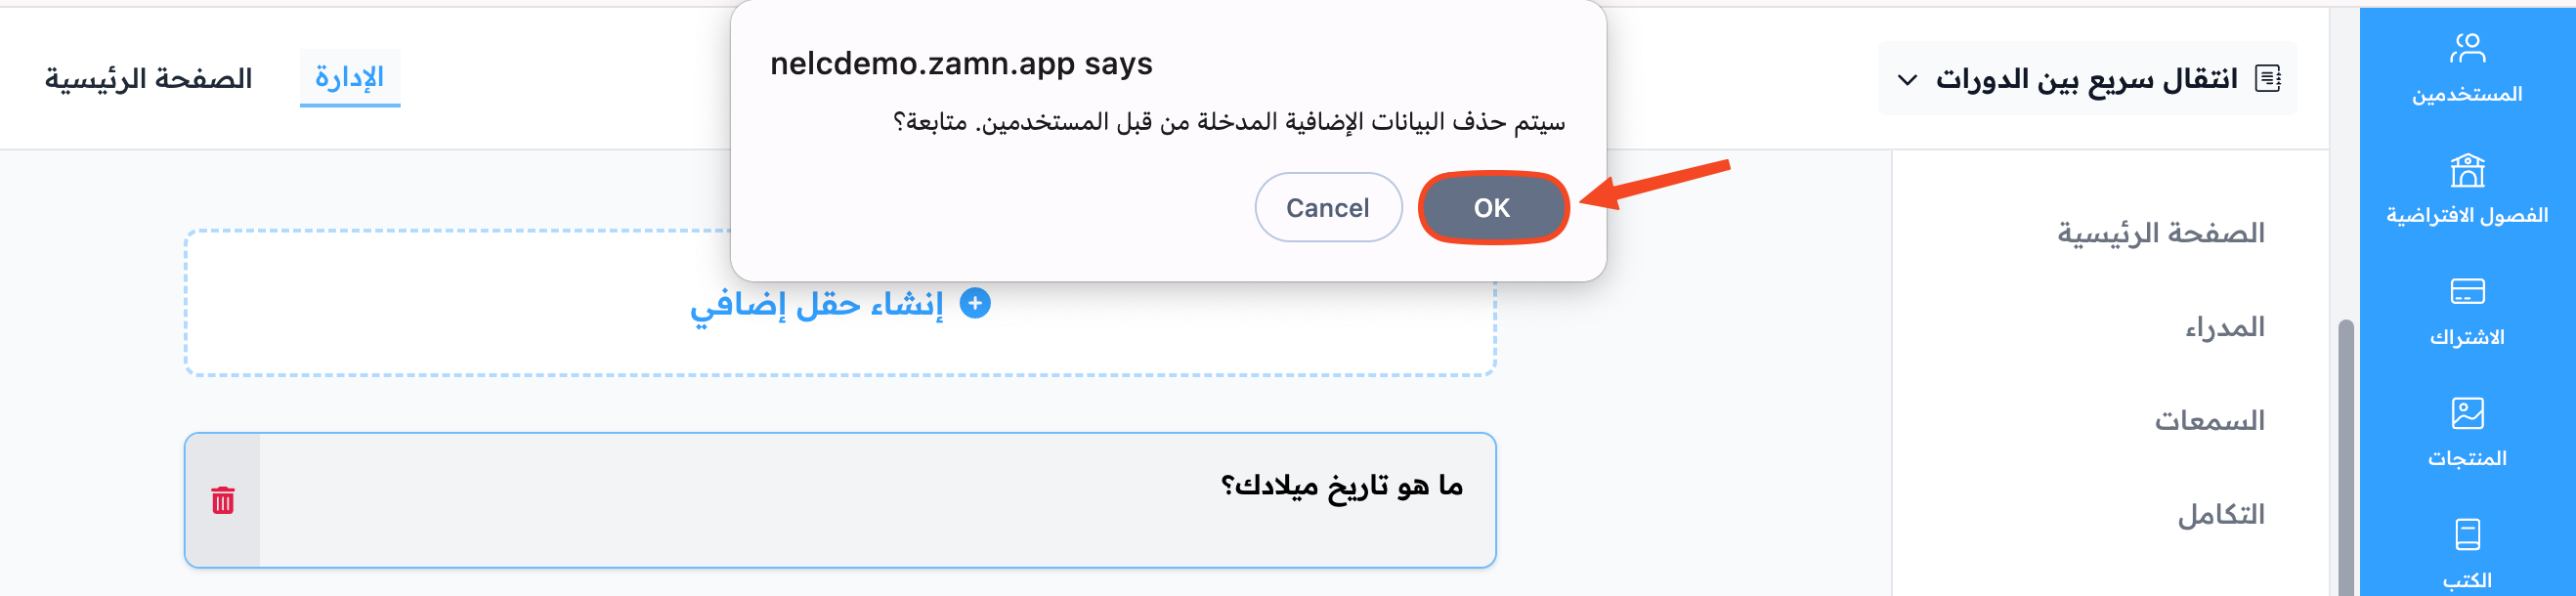
Accept the confirmation message to finish deleting.