Connect Facebook Pixel
What is Facebook Pixel?
Facebook Pixel is an analytics tool that helps you measure the results of your ads, by following and understanding the actions that visitors take on your website. You can see these actions, and reach these customers again with Facebook ads later.
Stages of connecting Facebook Pixel to your platform
- Set up Business Manager on Facebook and copy the pixel ID.
- Connect Facebook Pixel to your platform with the ID.
Steps to set up Business Manager on Facebook
Create the pixel
-
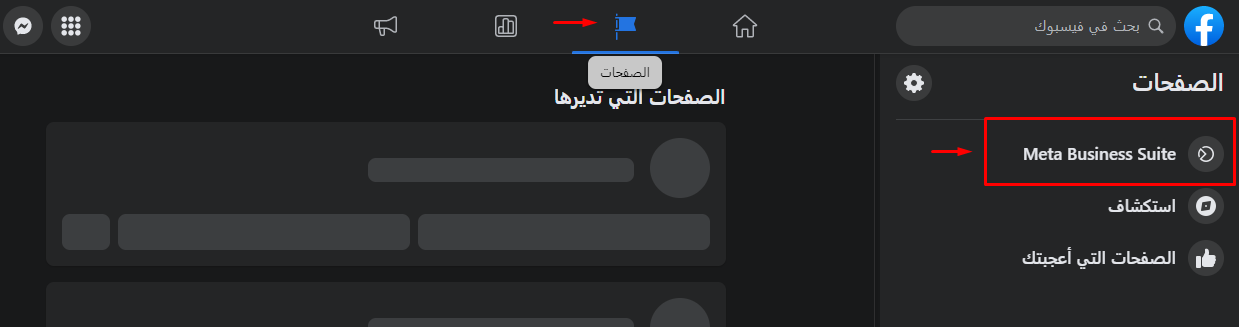
In your Facebook account, open Pages, then click Meta Business Suite.
-
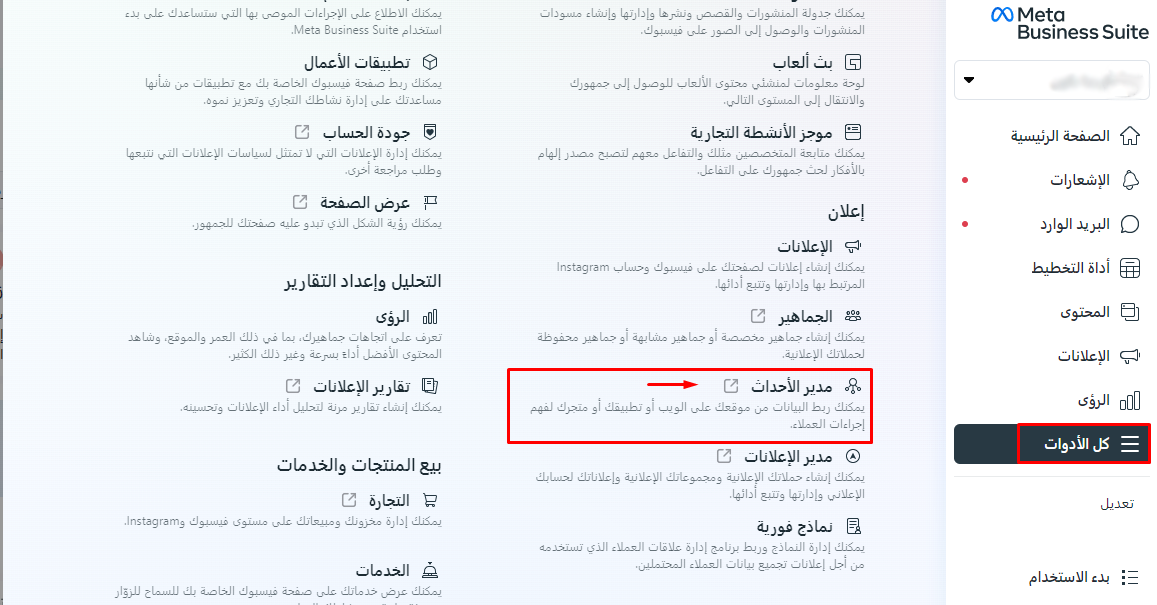
Click All tools.
-
Choose Events Manager.
-
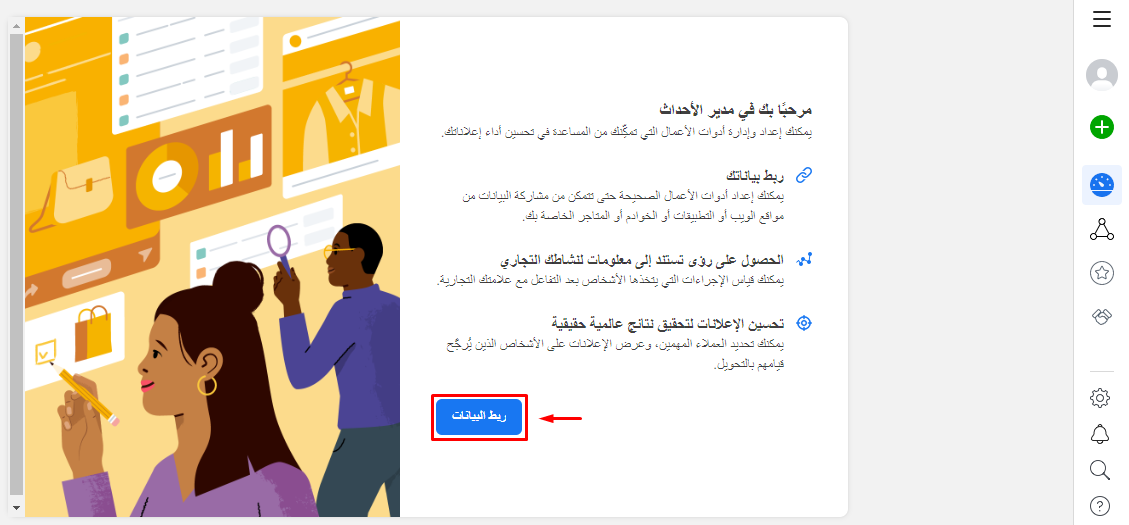
On the Events Manager page, click Connect data.
-
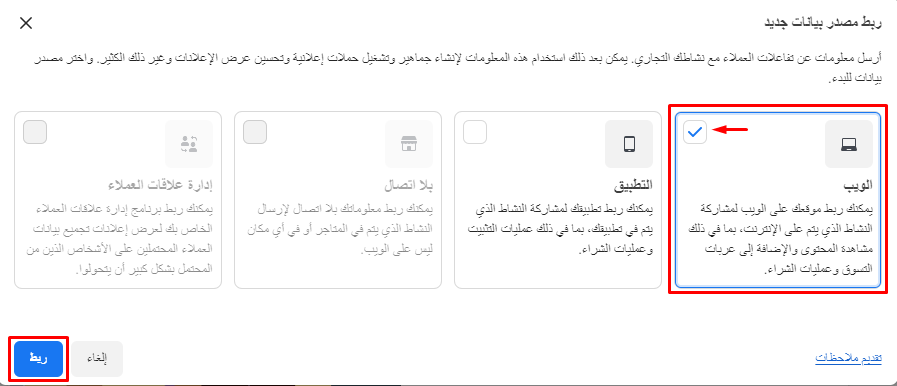
Choose Web as the data source.
-
Click Connect.
-
Write a name for the pixel.
-
Click Create pixel.

Add your platform link and copy the ID
-
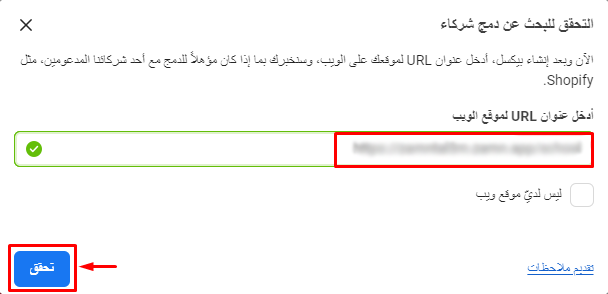
Enter the link of your platform on Zamn.
-
Click Check.
-
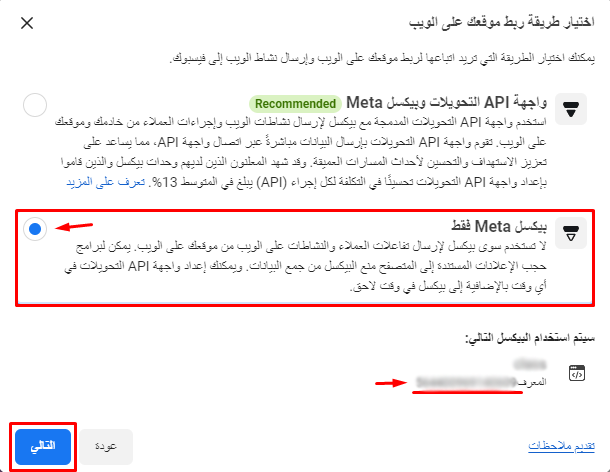
Choose Meta Pixel only.
-
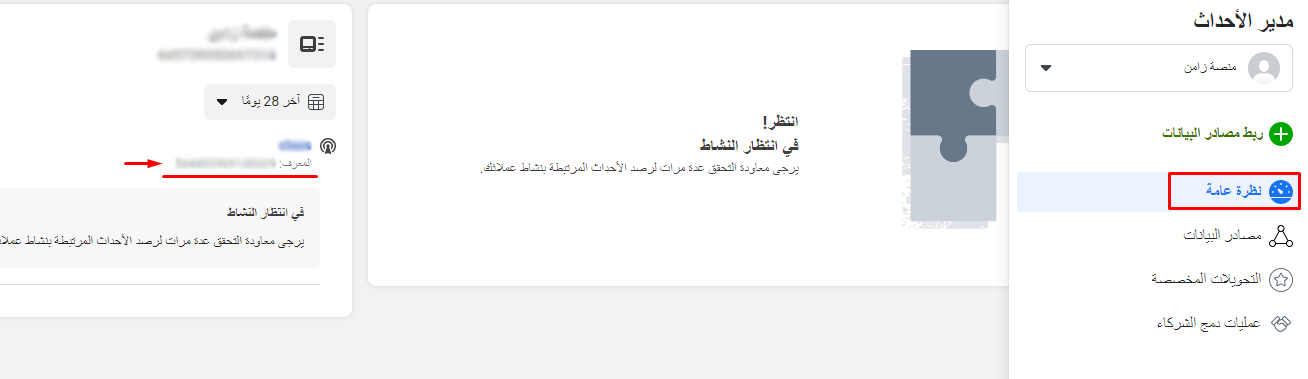
Copy the ID.
-
Click Next.
Steps to connect Facebook Pixel to your platform
-
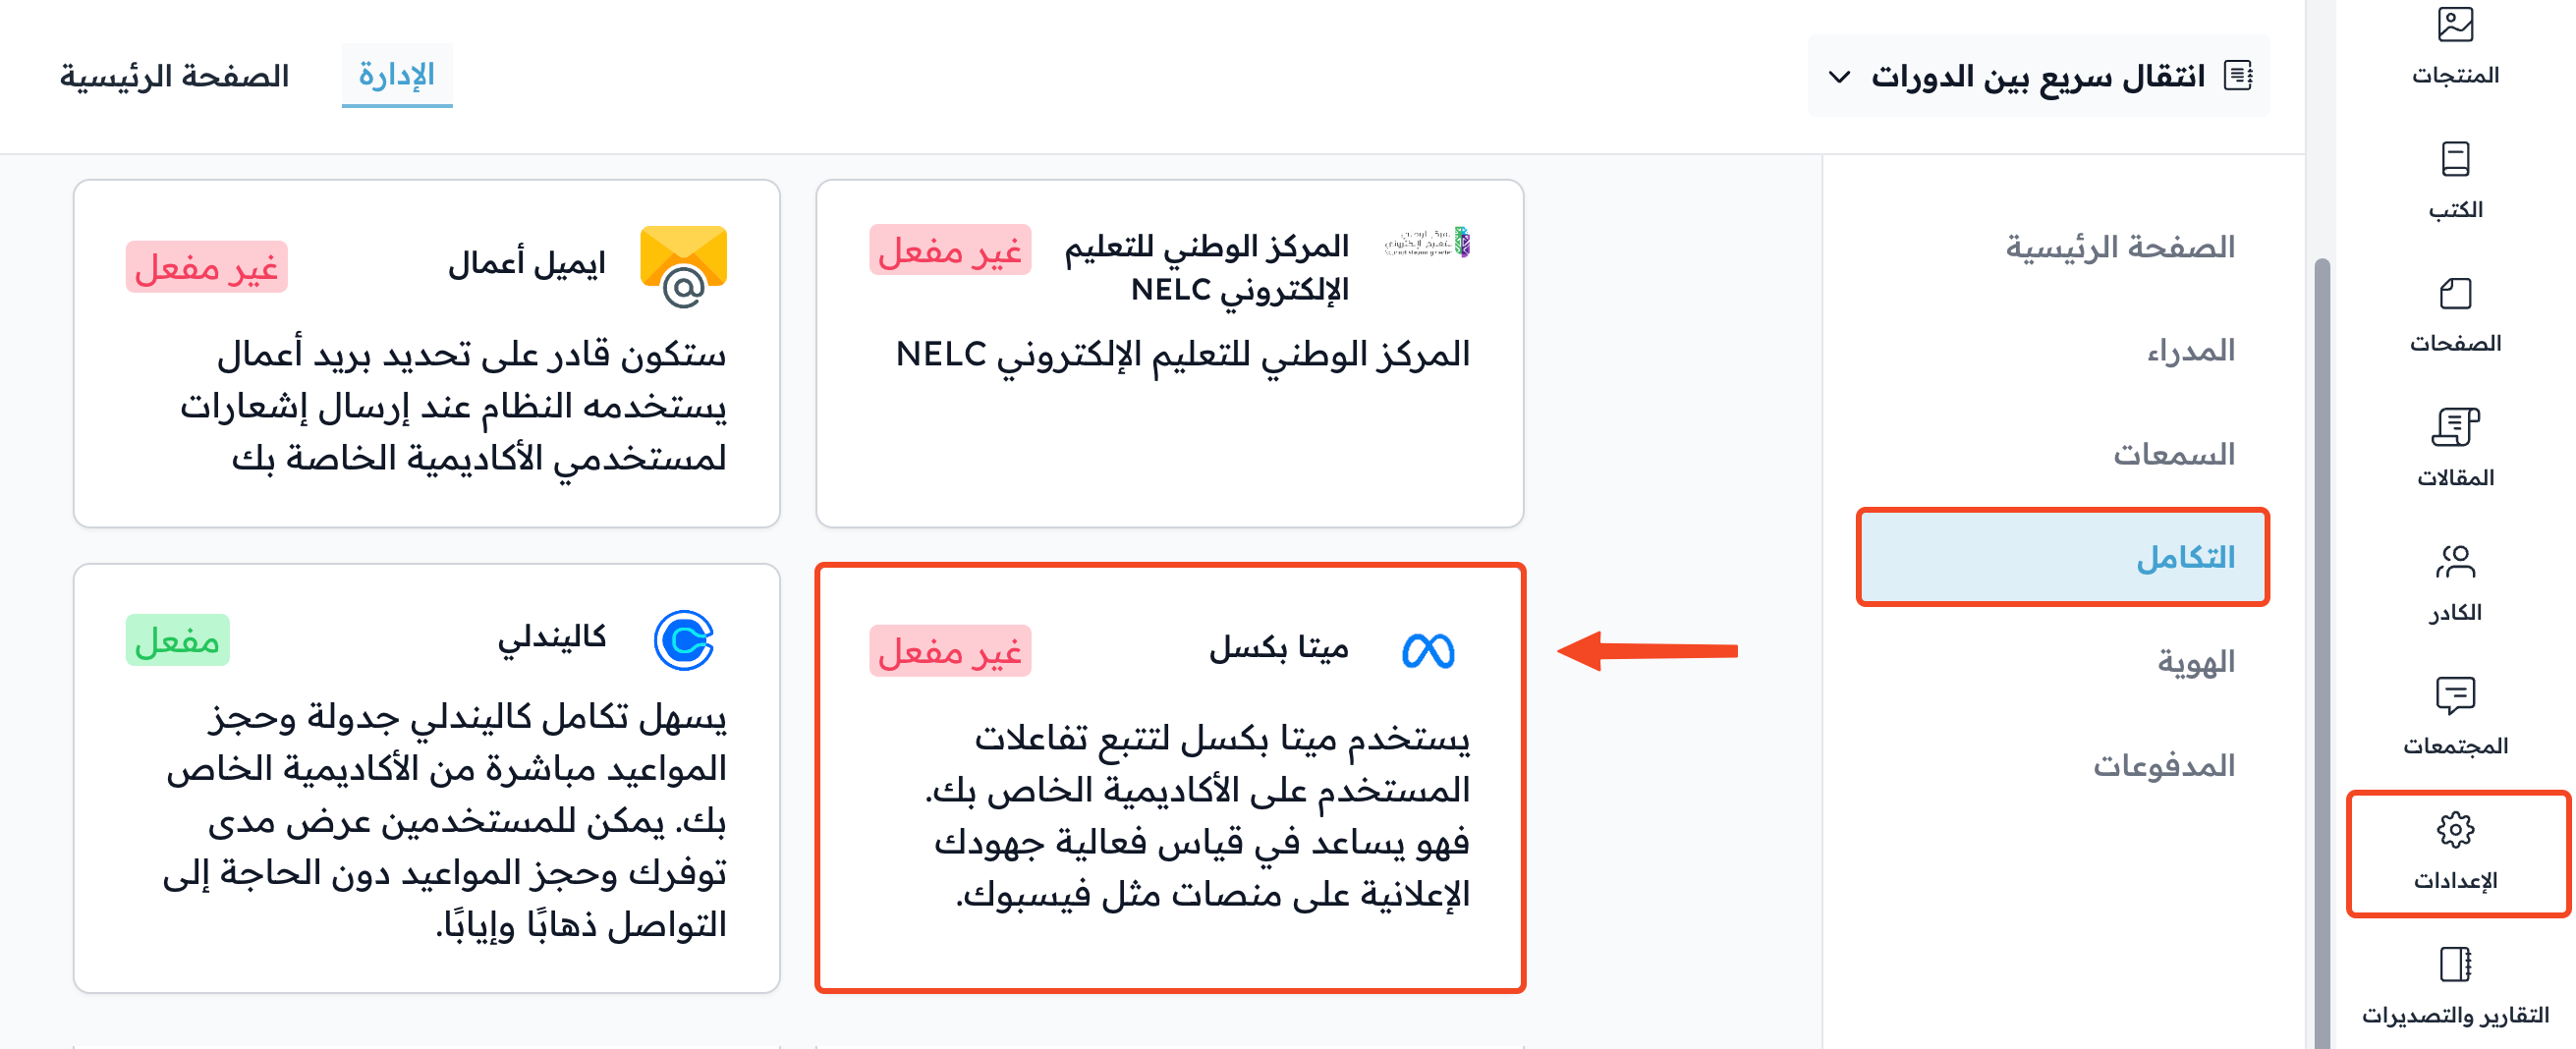
In the dashboard of your platform, click Settings.
-
Click Integrations.
-
Choose Meta Pixel.
-
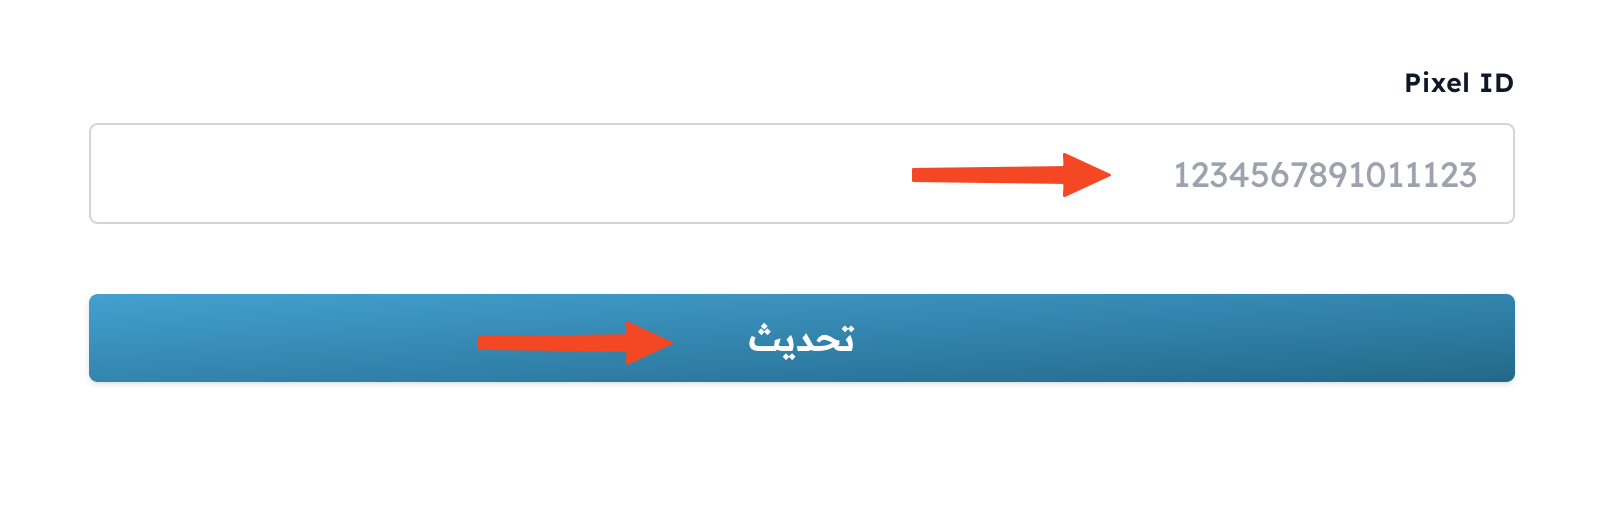
Paste the ID you copied from Facebook in the Pixel ID field.
-
Click Update.
If you see the message You need to upgrade your plans to use the link with Meta Pixel, you need to upgrade your plan to use this integration.