Add a new course
This article shows how to create a new course on your platform, and how to add the course images. This feature is for platform admins.
Steps to create a course
-
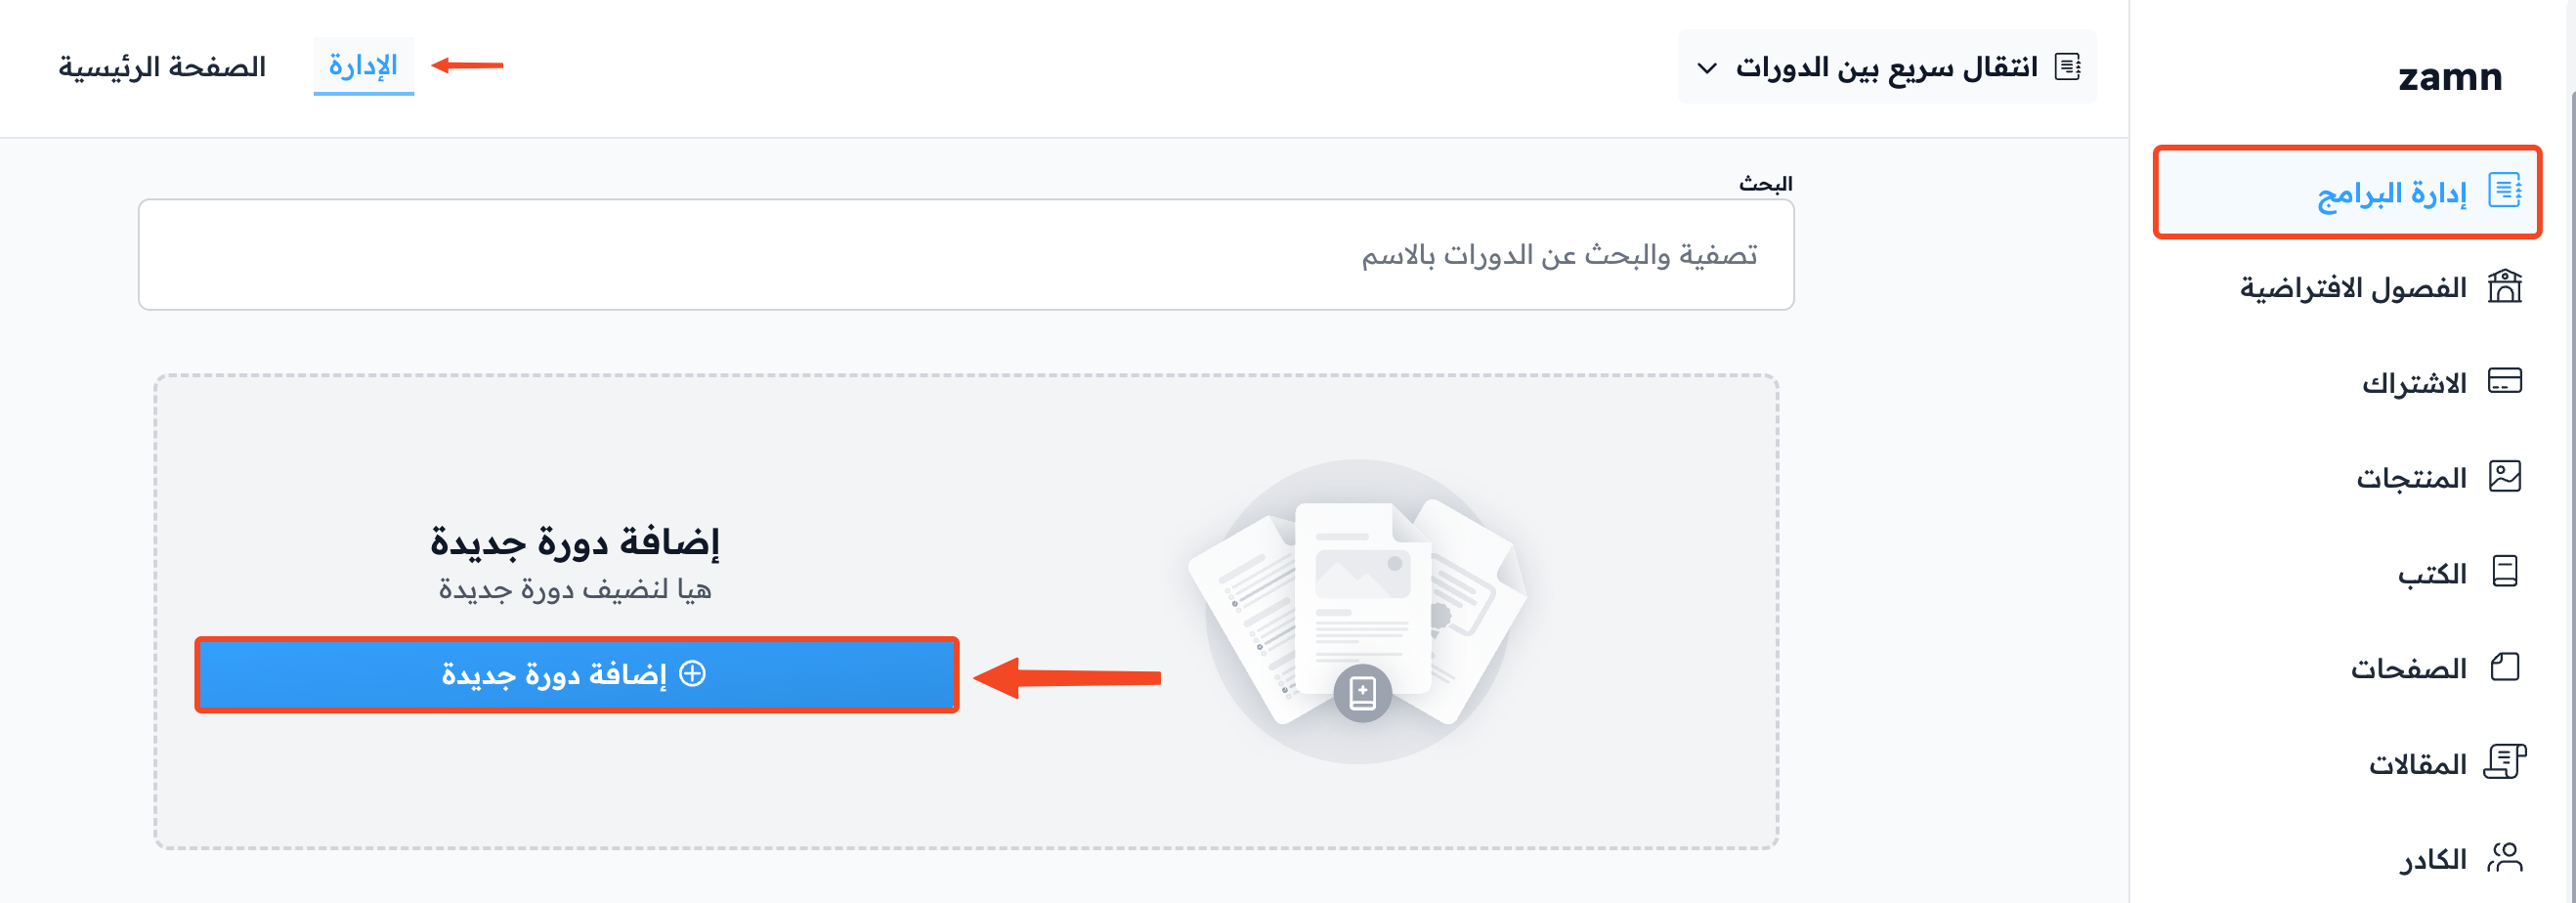
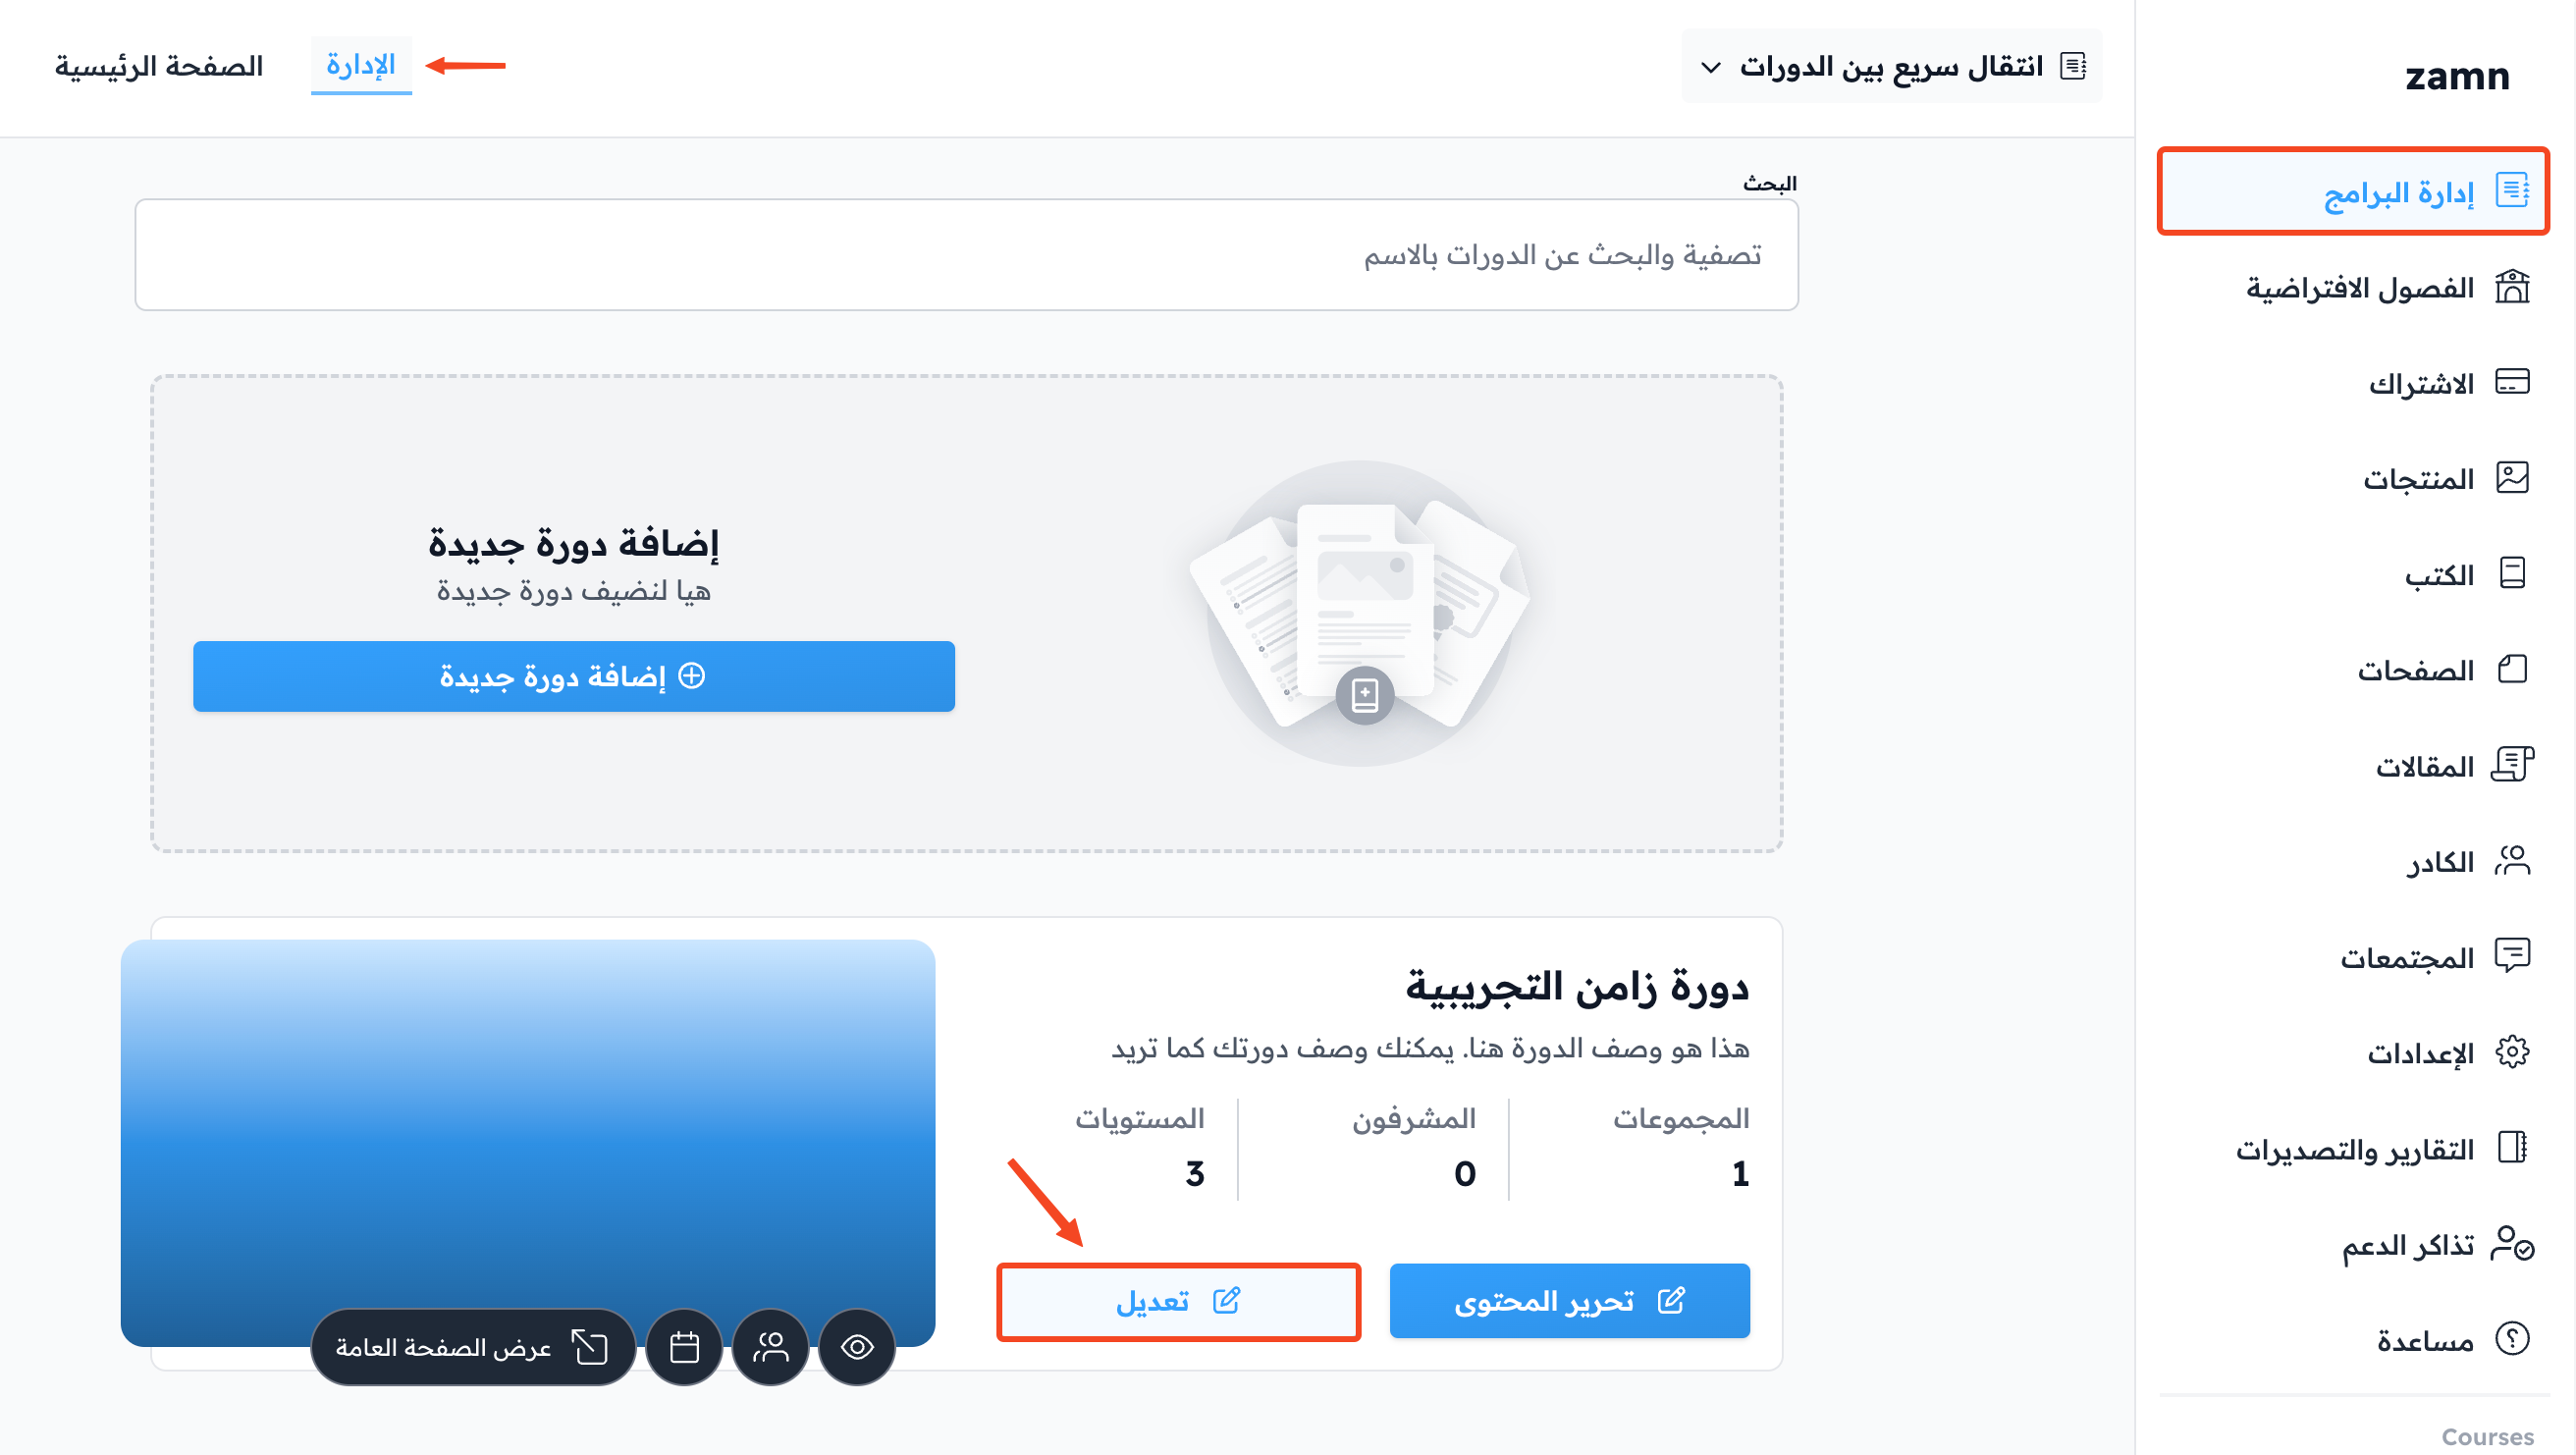
Click Admin in the top bar to go to your platform dashboard.
-
On the Courses page, click Add New Course.
-
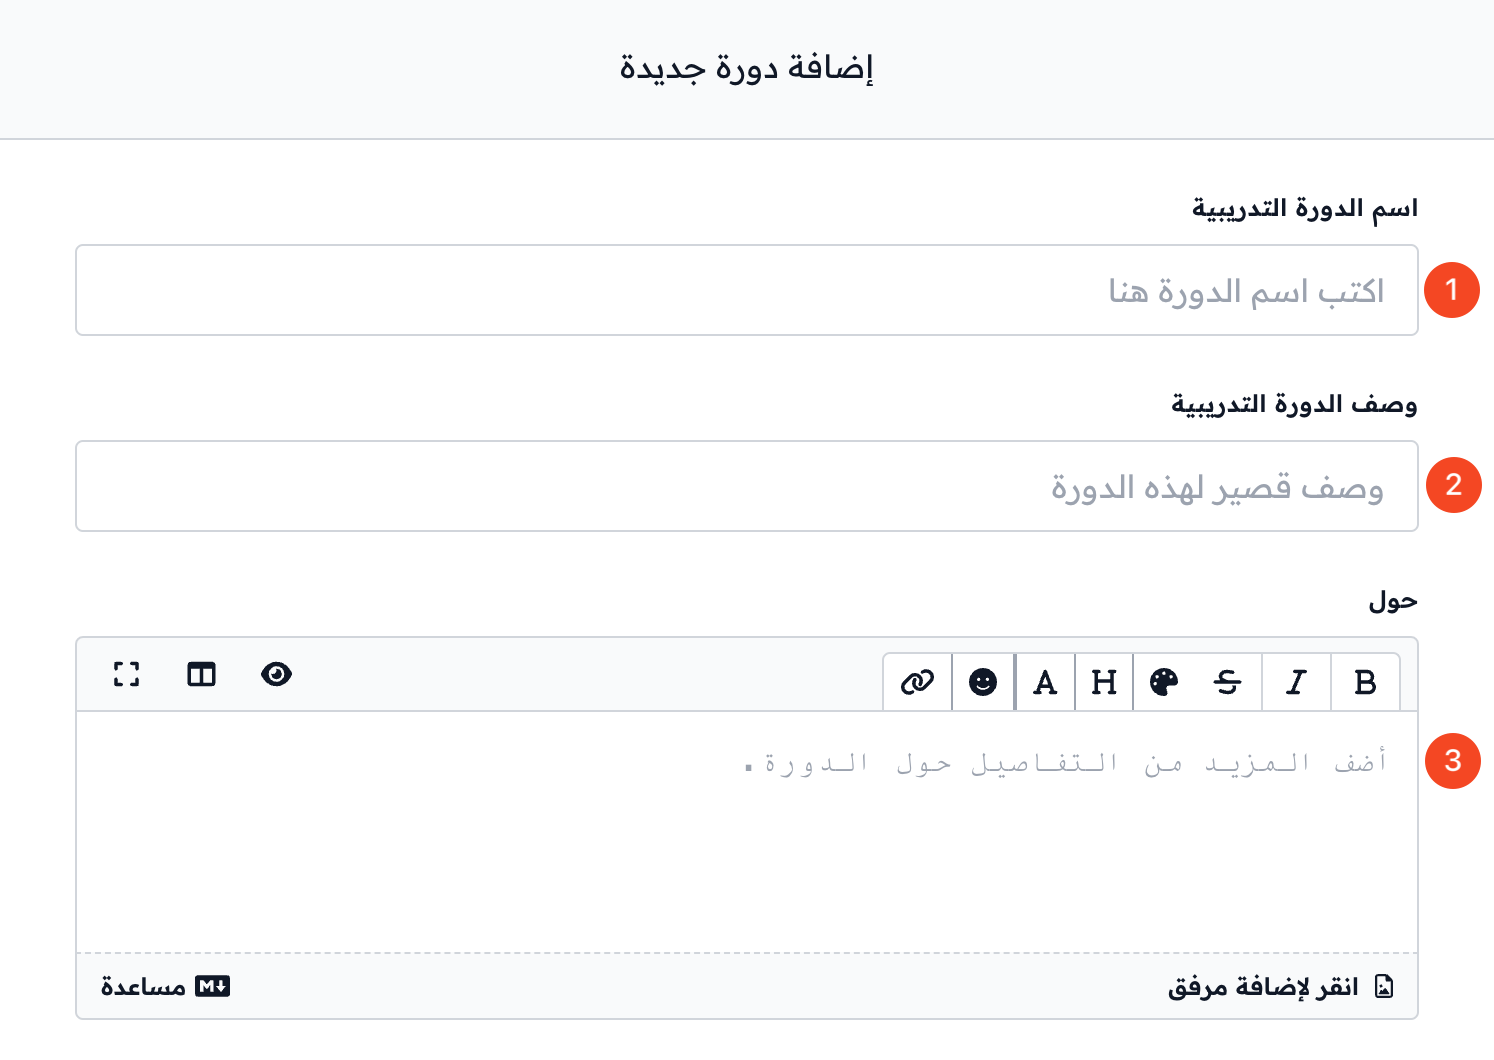
Enter the course details:
- Name: type the course name.
- Description: write a short description of the course, between 50 and 150 characters.
- Details: you can add more details about the course.
-
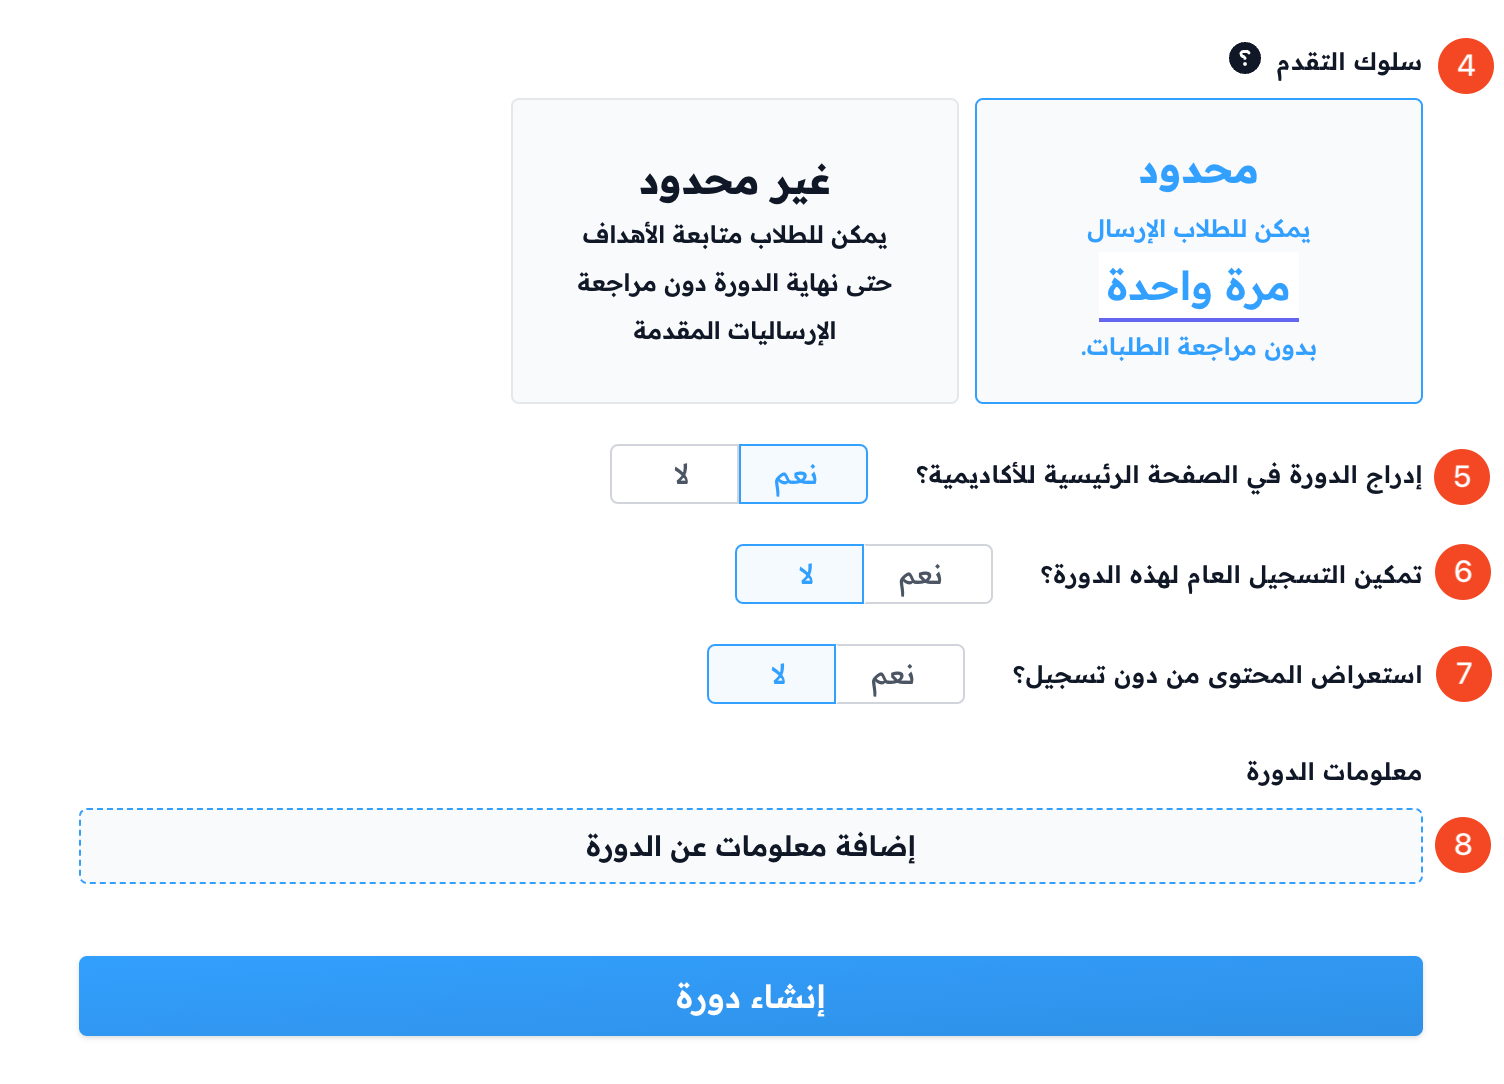
Choose the progression behavior.
-
With Add to homepage, choose whether the course shows on your platform home page.
-
With Enable public signup, choose whether visitors can sign up for the course by themselves. If you turn this off, you need to add students by hand.
-
With Show course outline to public, choose whether the course outline shows on the course page.
-
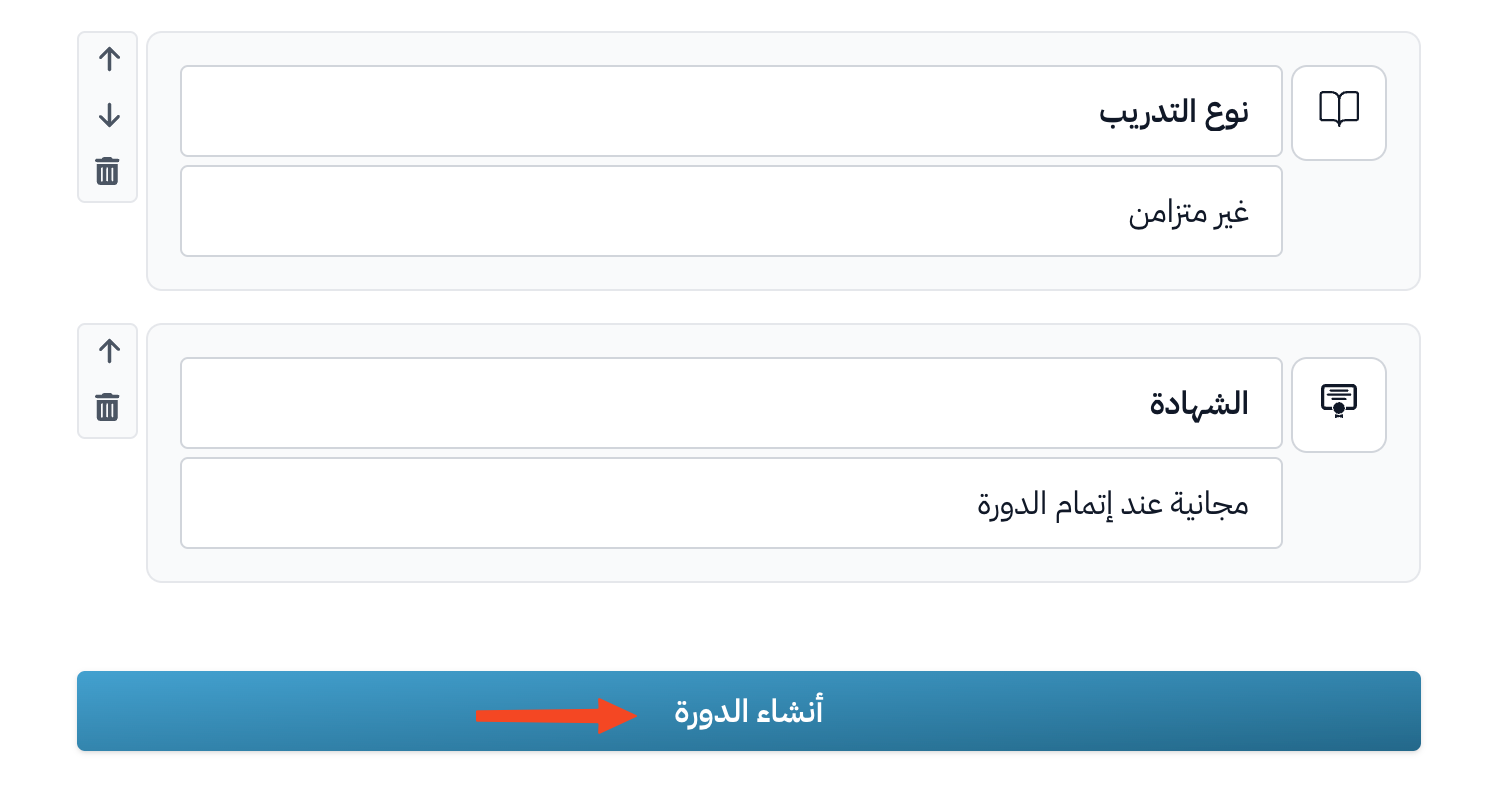
Add information about the course in Course Highlights, like the place, price, certificate and presenter.
You can also choose Categories, fill in the SEO settings, and turn on Show watermark on videos and slides. You do not have to use them.
Add course highlights
-
Click Add Course Highlight.
-
Type the highlight title in Title.
-
Type the highlight description in Description.
-
Choose the icon that fits the highlight.
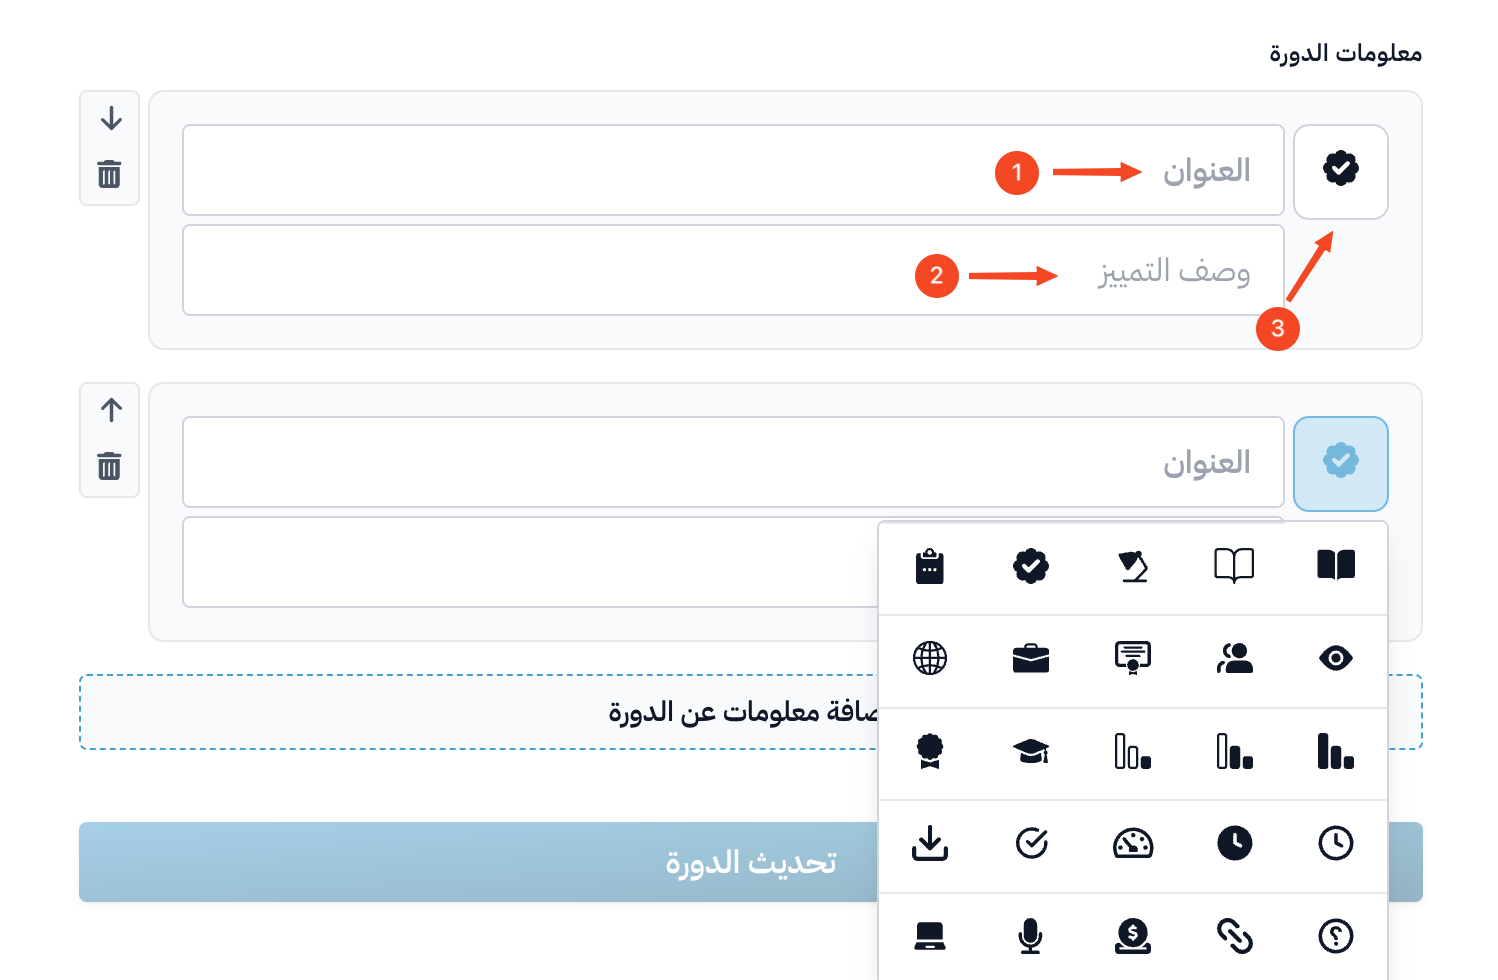
You can add up to four highlights.
Save the course
When you have entered all the course details, click Save to add the course and save everything you entered.
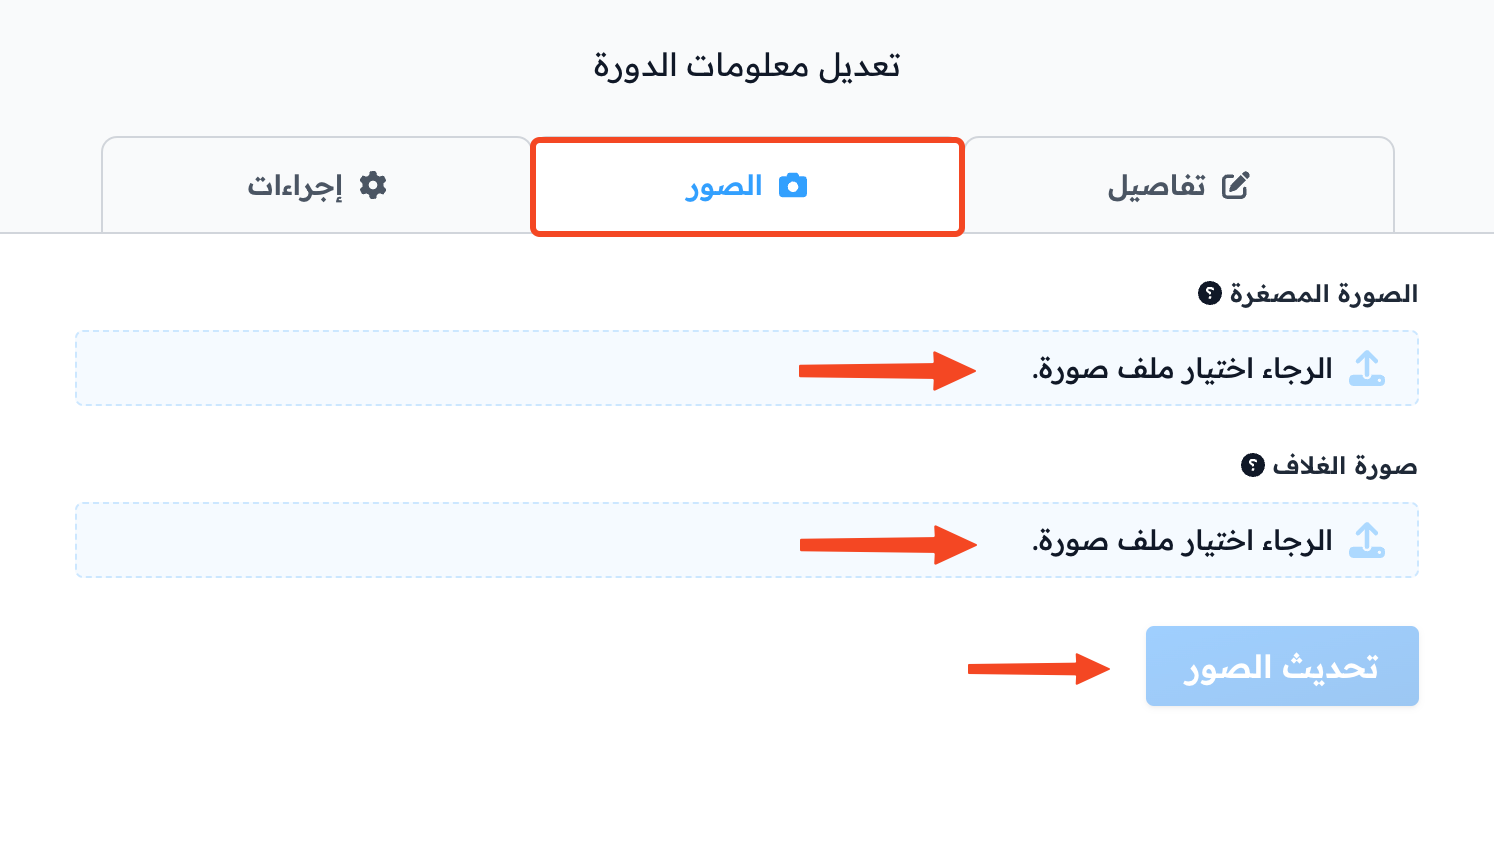
Add images to a course
-
On the Courses page, click Edit Course Details for the course you want to add images to.
-
Go to the Images & Video tab.
-
Add the Thumbnail and the Cover Image of the course. Recommended sizes:
- Thumbnail: 700 × 350 pixels.
- Cover image: 1280 × 720 pixels (16:9).
-
You can also paste a YouTube video link in Course Video (YouTube), to show it instead of the cover image at the top of the course page.
-
Click Update Images & Video to save.