Create coupons (discount codes)
Discount coupons give your students a discount on your platform products. This article is for platform admins.
Steps to create a coupon
-
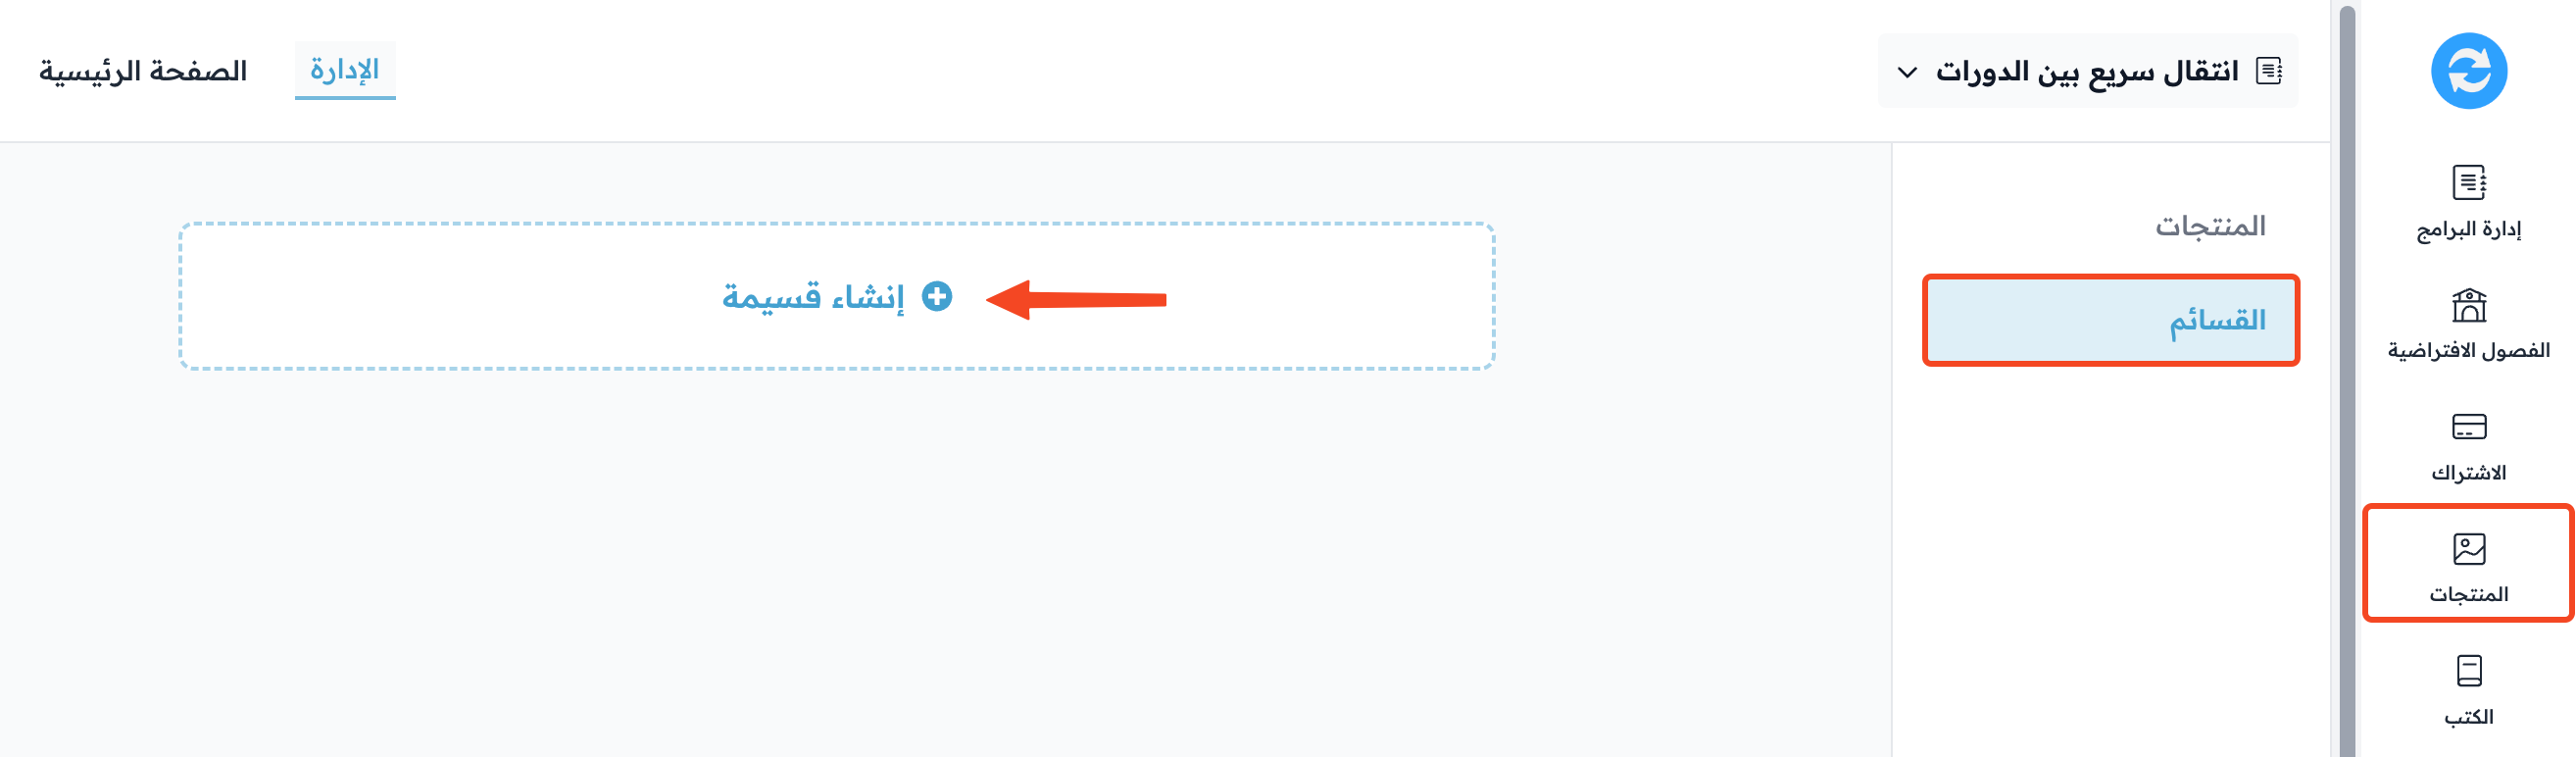
From the Product Management menu in the dashboard, go to the Discount Coupons page, then click Create Coupon.
-
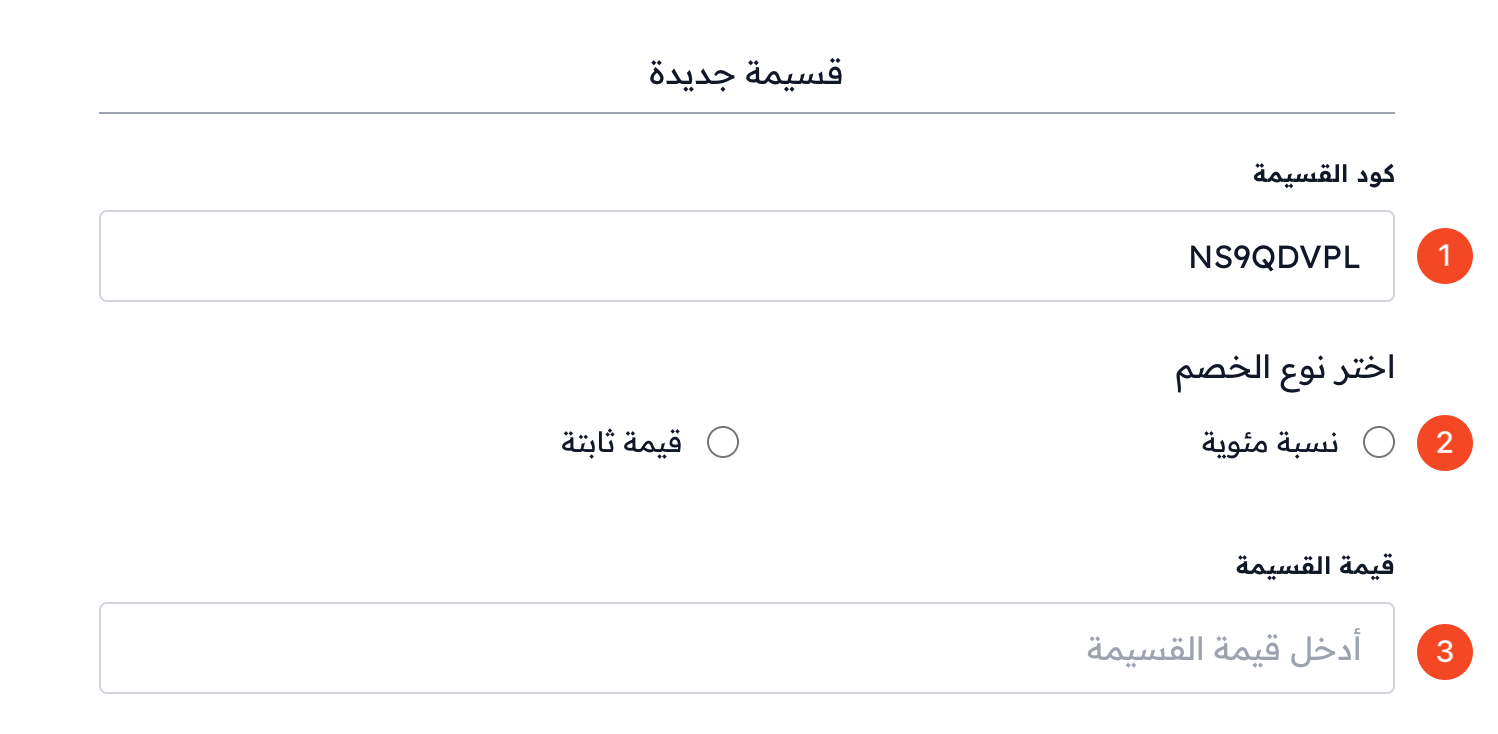
The Coupon code is created for you. You can change it and type your own code.
-
Choose the discount type: Percentage or Fixed value.
-
Enter the coupon Value.
-
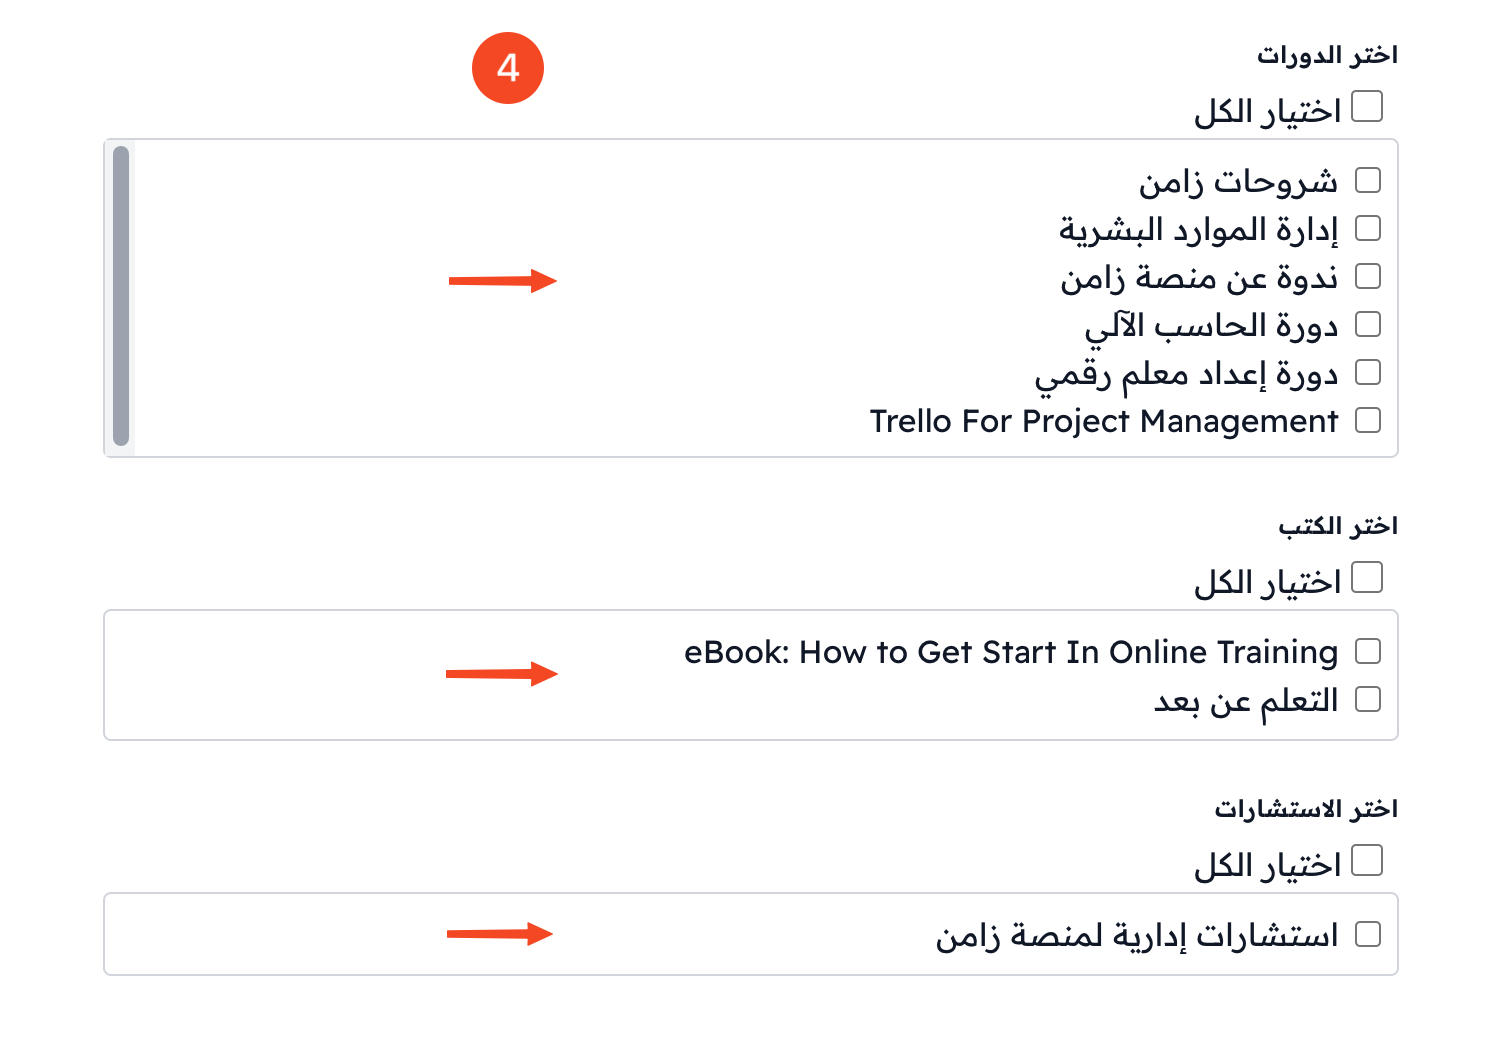
Choose the products the coupon applies to: courses, books and consultations.
-
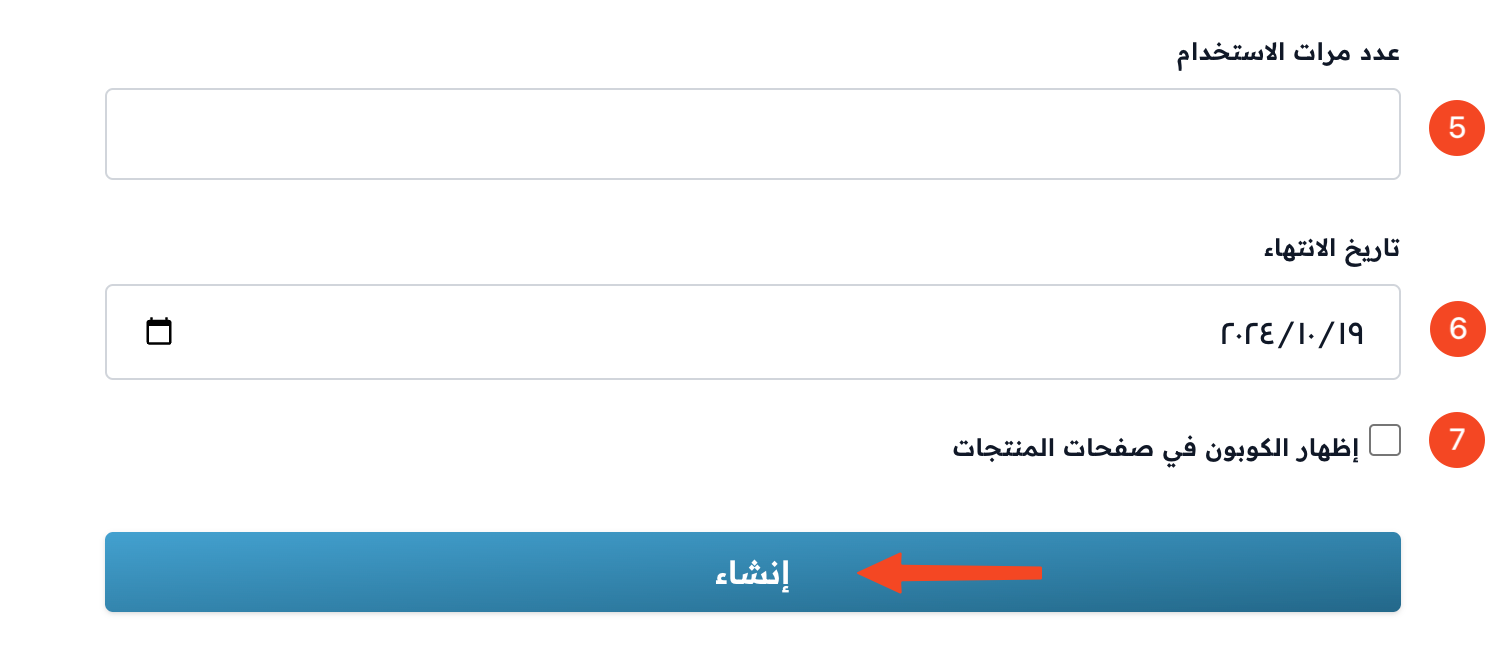
Set the Reedem Limit: how many times all students together can use the coupon. The coupon stops working when this limit is reached.
-
Set the coupon Expire Date. Students cannot use the coupon after this date.
-
You can turn on Show on products and payment pages.
-
Click Create to save.
Edit a coupon and follow its use
Your coupons show in a table on the Discount Coupons page. Each row shows the coupon Code, Discount, Products, Uses, Expires date and Status.
- To change a coupon, click the ⋯ (Actions) button at the end of its row, then click Edit.
- To copy the coupon code, click ⋯, then click Copy Code.

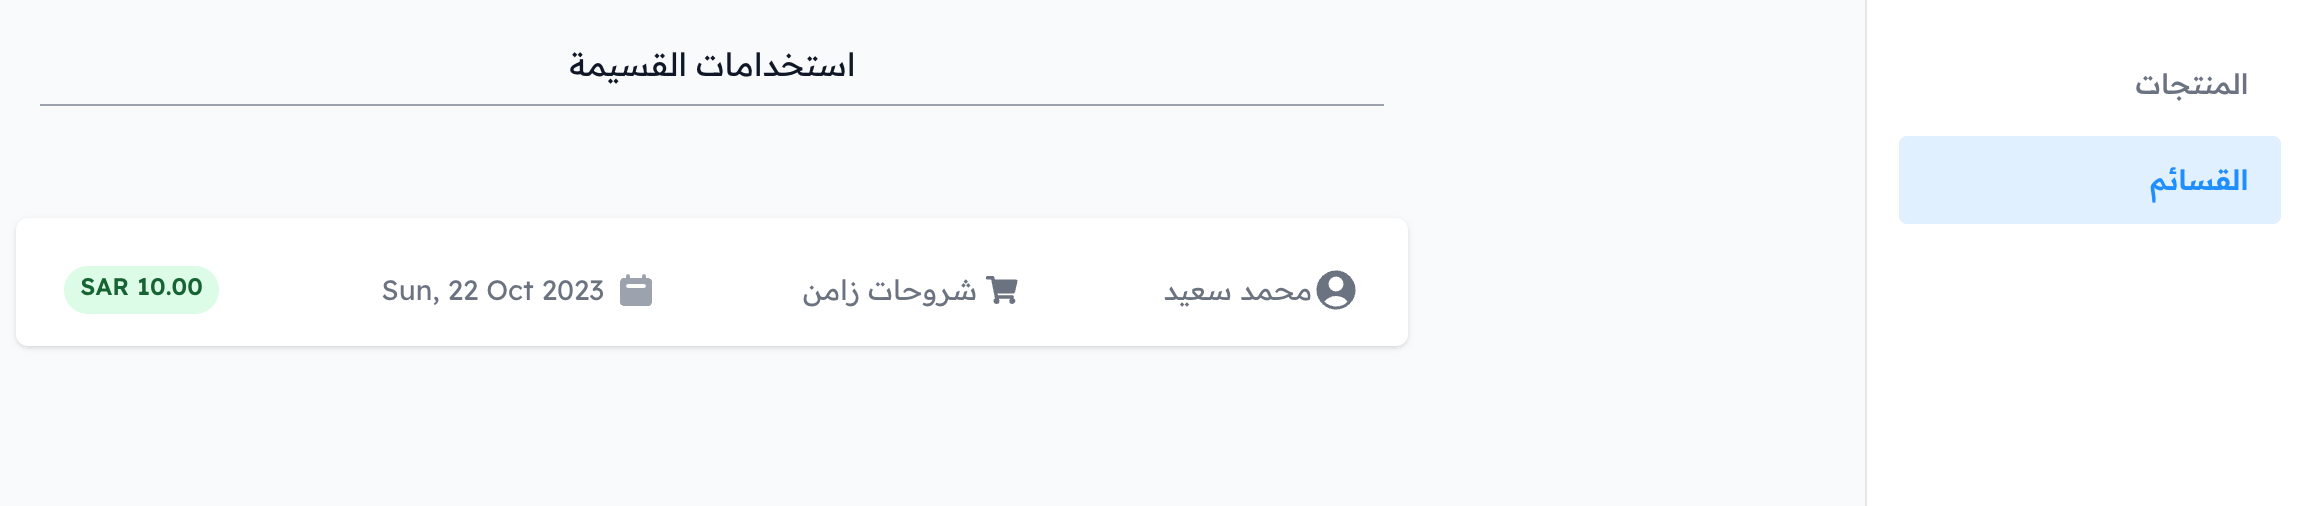
To see how the coupon was used, click the coupon code, or click ⋯, then click View.

The page shows each time the coupon was used.
Example
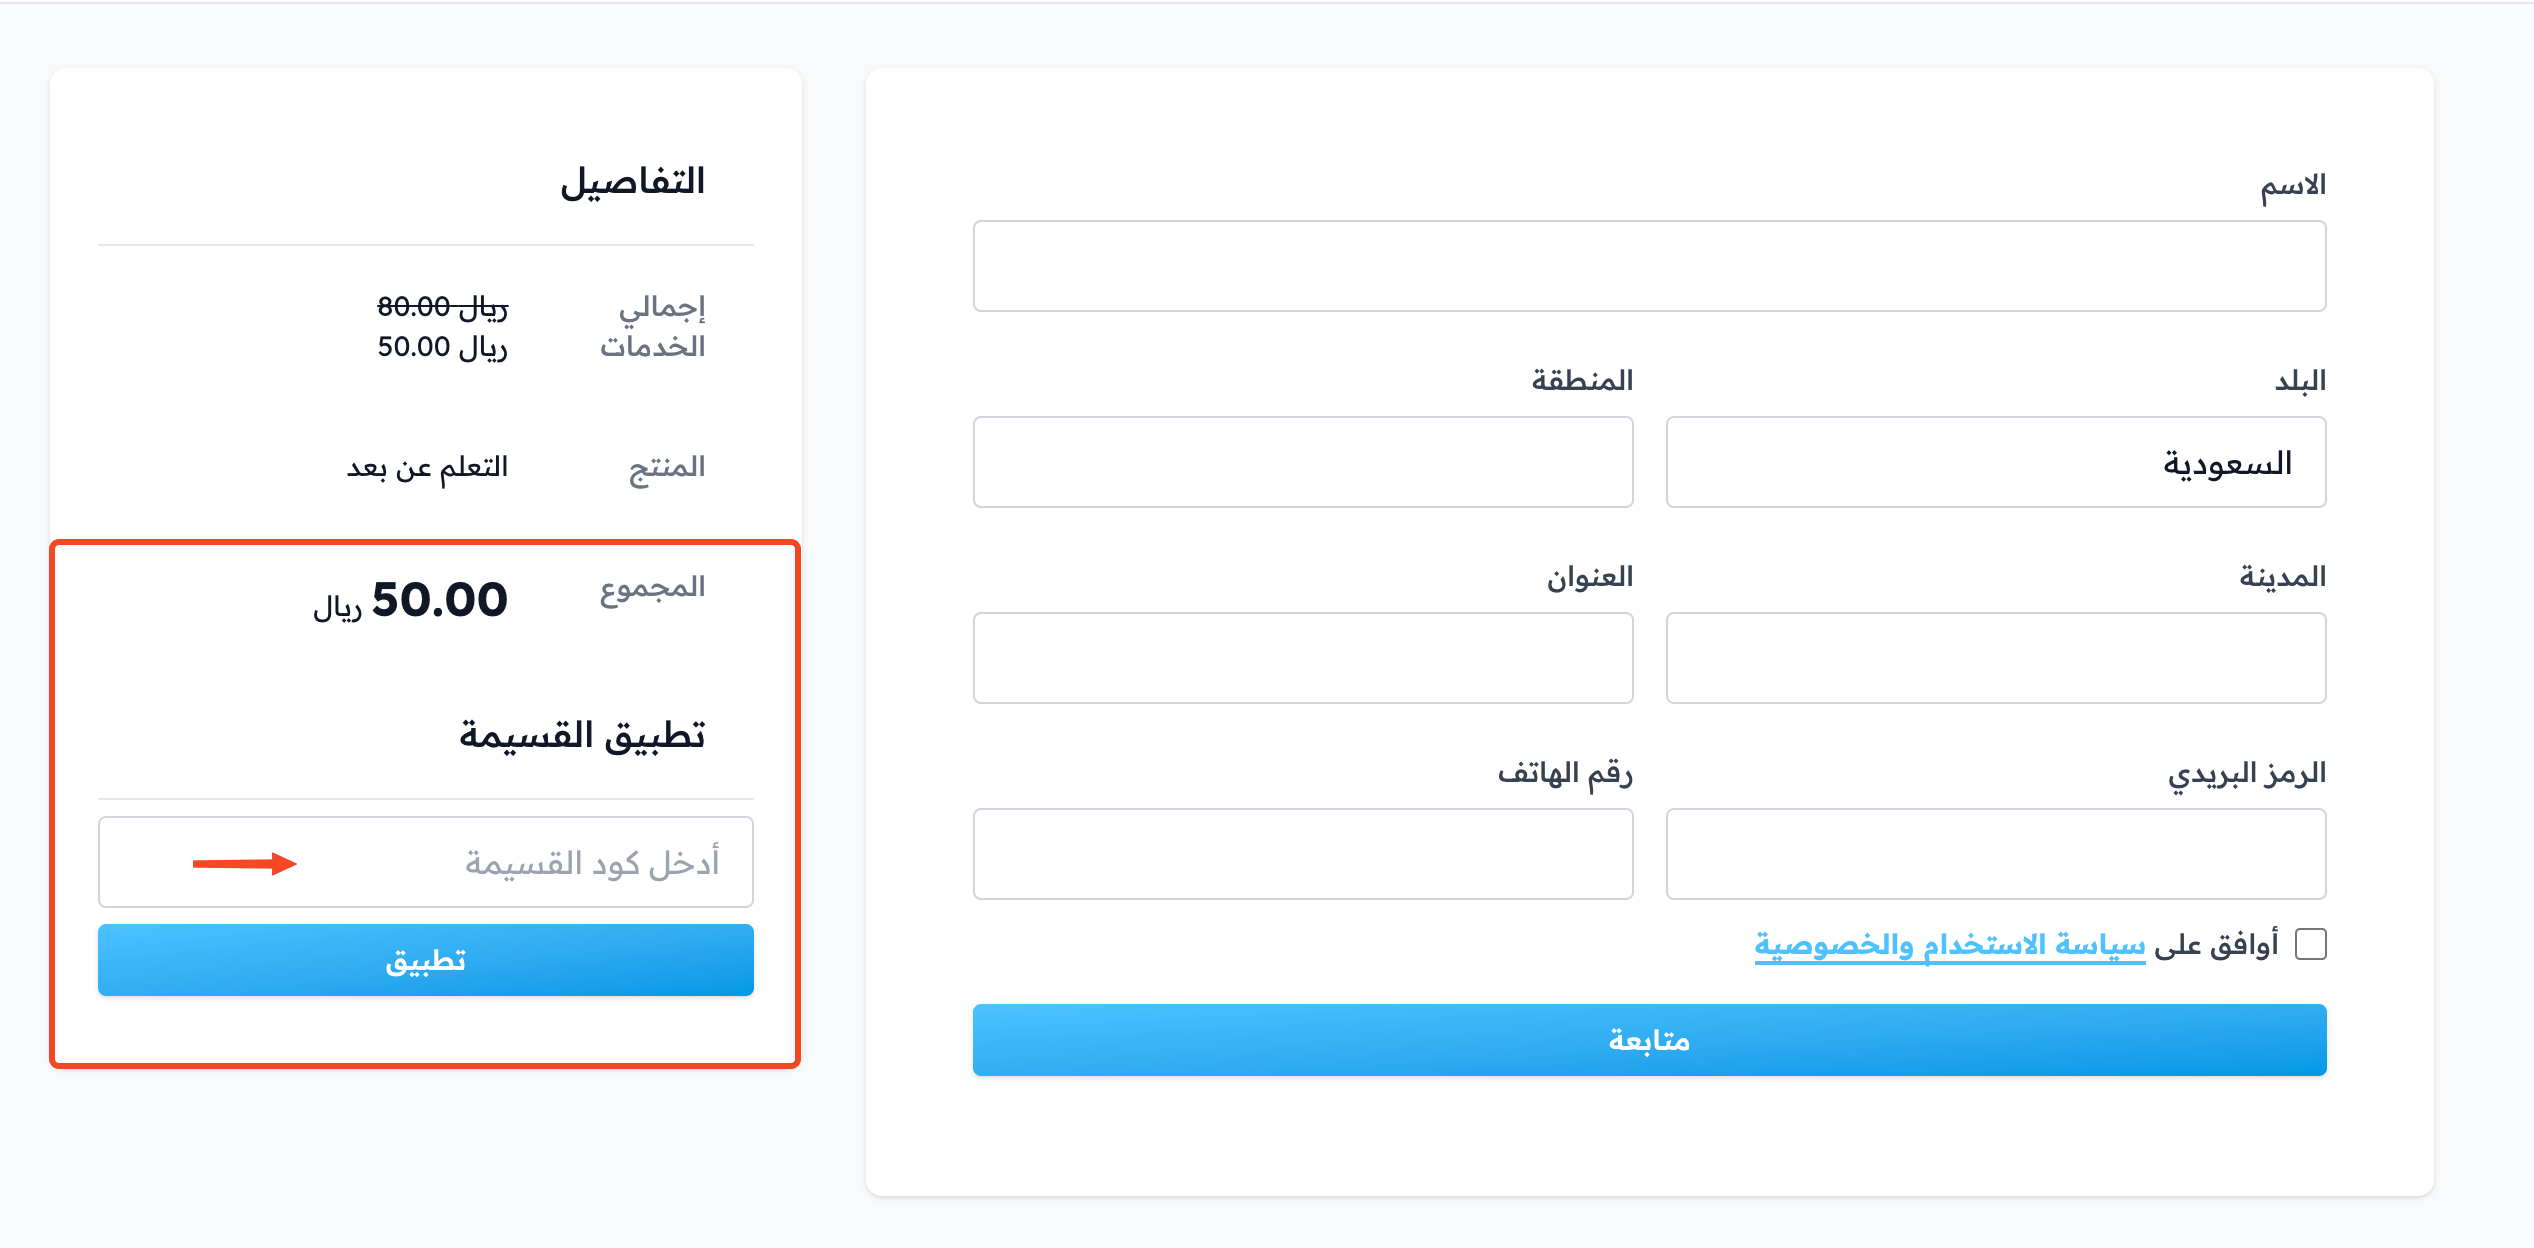
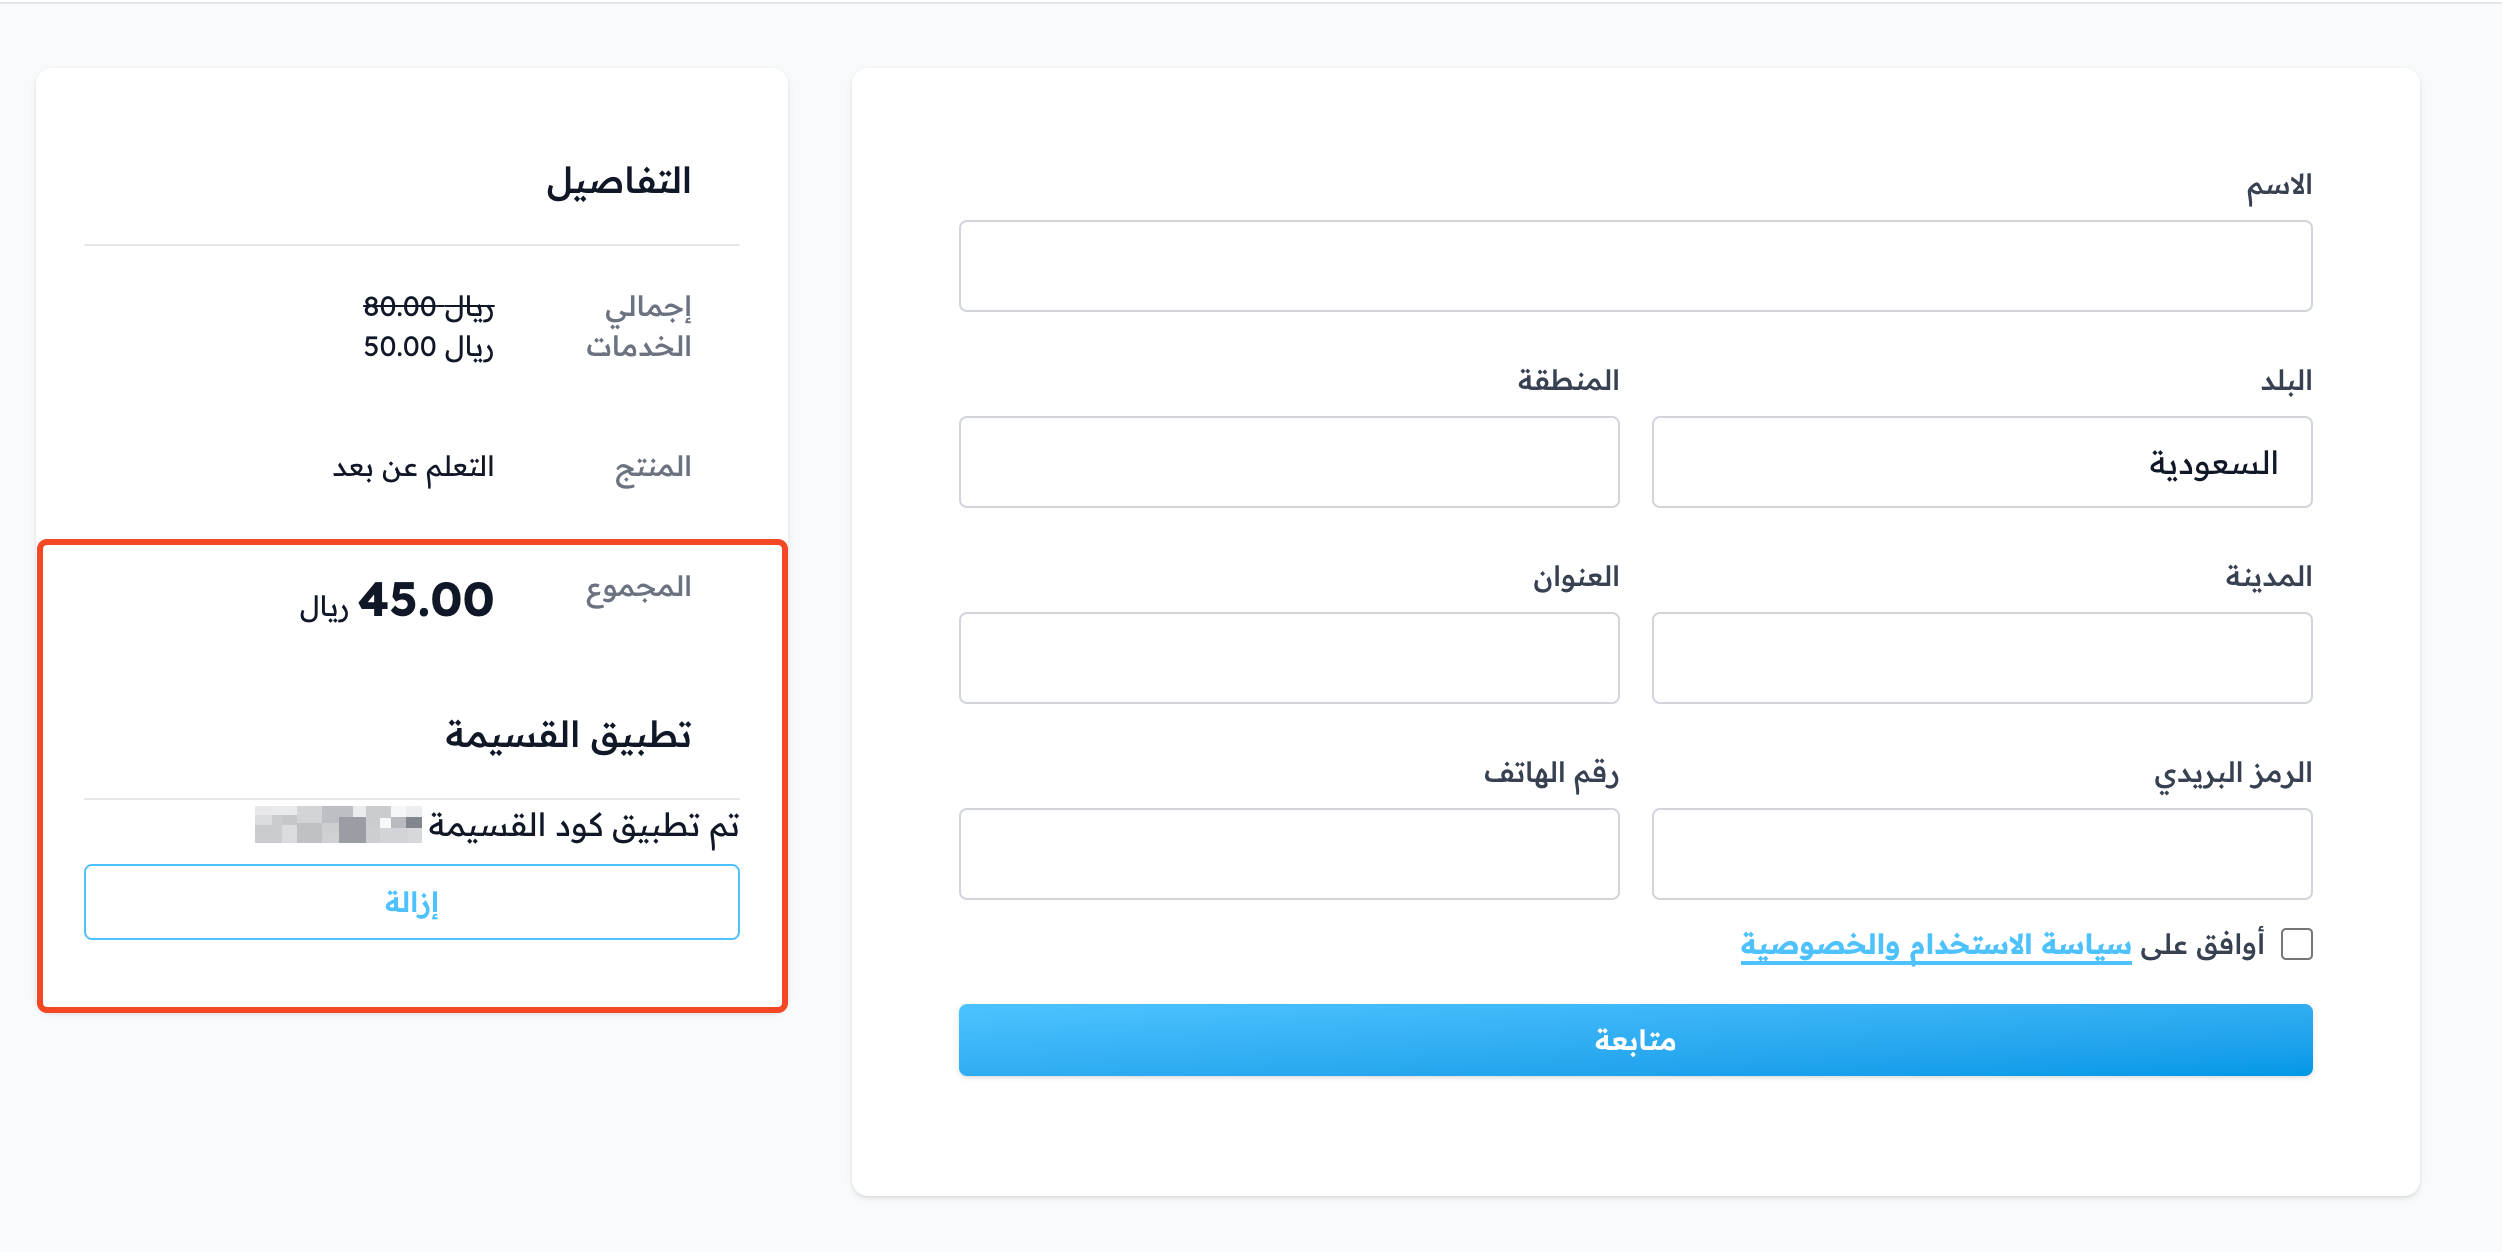
This is how a student uses the coupon on the checkout page: