How to add a student to a course
You can add students to a course in two ways: by hand, or by importing a CSV file with a group of students at once.
Steps to add students to courses
-
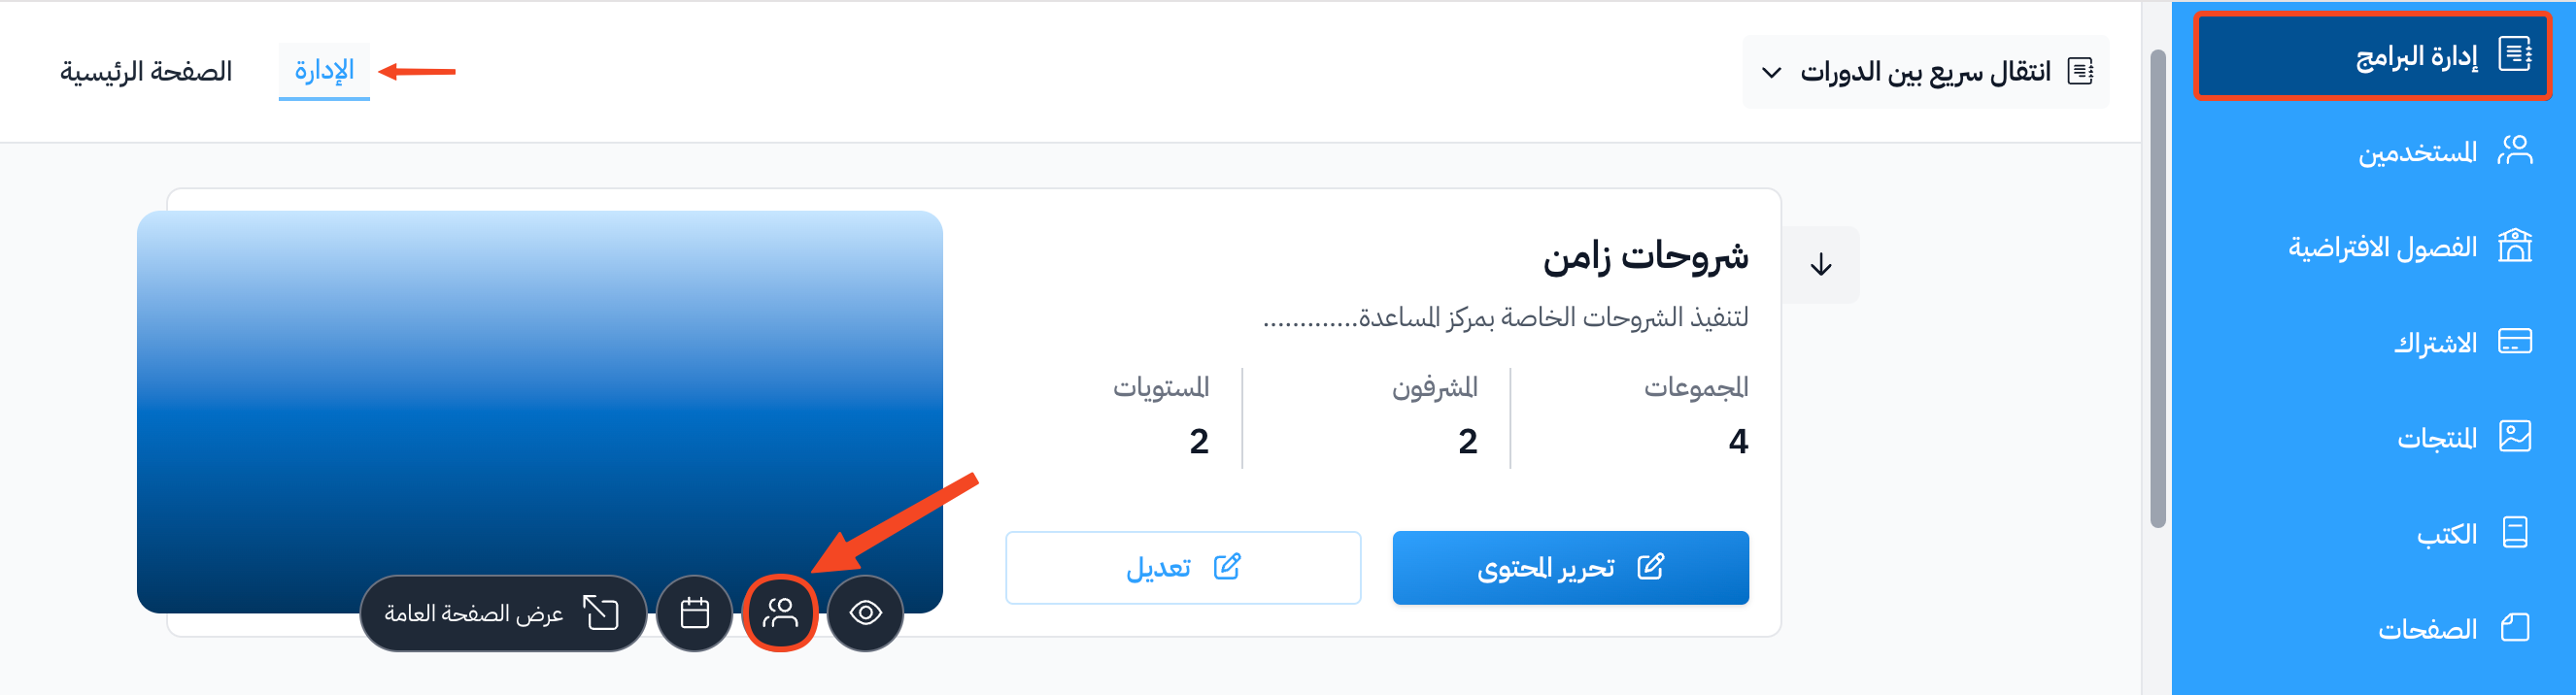
Go to the Courses page from the dashboard.
-
Click the Manage Students icon (the people icon) on the course image.
-
Click Add New Students.
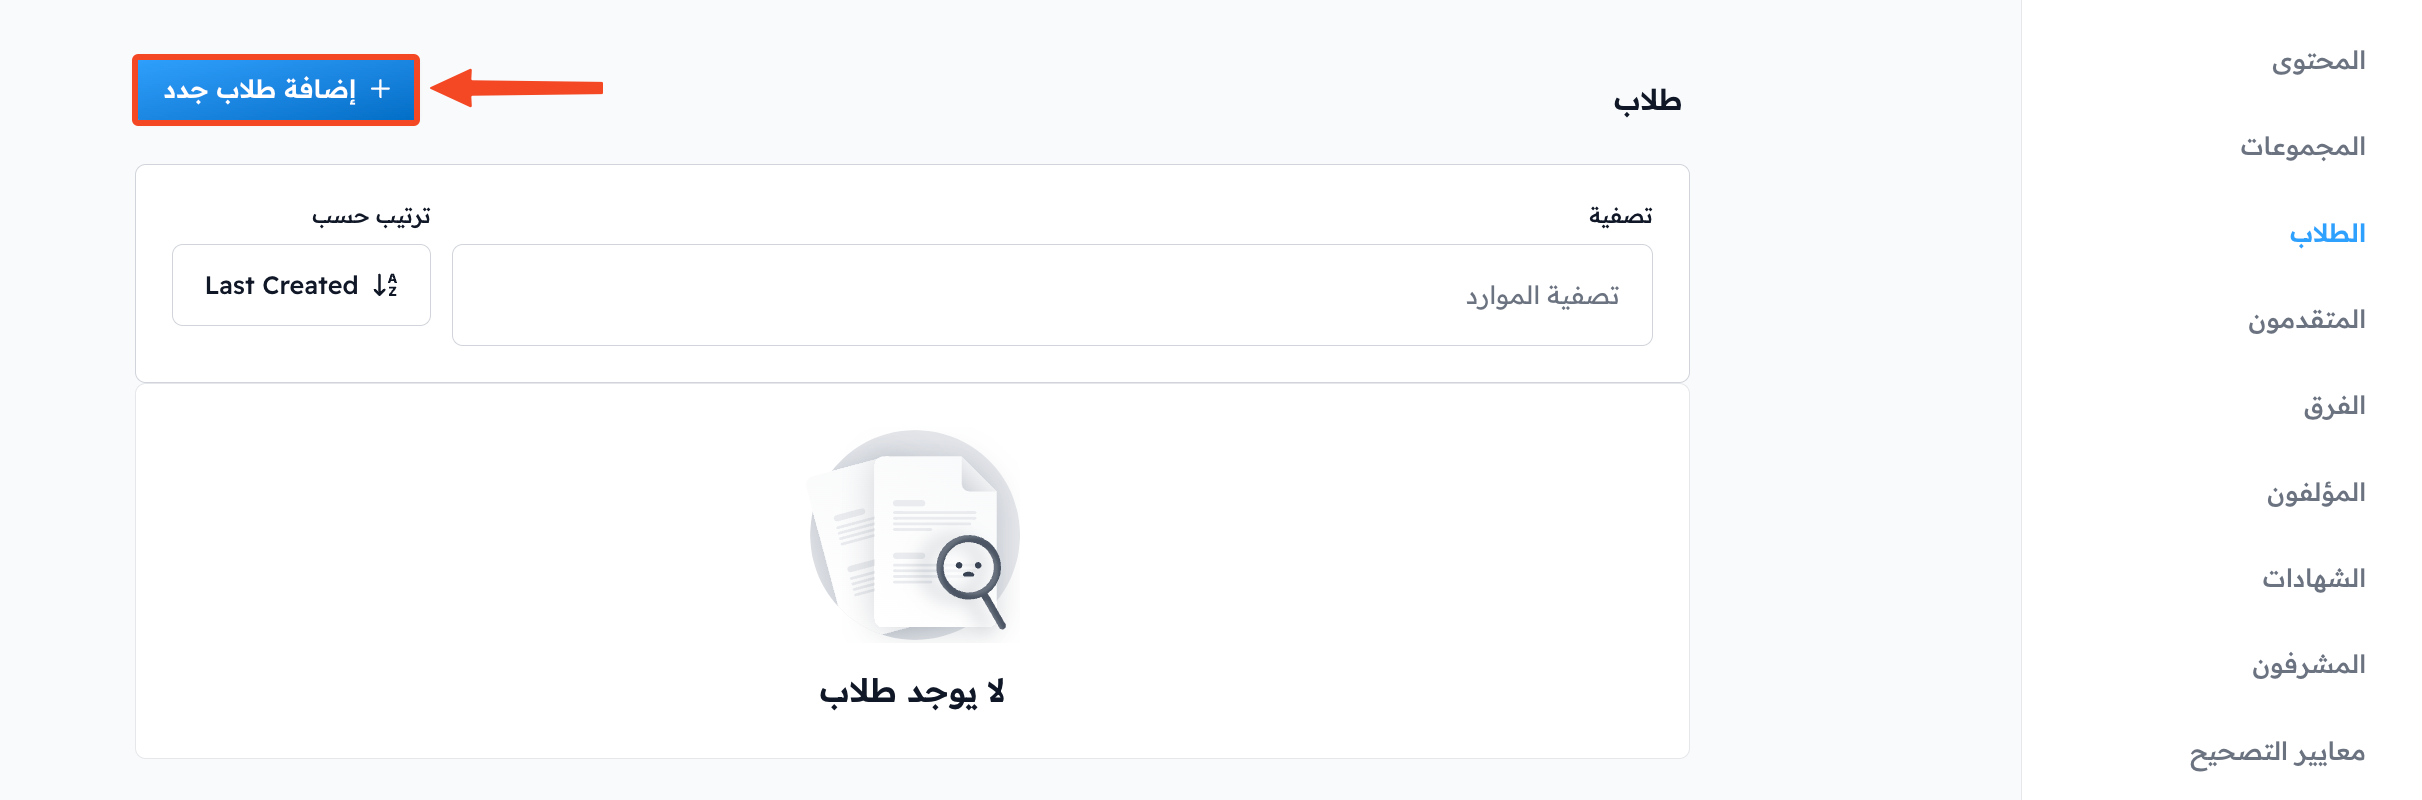
You can add students in two ways:
- Add them by hand from the Manual tab.
- Import a group of students at once from the CSV File Import tab.
Add students by hand
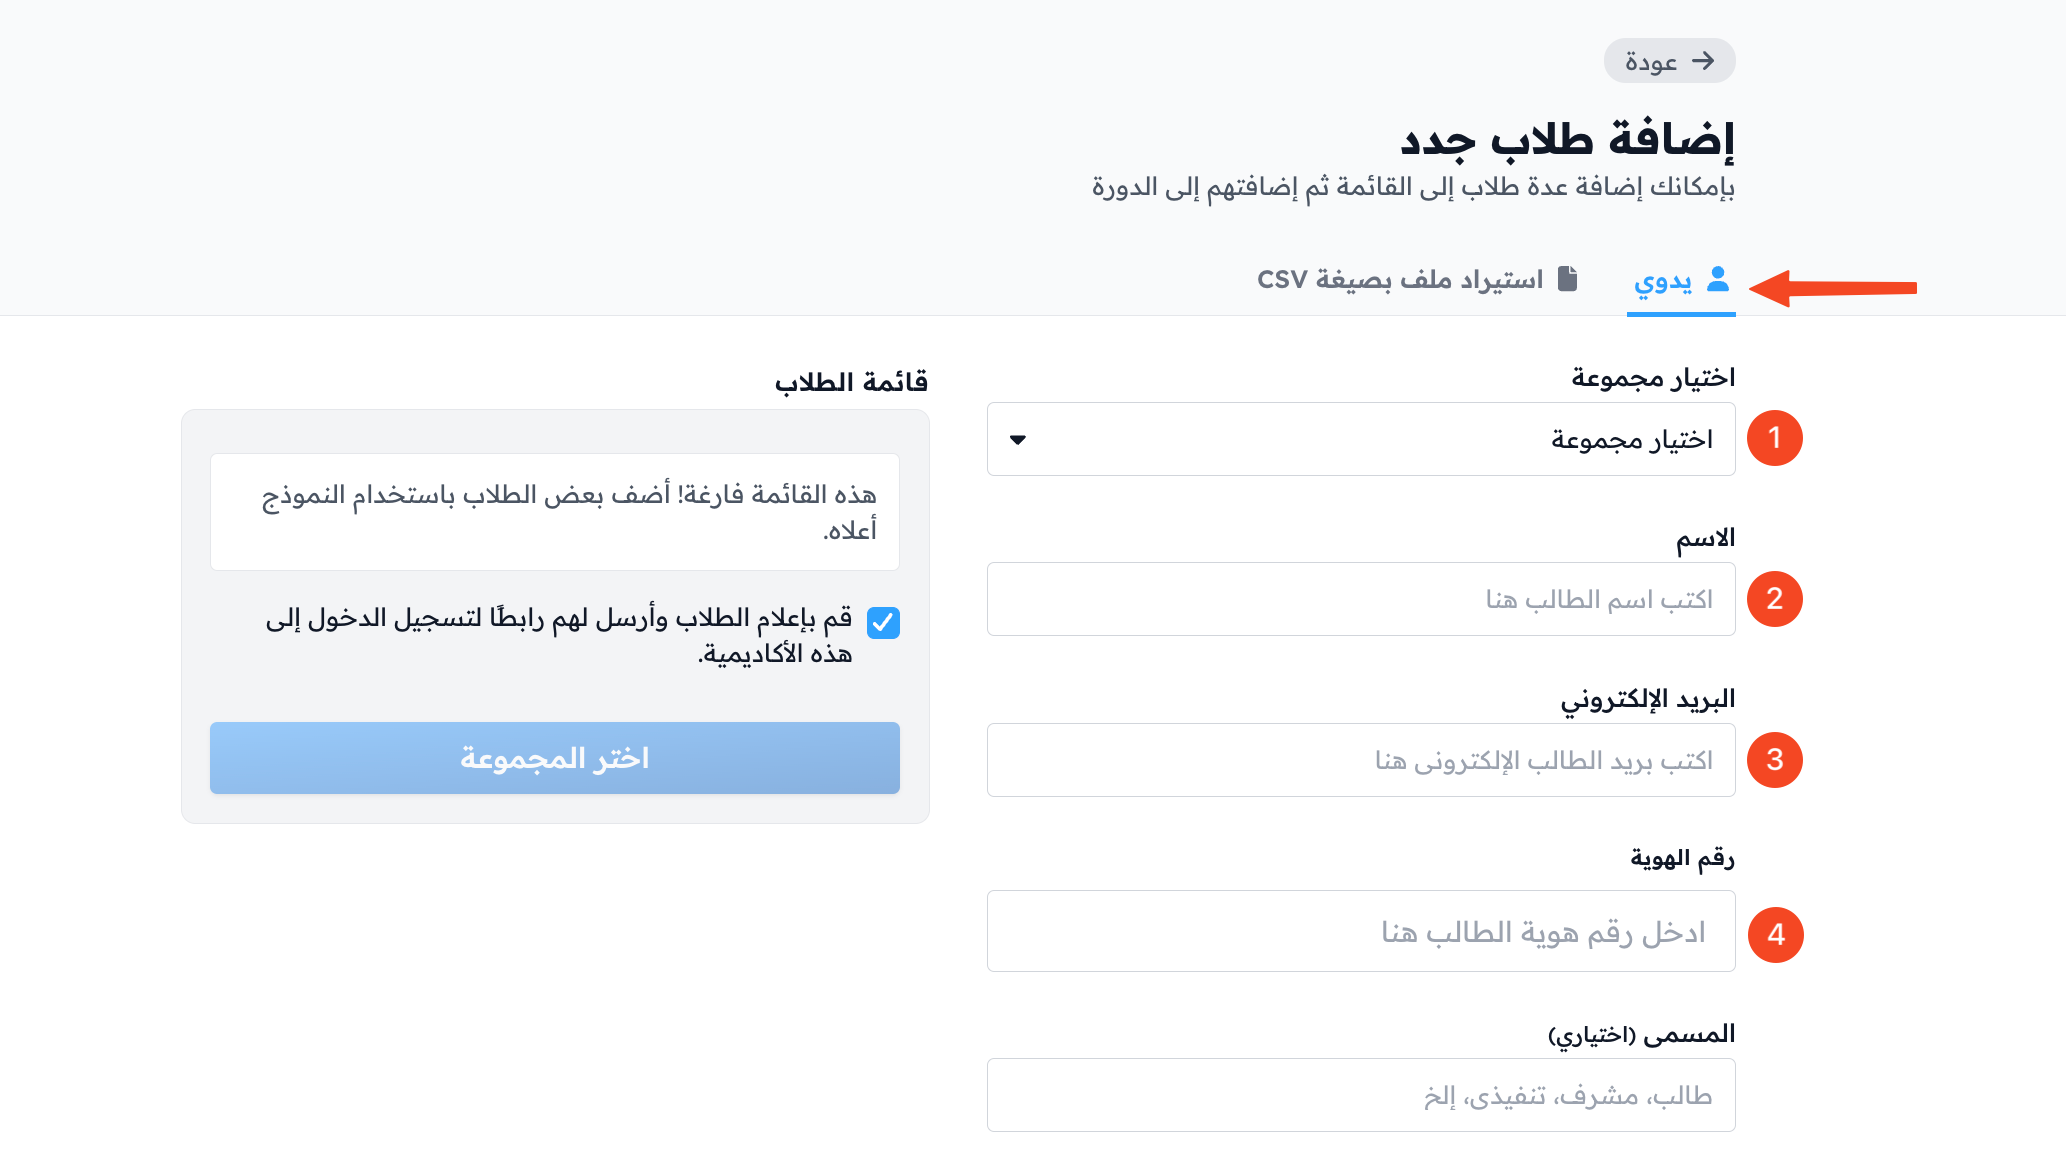
In the Manual tab, fill in the required details:
-
Choose the cohort you want to add the students to.
-
Type the student's full name.
-
Enter the student's email address.
-
Enter the student's identity number if you want. This field is optional.
-
You can also fill in optional details: Title, Affiliation, Team Name and Tags.
-
Click Add to List.
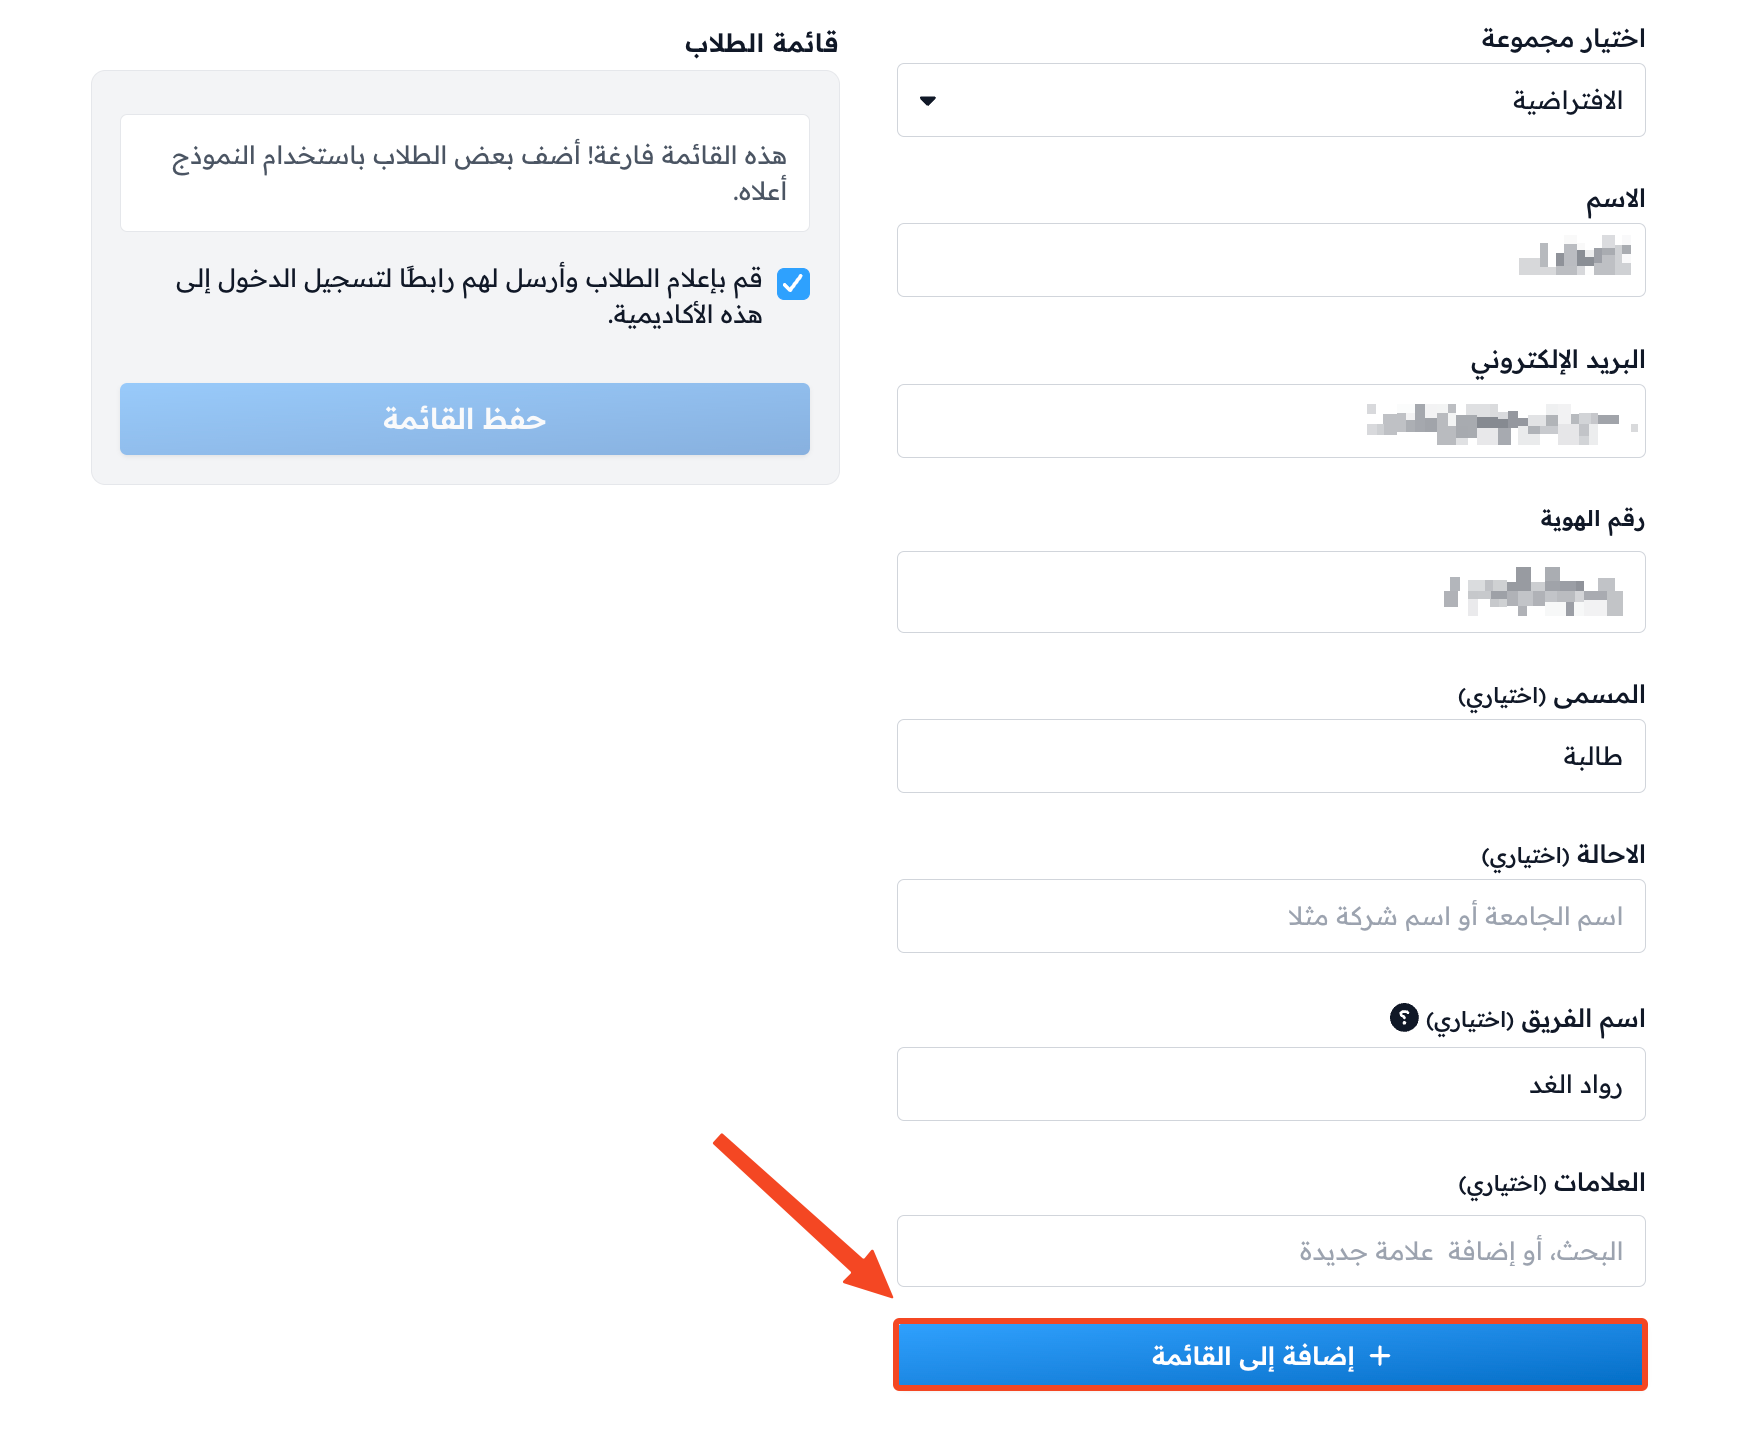
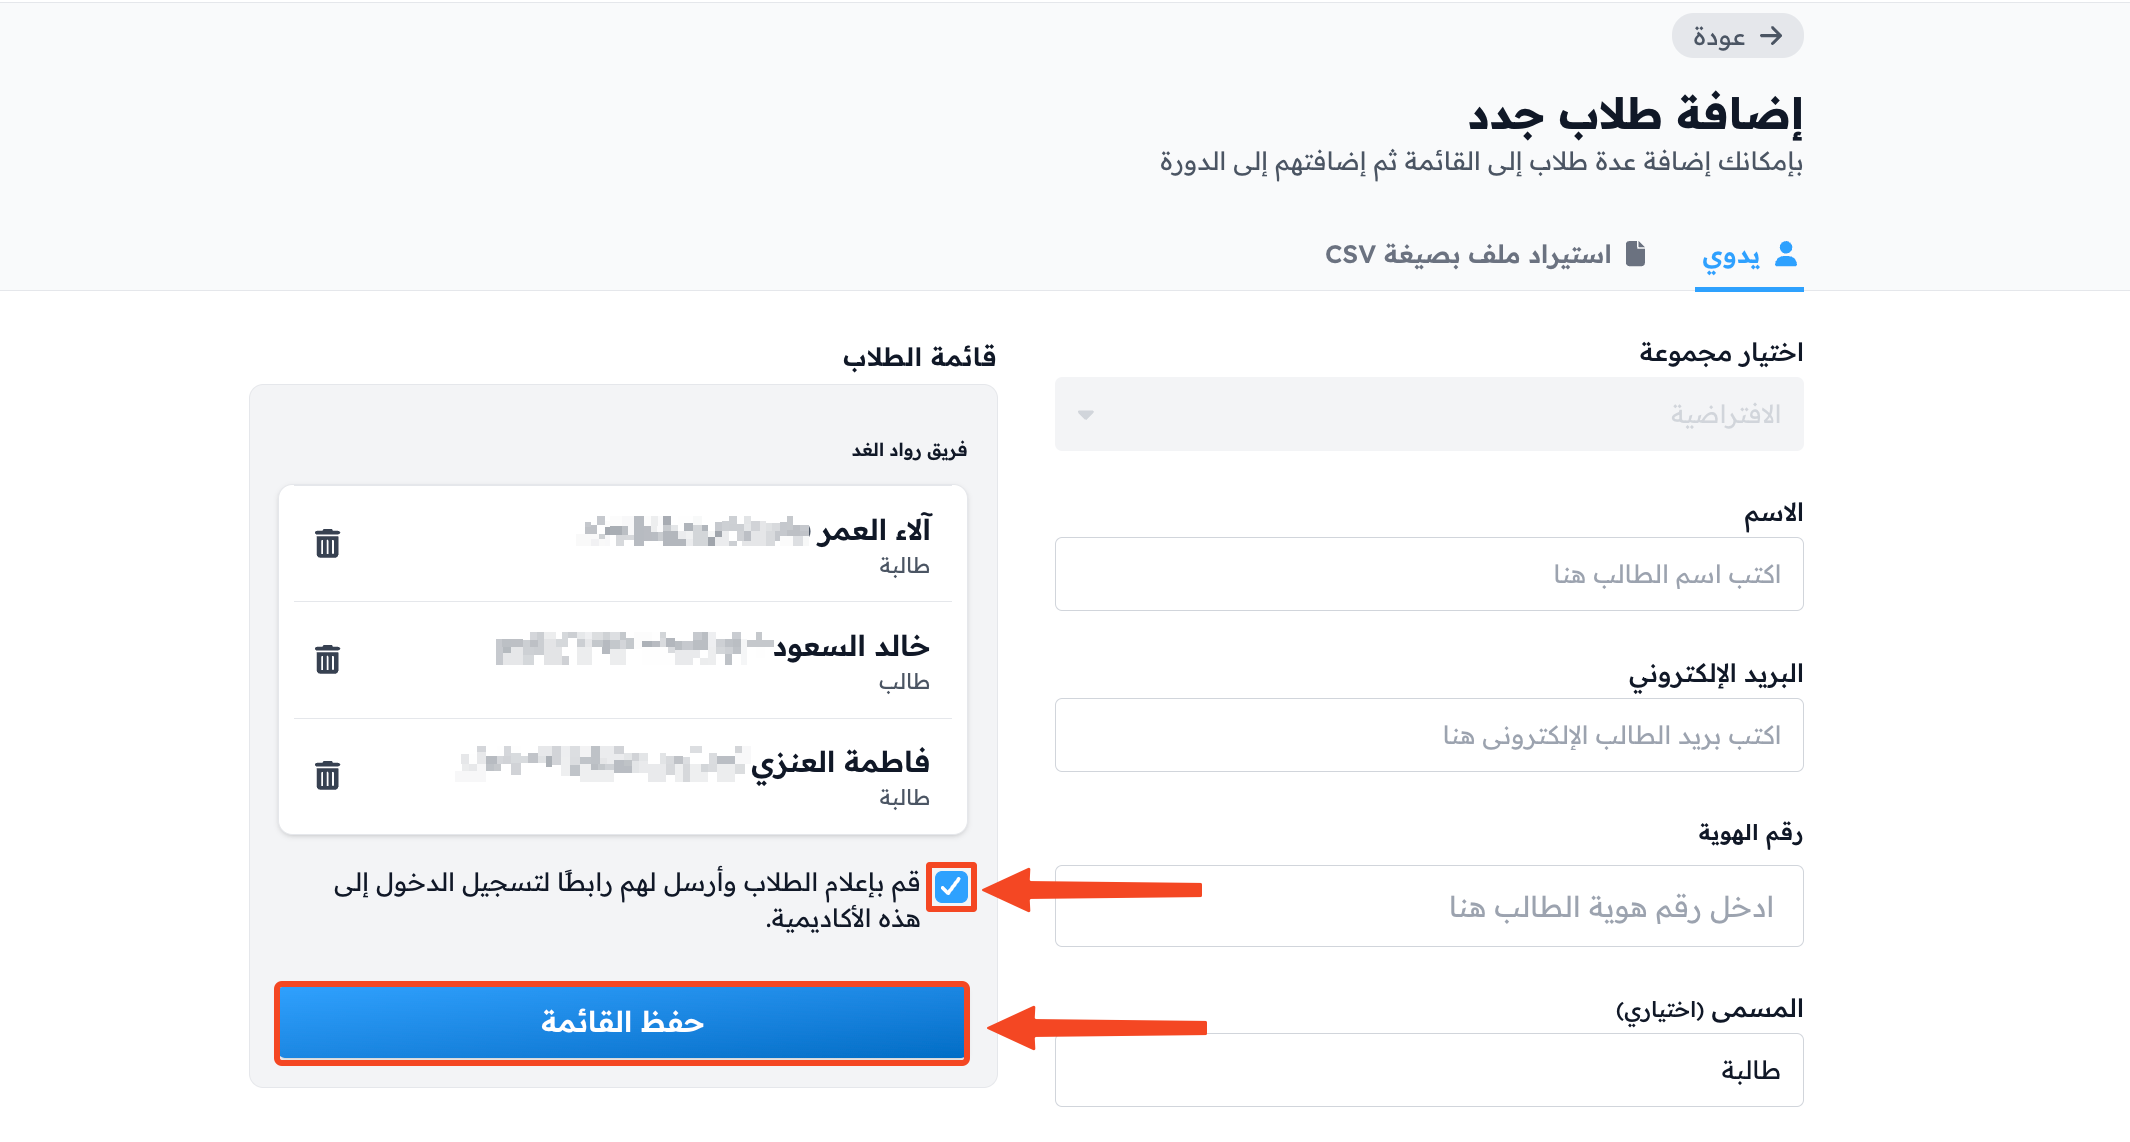
You can enter the details of more students to add them to the same list.
When you finish adding students to the list:
-
You can turn on or off the option Notify students, and send them a link to sign into this platform.
-
Click Save List to save the list and add the students.
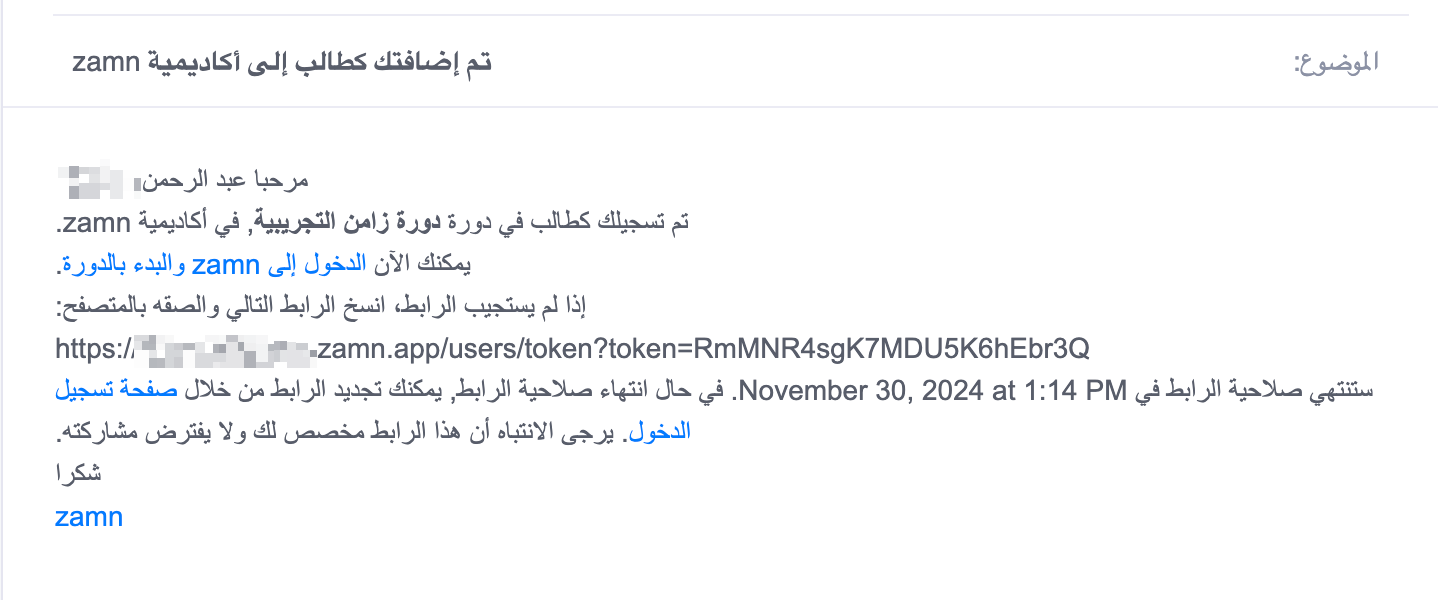
If you turned on the notify option, the students get an email telling them they were added to the course, so they can sign in to the platform and start the course.
Import a group of students at once
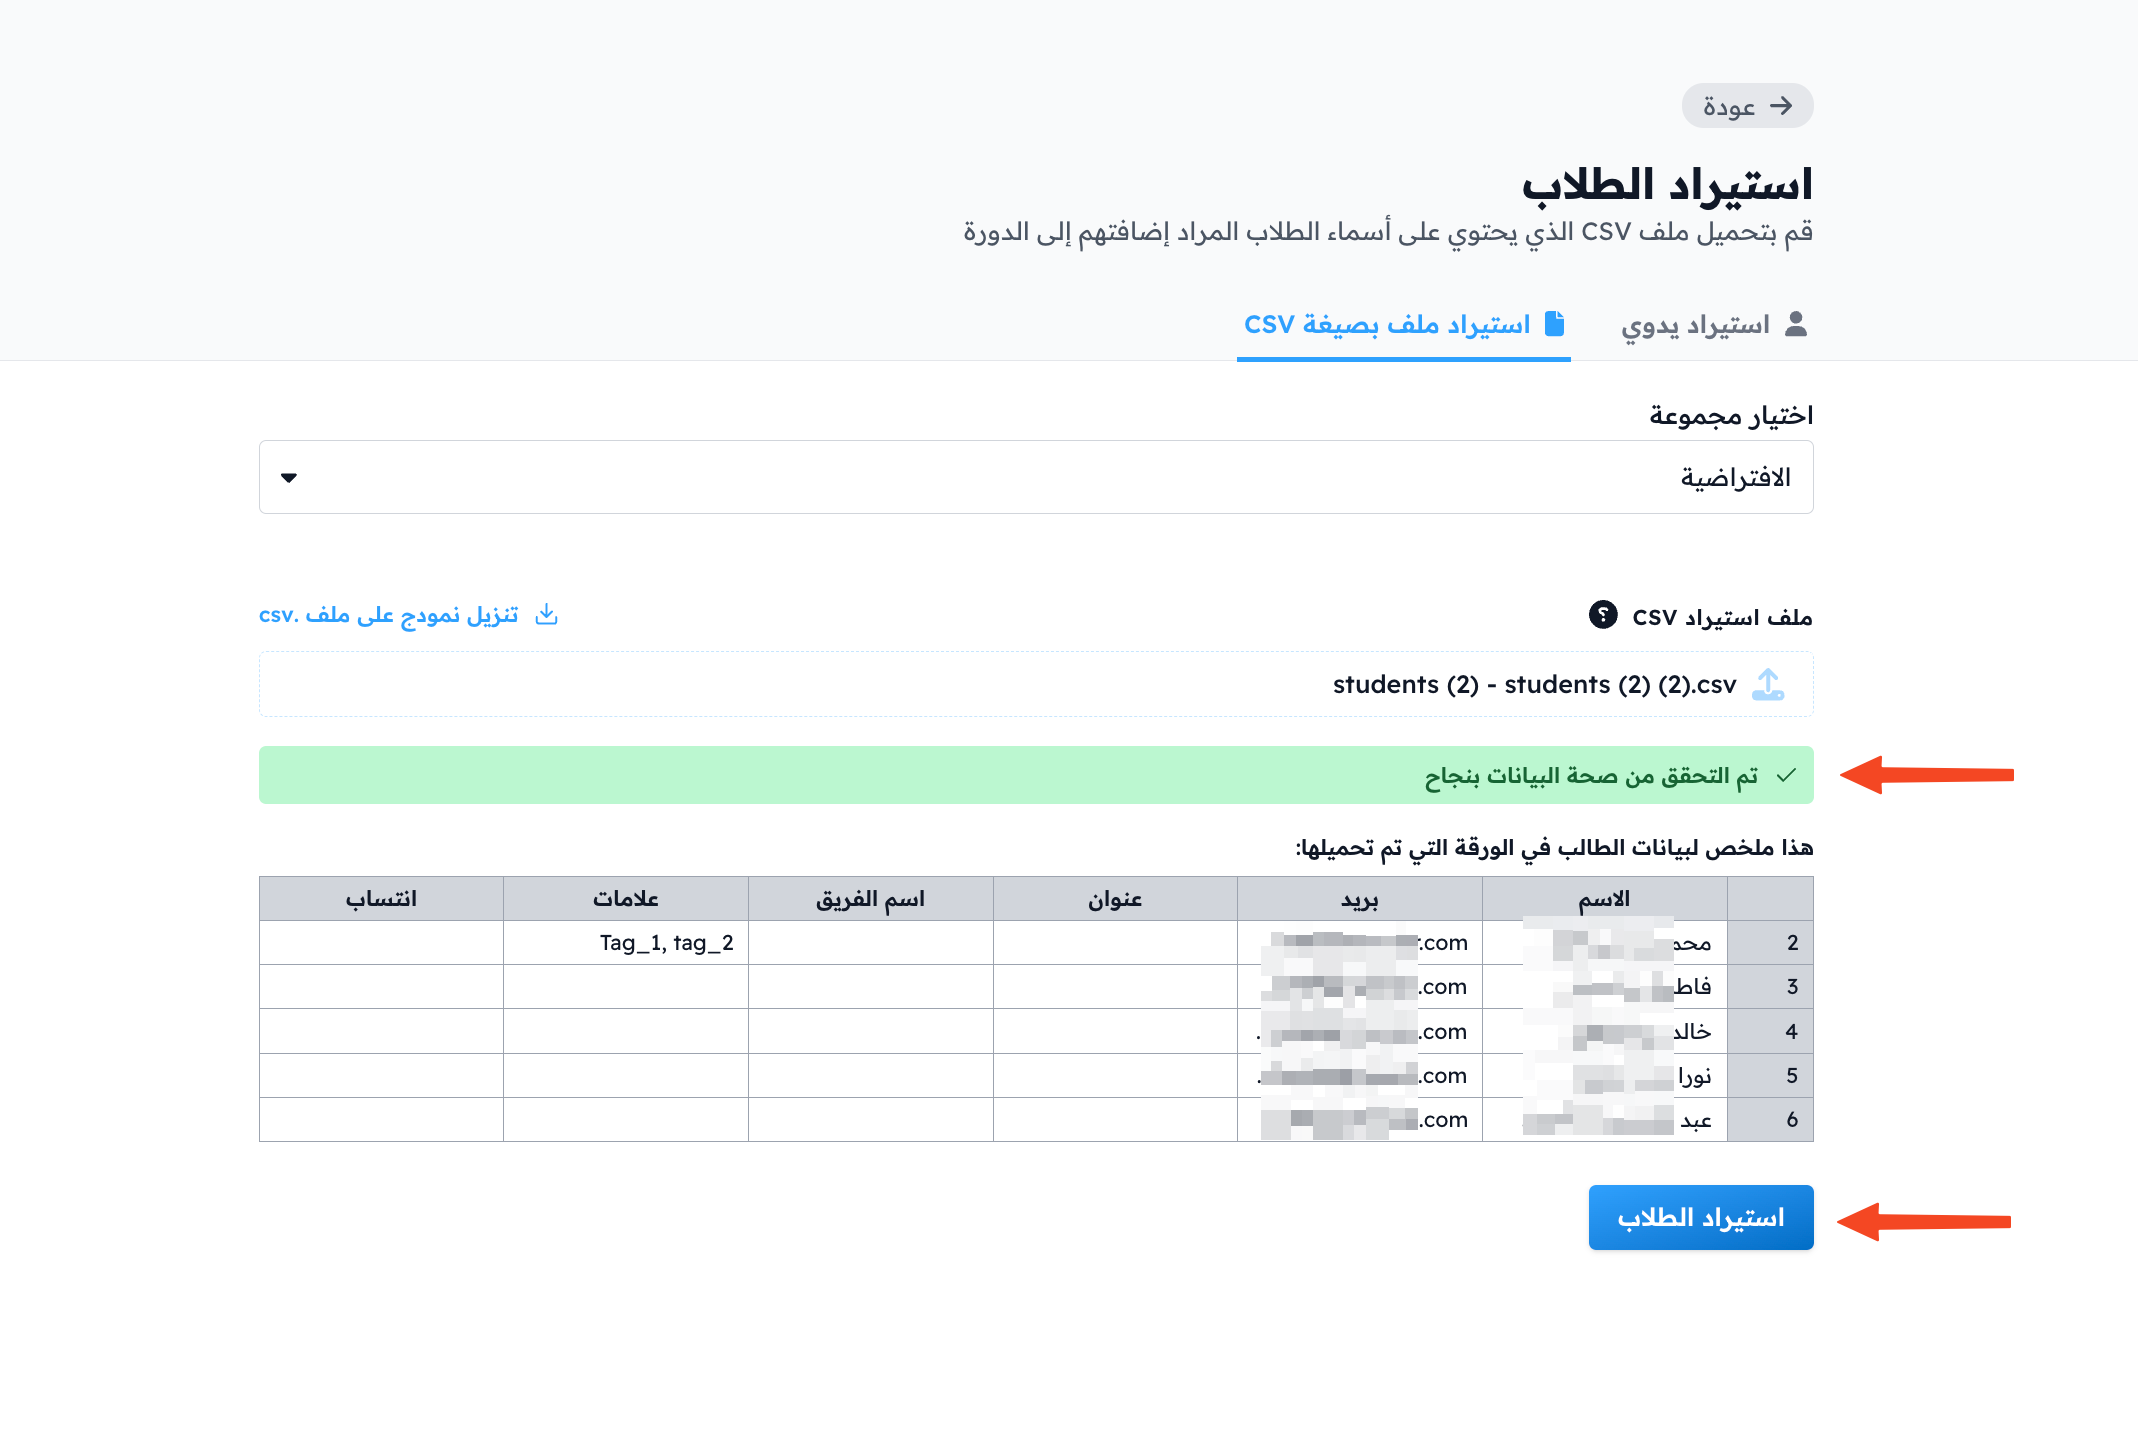
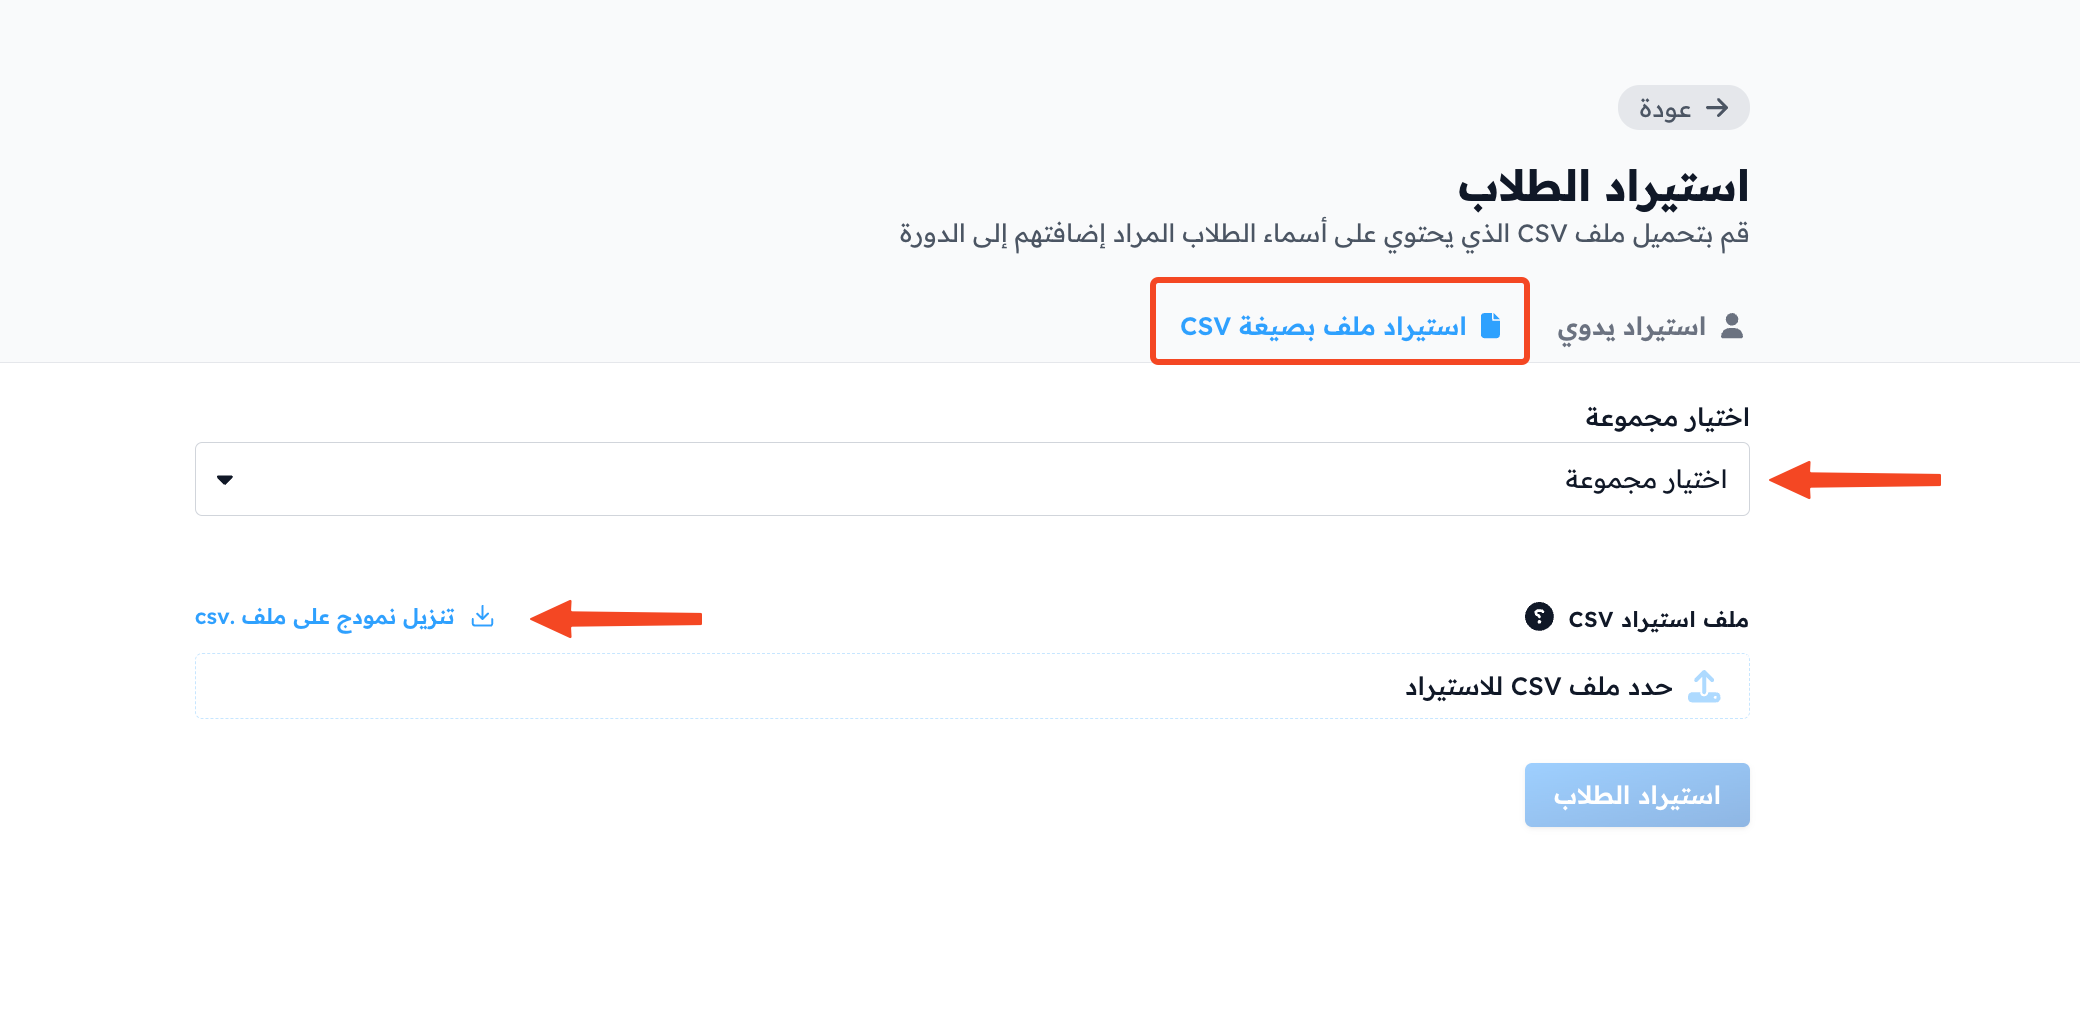
In the CSV File Import tab:
-
Choose the cohort you want to add the students to.
-
Click Download an example .csv file.
-
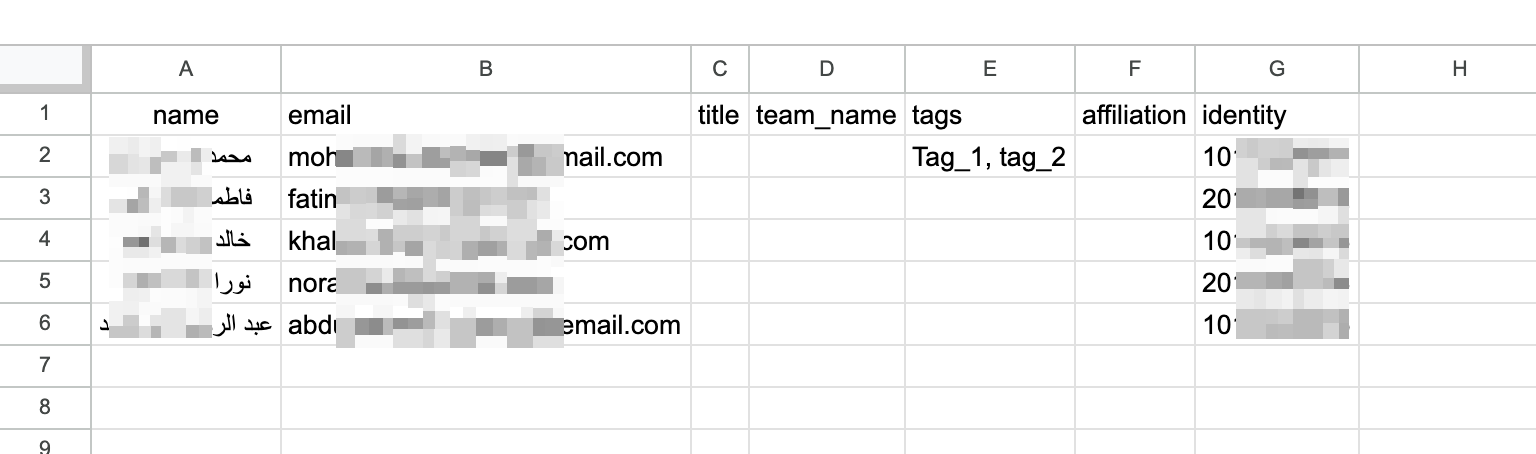
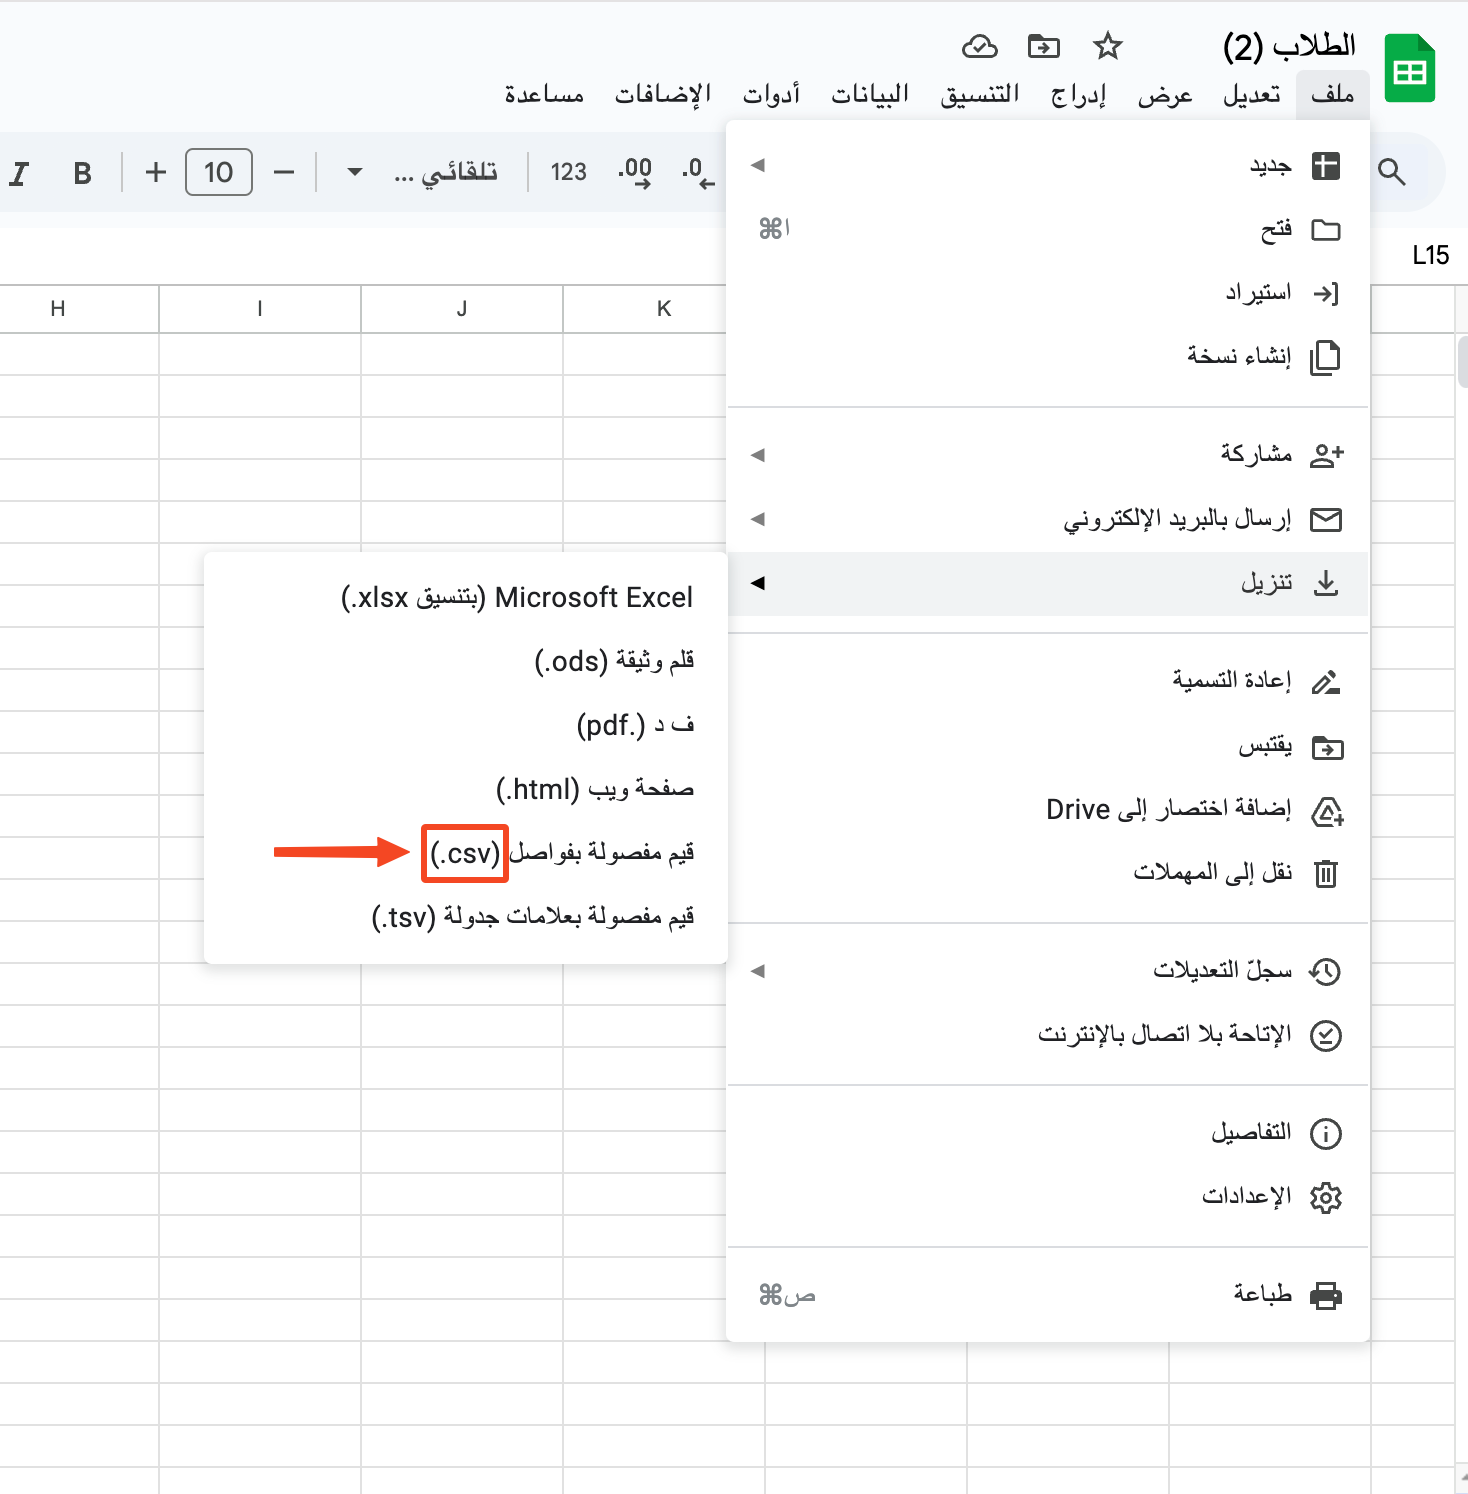
Fill in the students' details, then download the file in CSV format.
NoteThe name and email columns are required. The other columns, including the identity number, are optional.
-
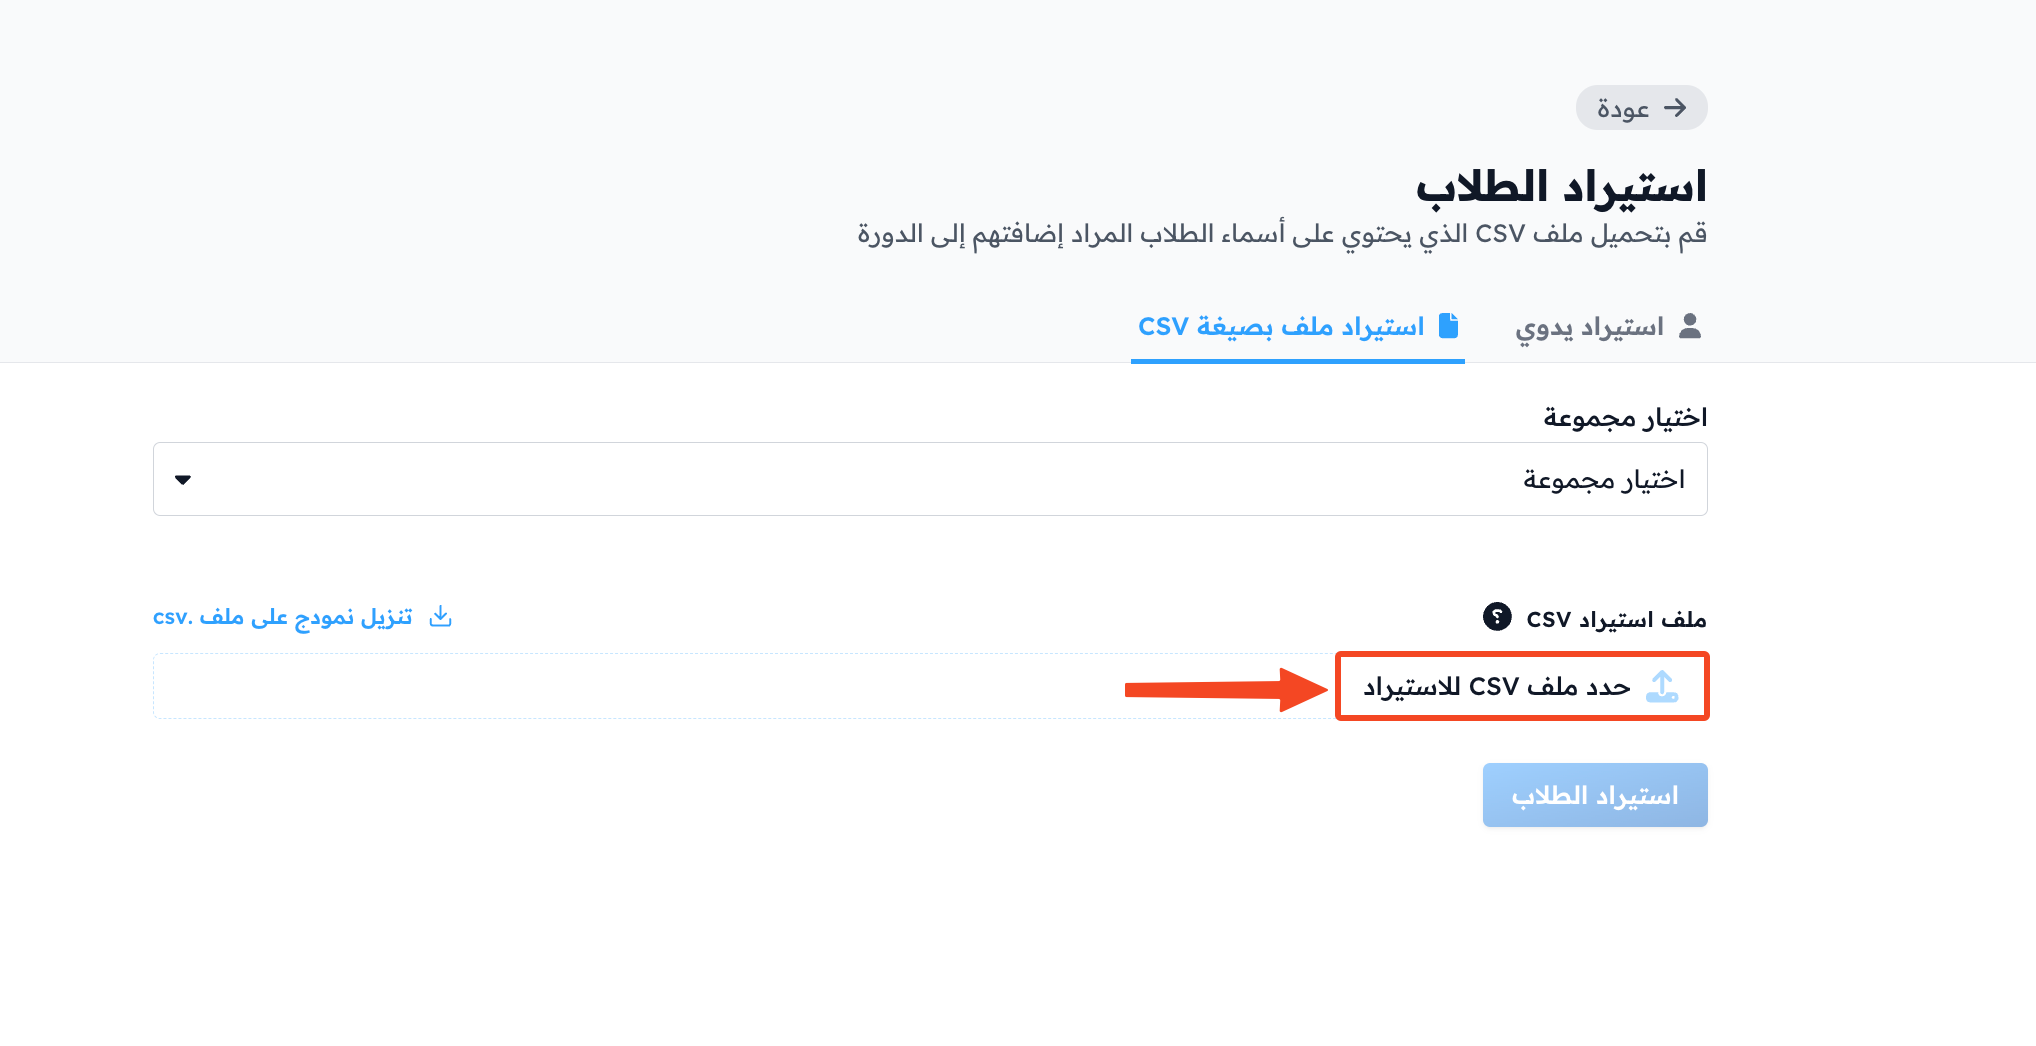
Click Select CSV file to import.
-
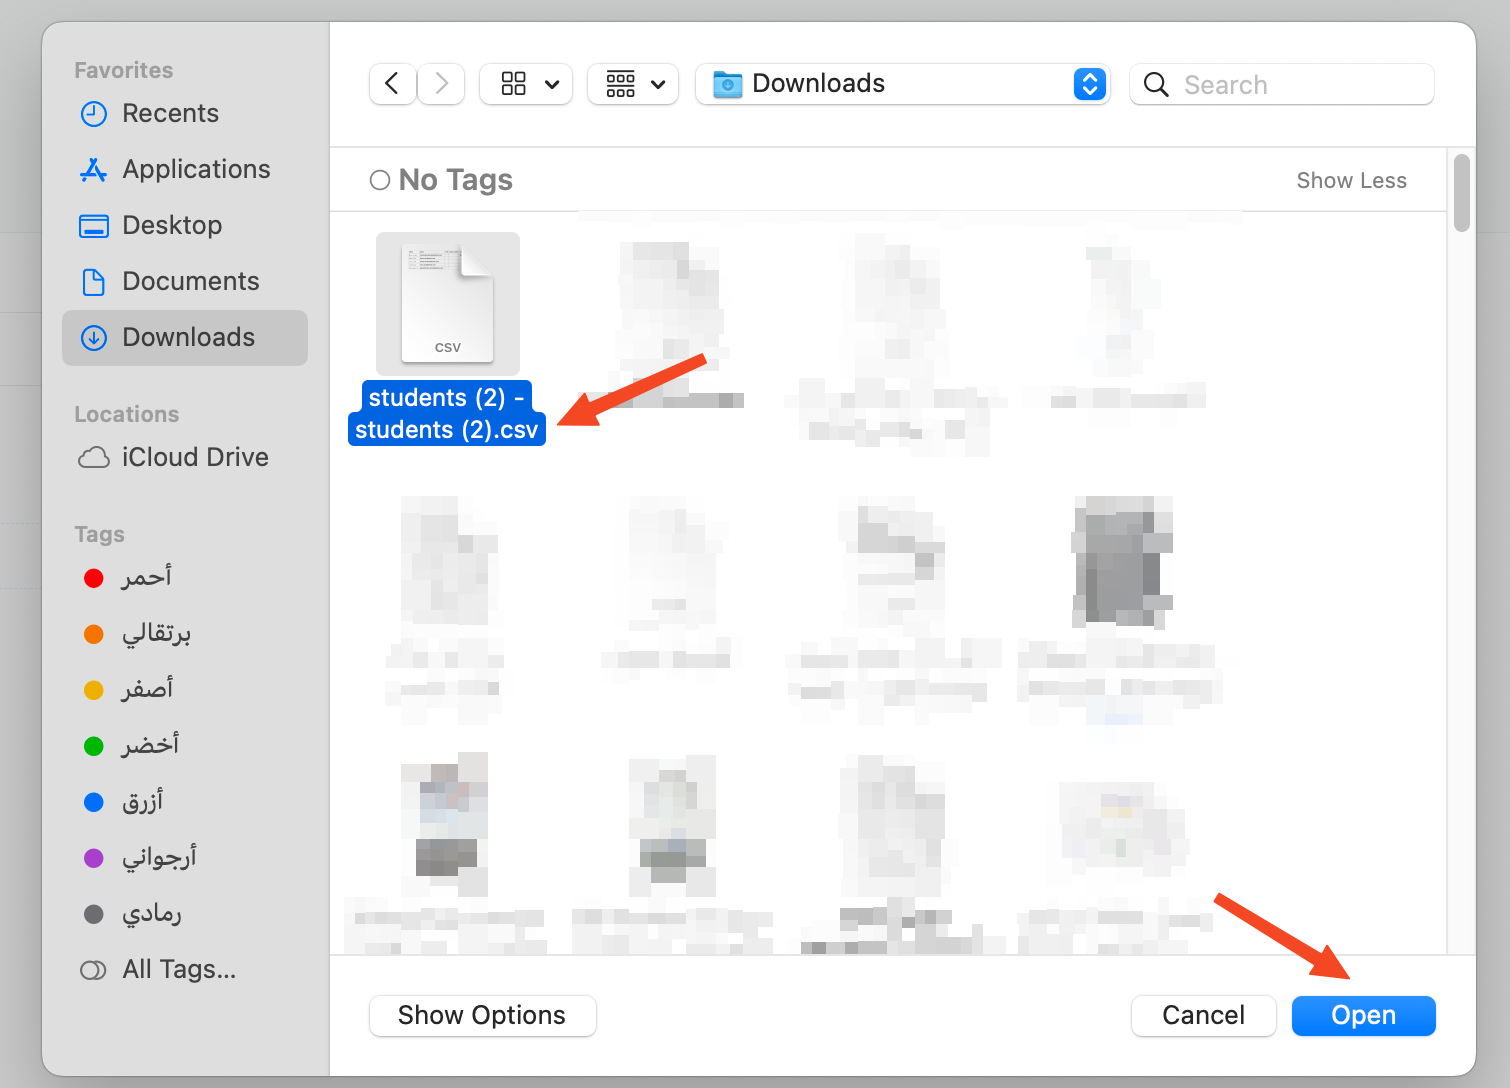
Choose the file and click Open.
-
After the data is checked and found valid, click Import Students.