Connect your platform with the Tamara payment gateway
Tamara is a buy now, pay later service. It lets your customers and students buy products from your platform and pay the price in three payments. This gives your customers an installment option and makes buying easier for them.
How to connect with Tamara
The connection has two parts:
- Create an account on Tamara.
- Turn on the Tamara integration on your Zamn platform.
1. Create an account on Tamara
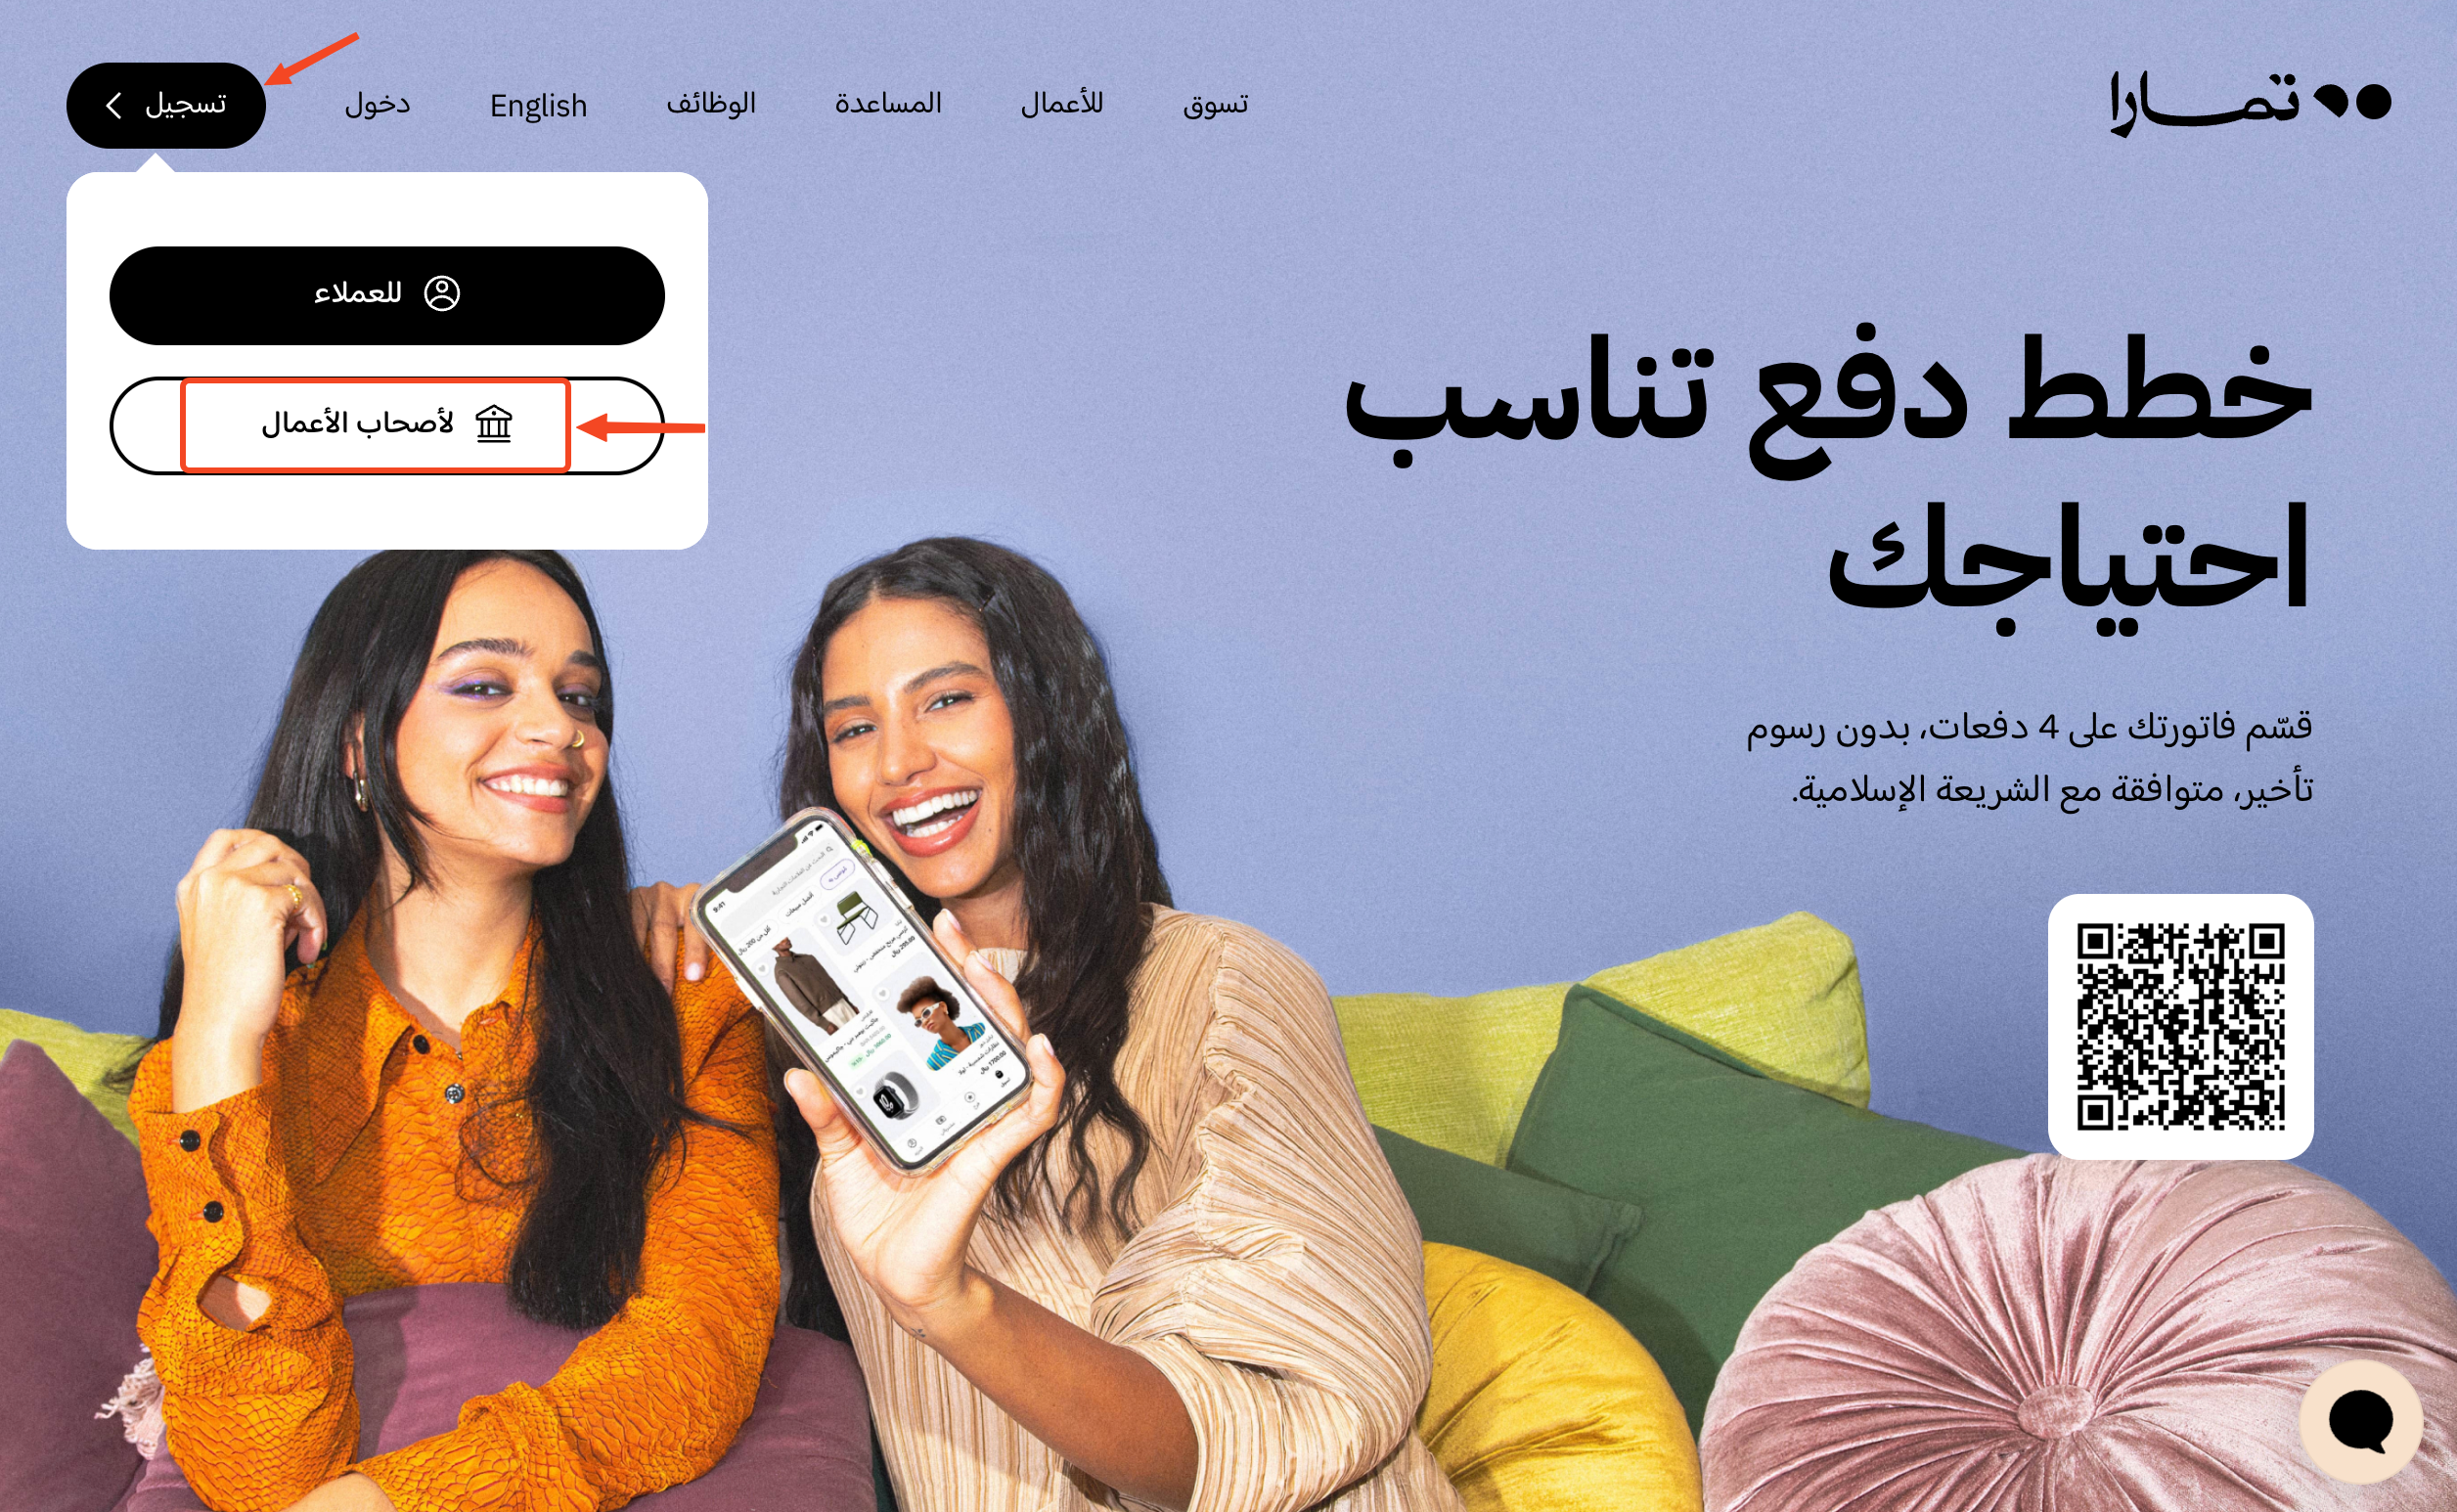
On the Tamara home page, click Sign up, then choose For businesses.
Make sure all the information you give is correct and up to date.
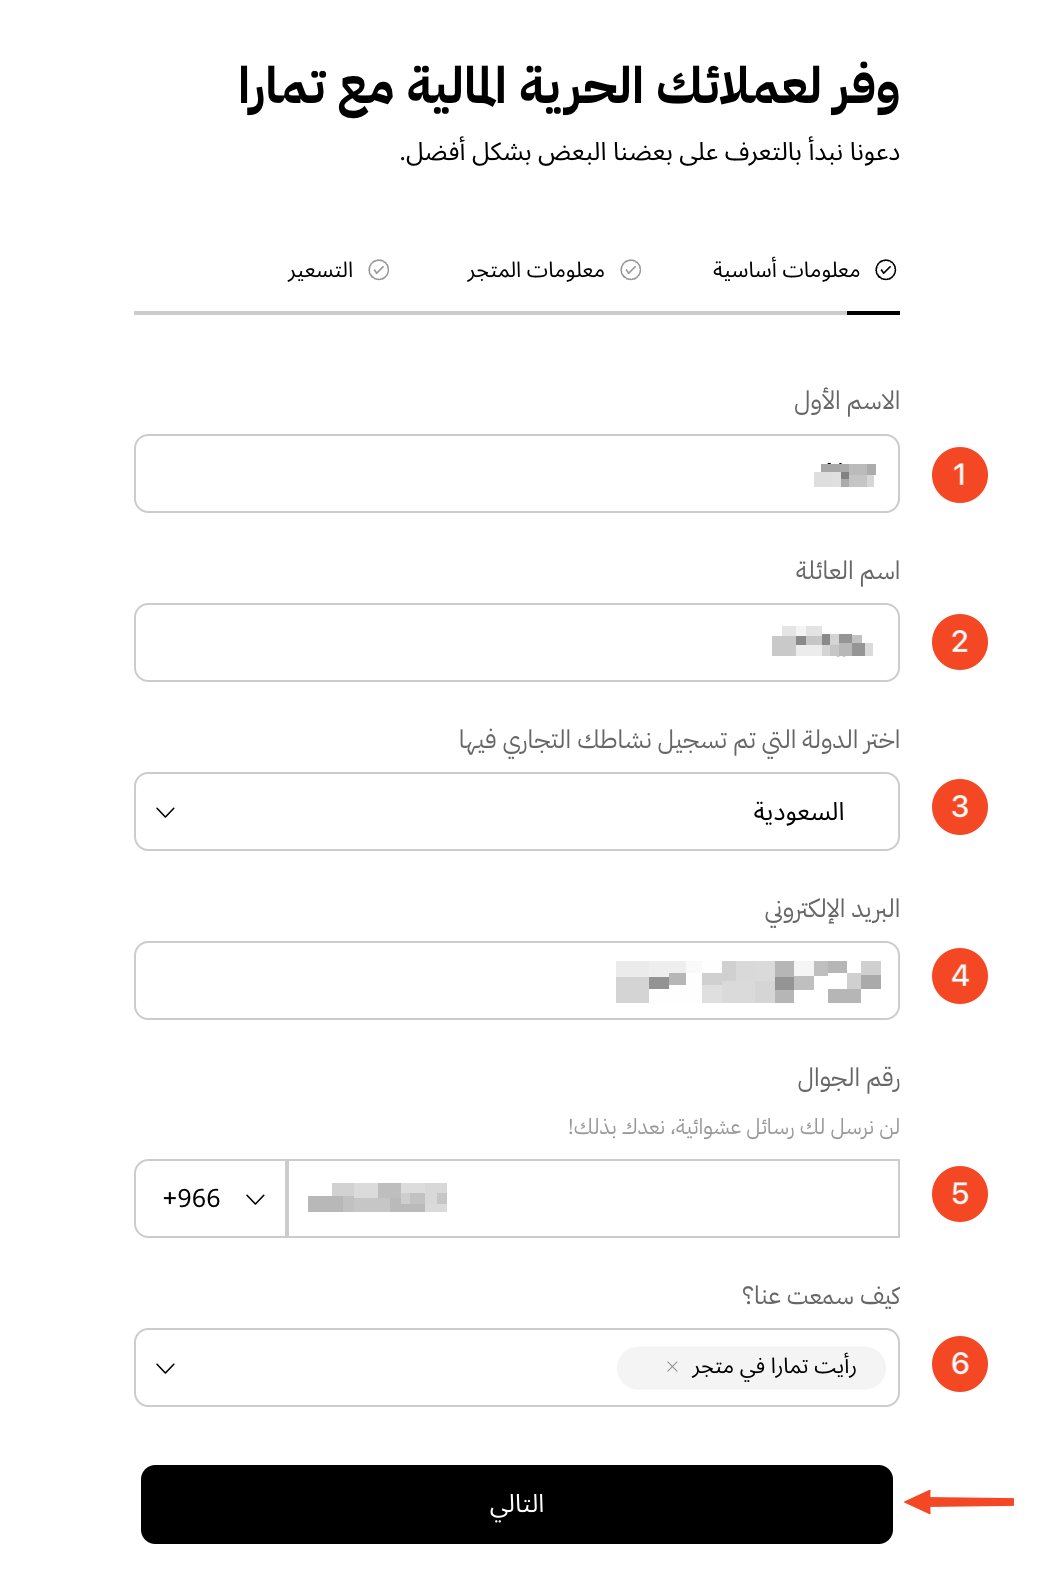
Then enter the required information:
-
First name.
-
Family name.
-
Choose the country where your business is registered.
-
Enter the email address Tamara will use to contact you.
-
Enter your mobile number.
-
Choose how you heard about Tamara.
After you enter all the information, click Next.
-
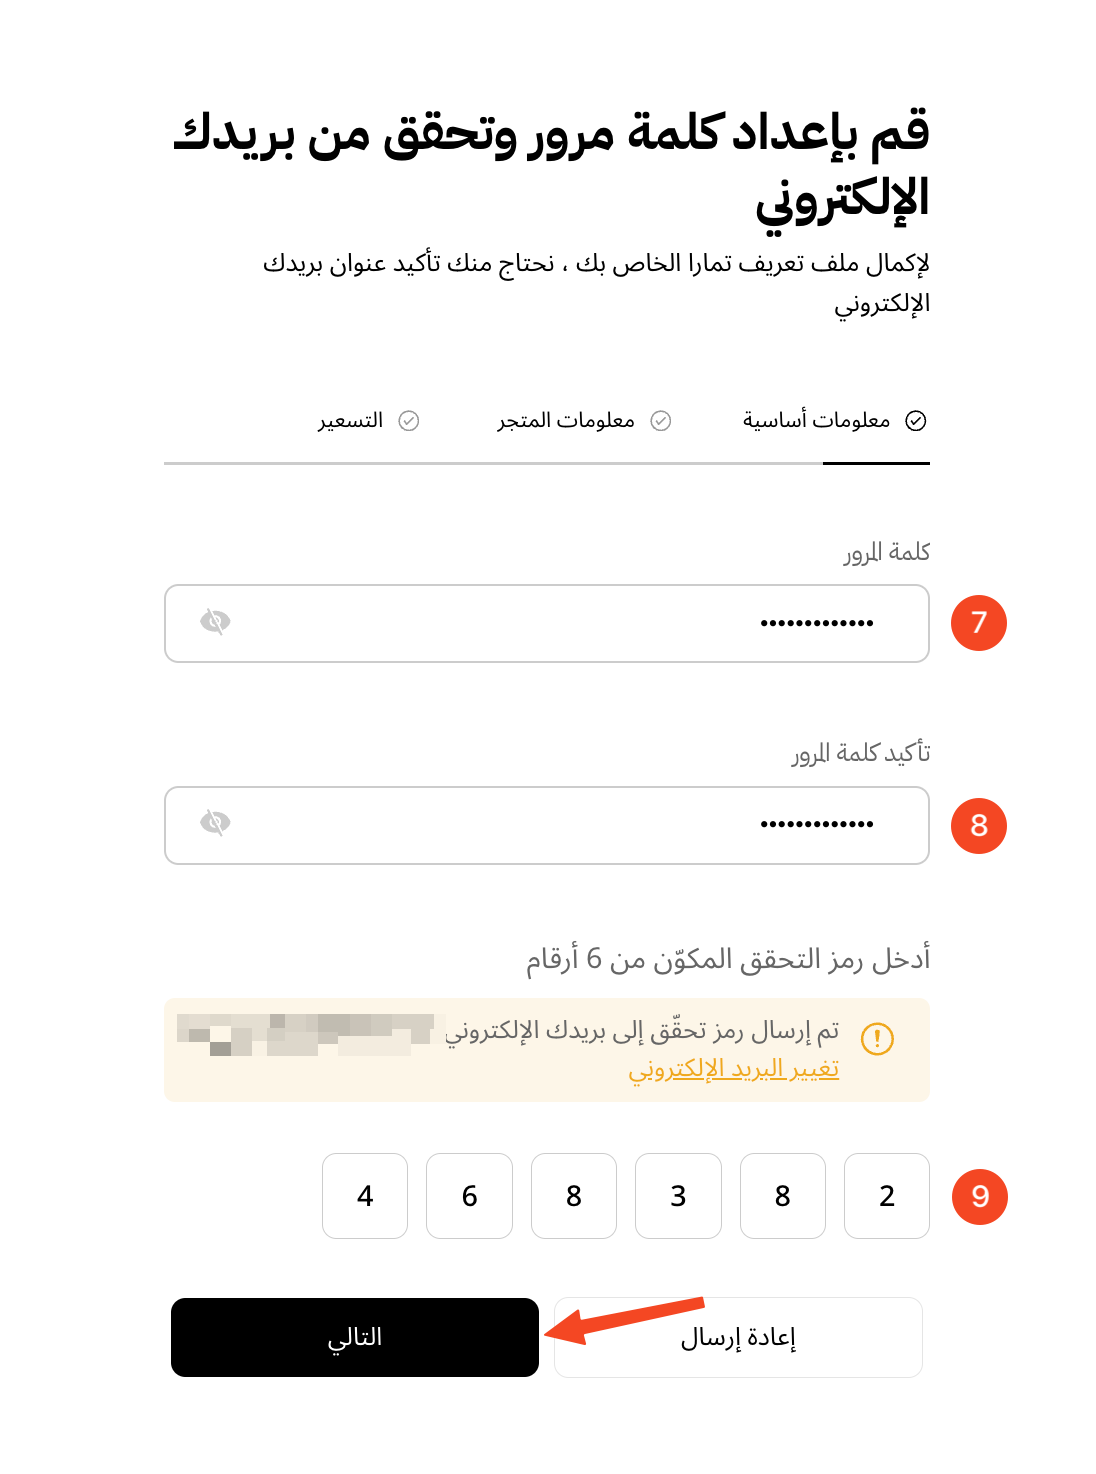
Choose a password for the account.
-
Type the password again to confirm it.
-
Enter the verification code sent to the email address you entered before.
Click Next to go to the section about your platform.
-
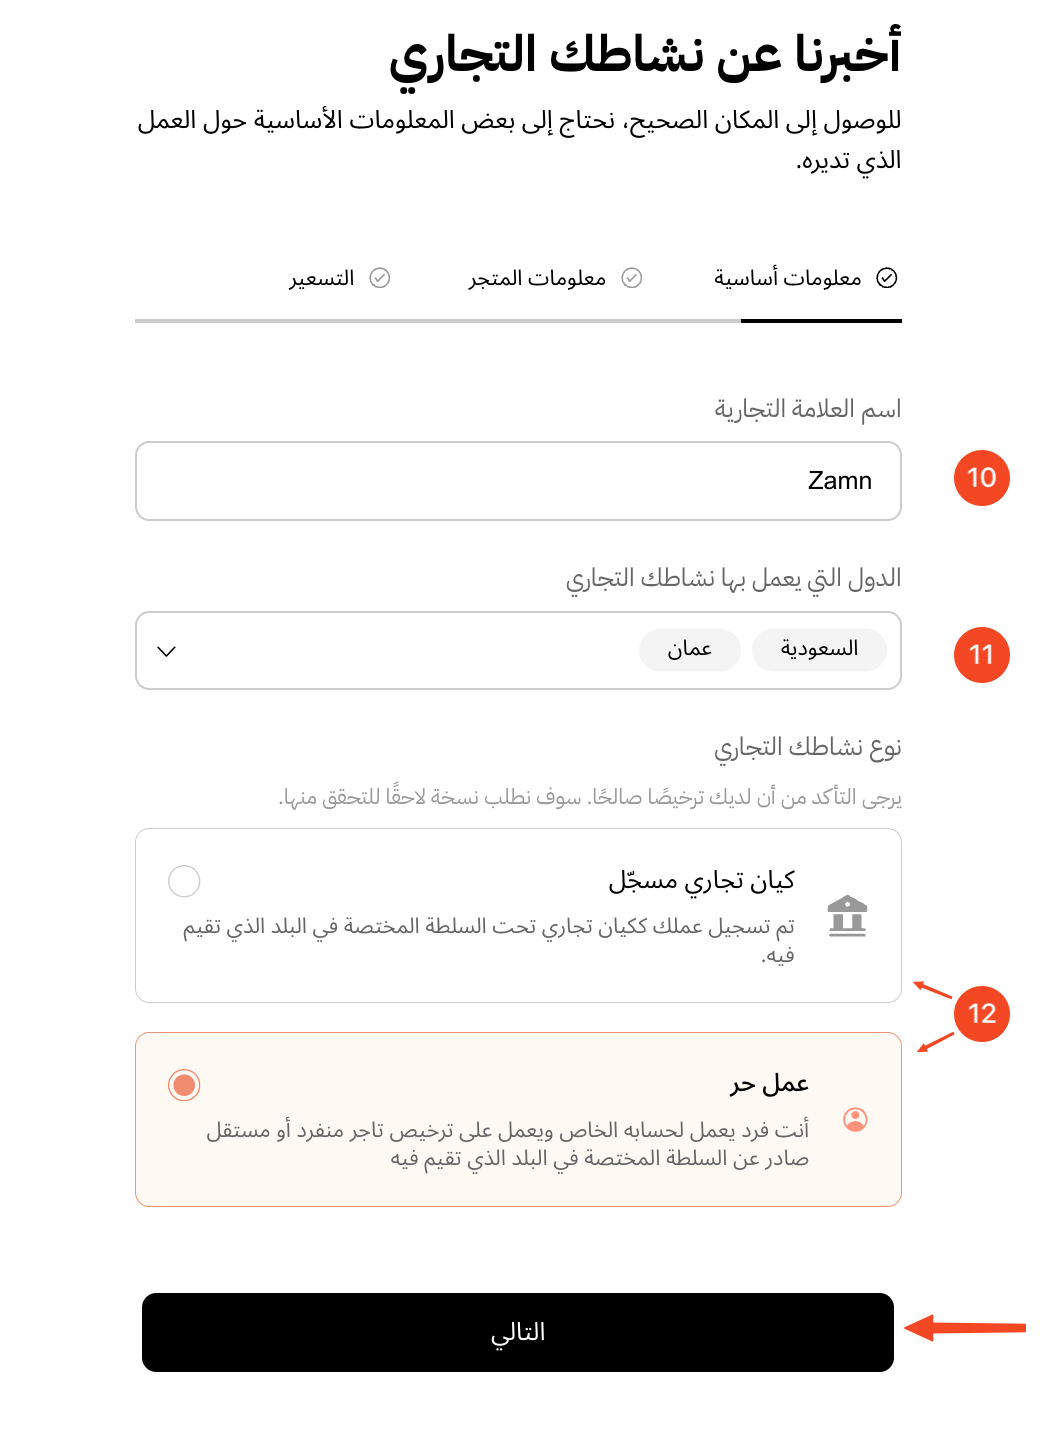
Enter the name of your platform.
-
Choose the countries you target with your platform.
-
Choose your business type.
Click Next to continue.
-
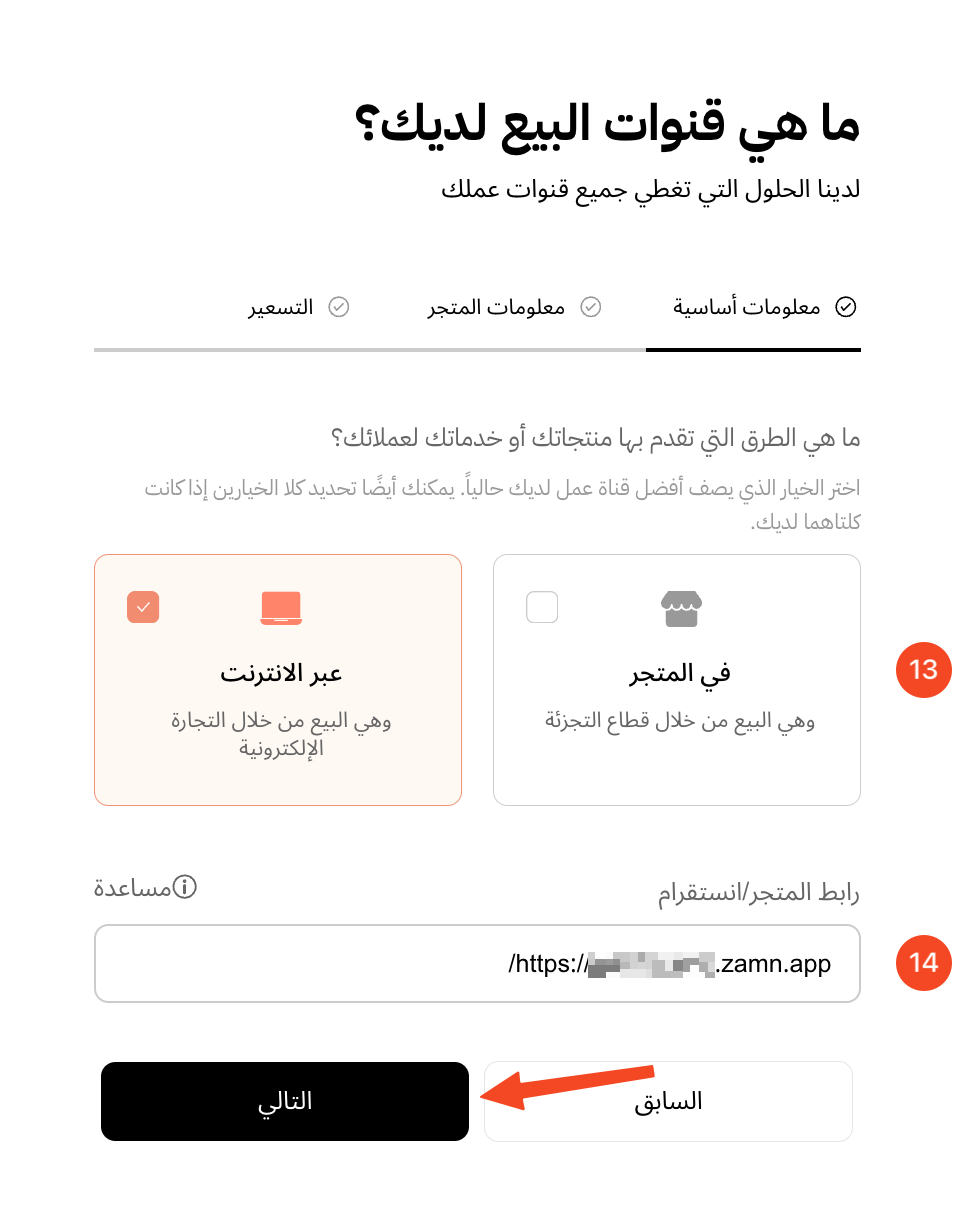
Choose Online as the way you offer your products and services to customers.
-
Enter the link of your platform.
Click Next.
-
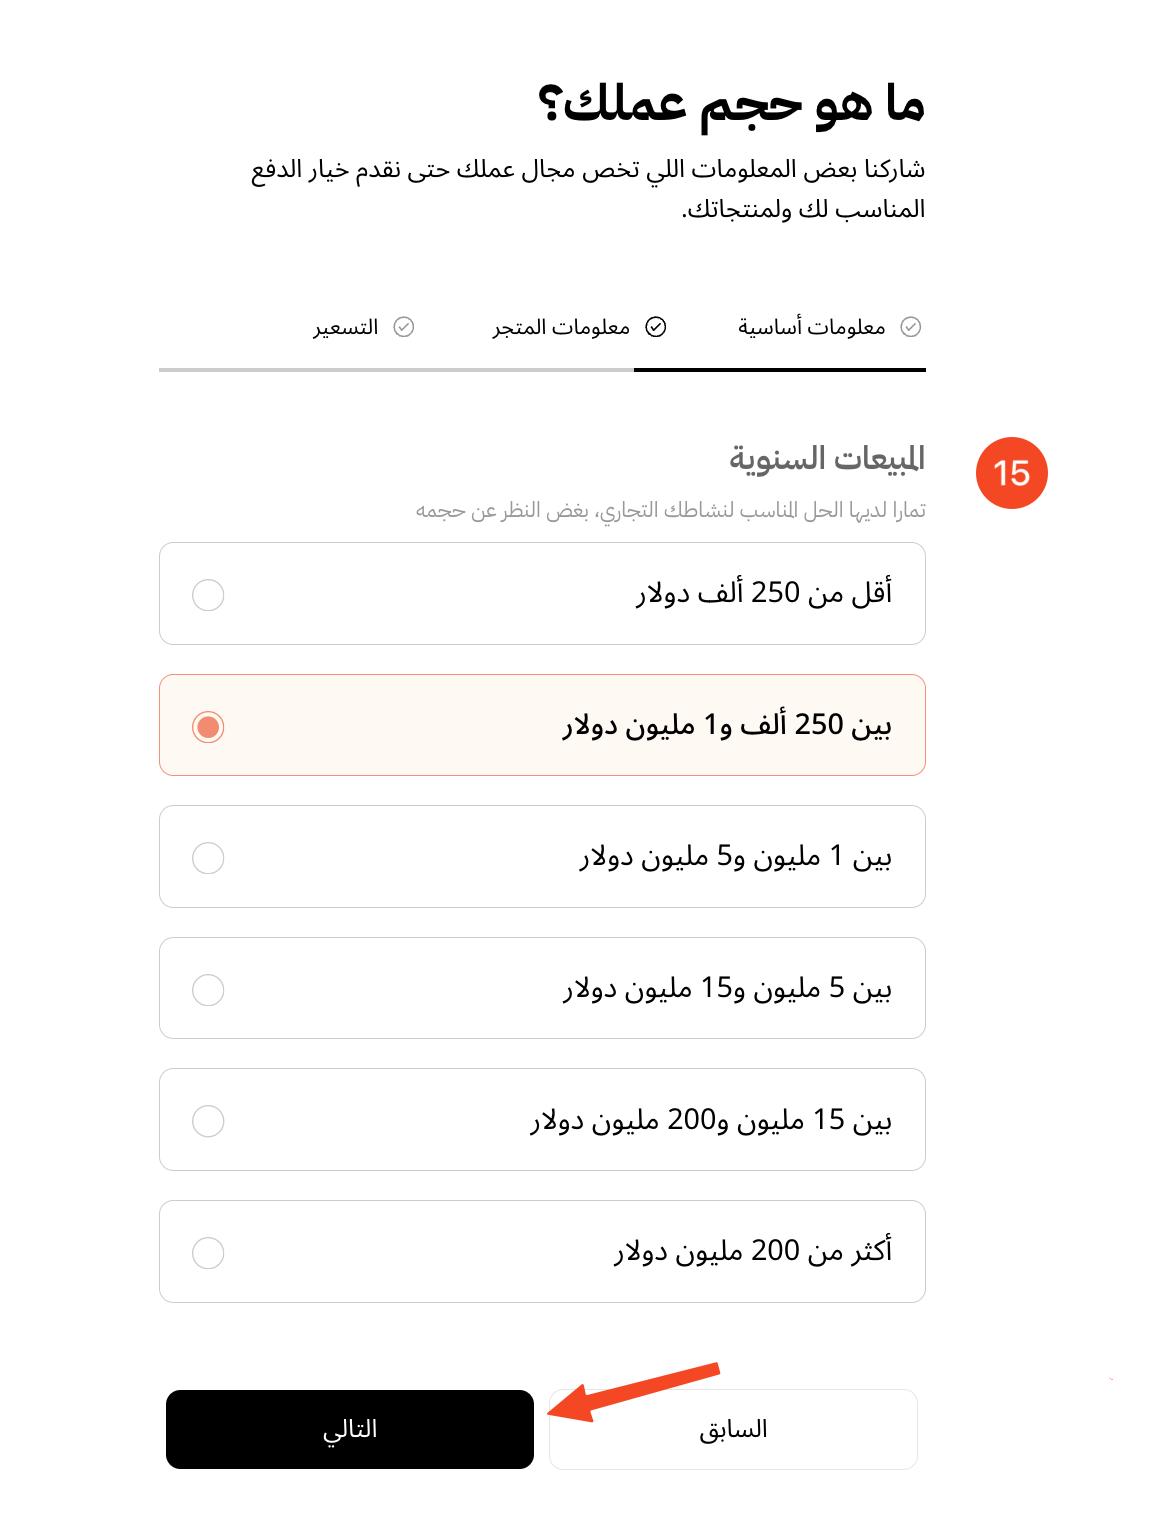
Choose your rough yearly sales, then click Next.
-
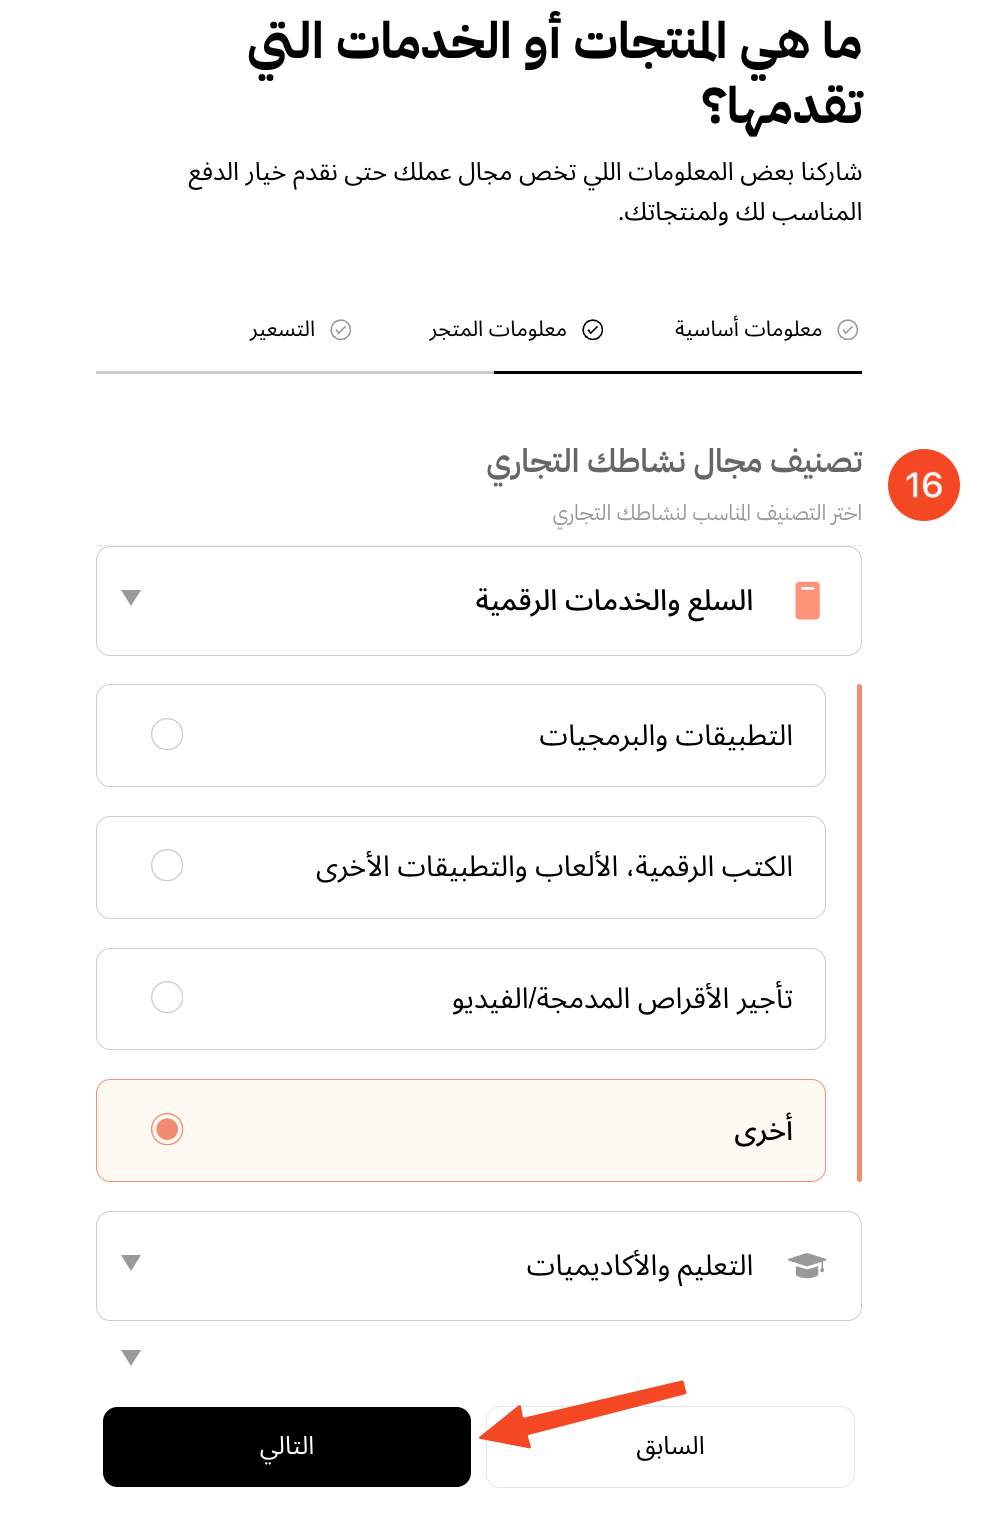
Choose your business field, picking what fits your type of products, then click Next.
-
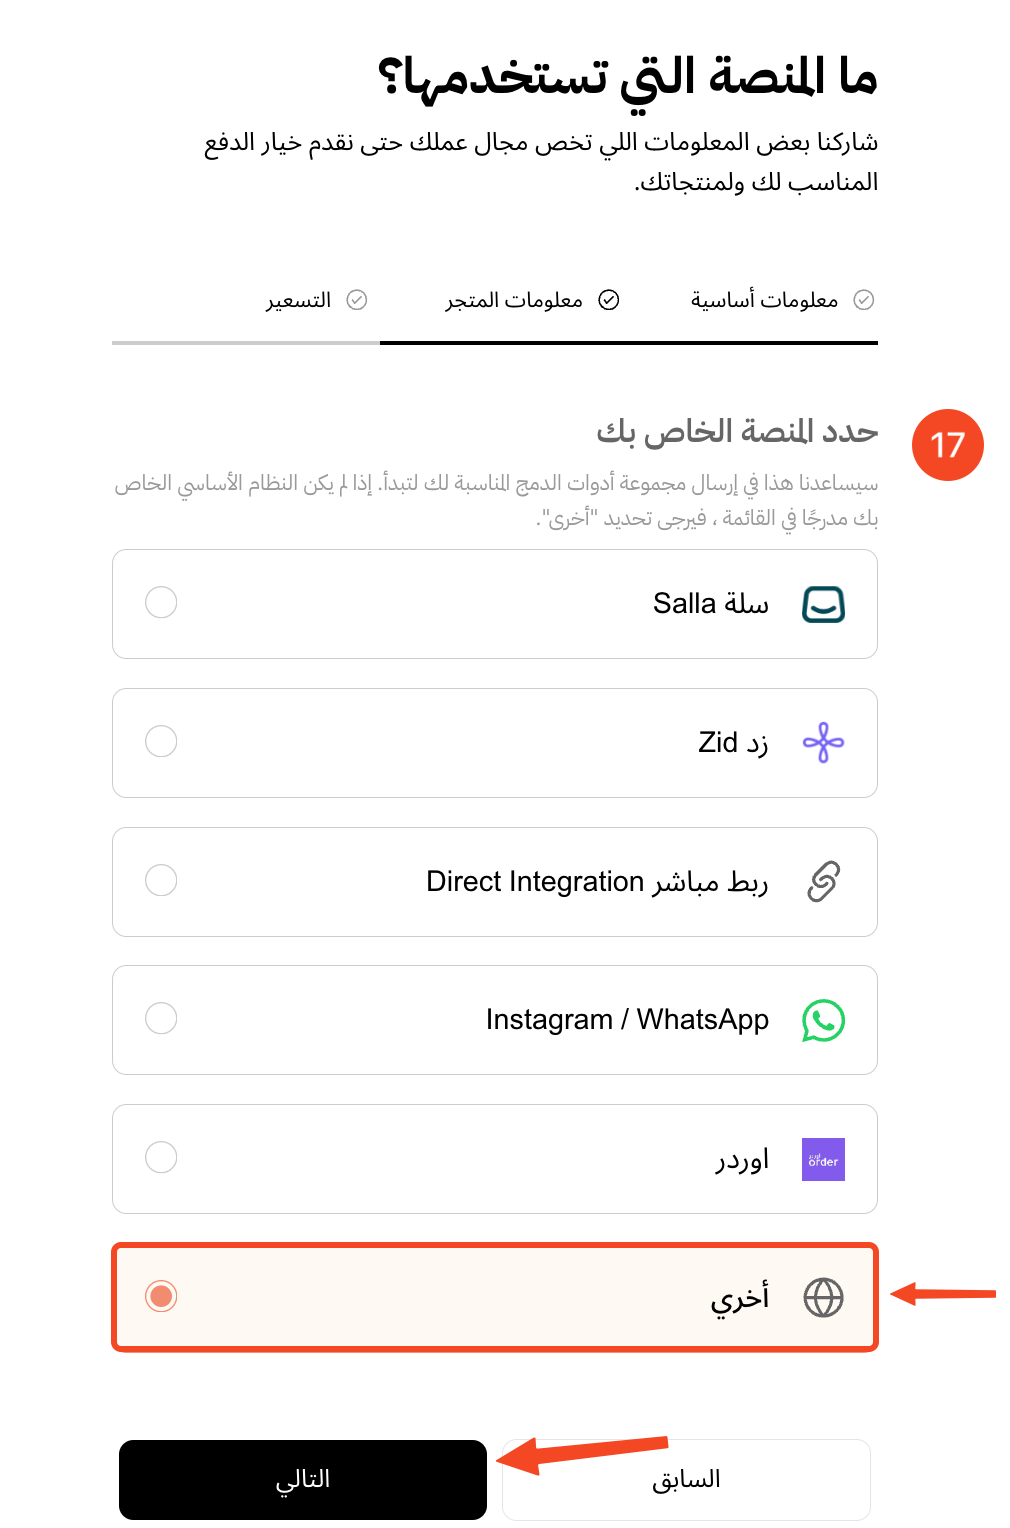
Choose Other for the platform you use, then click Next.
-
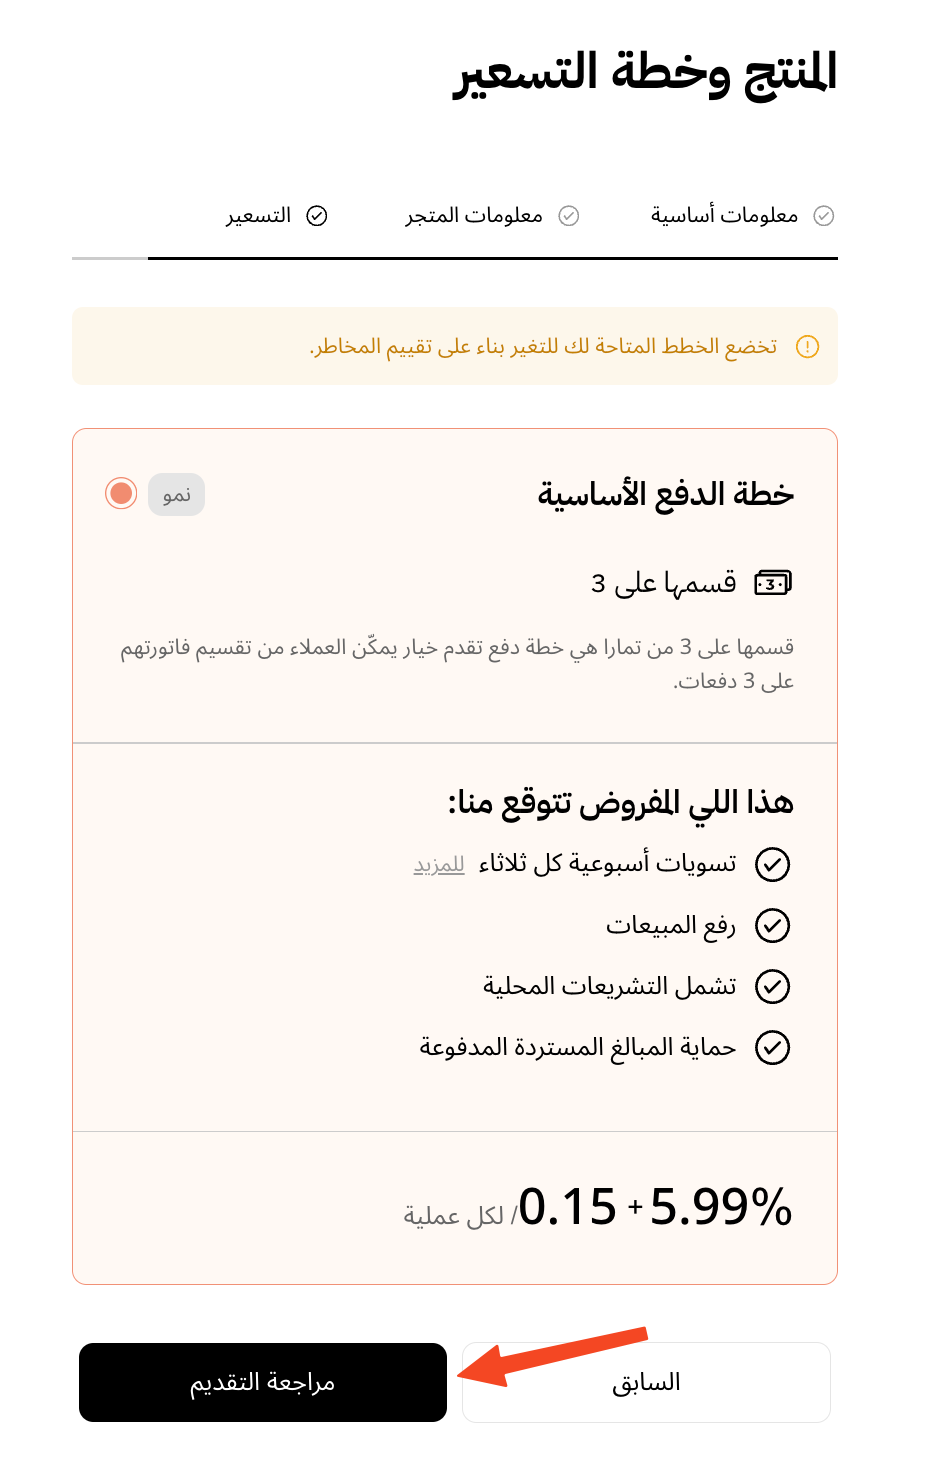
Tamara shows its payment plan with the pricing. Click Review application.
-
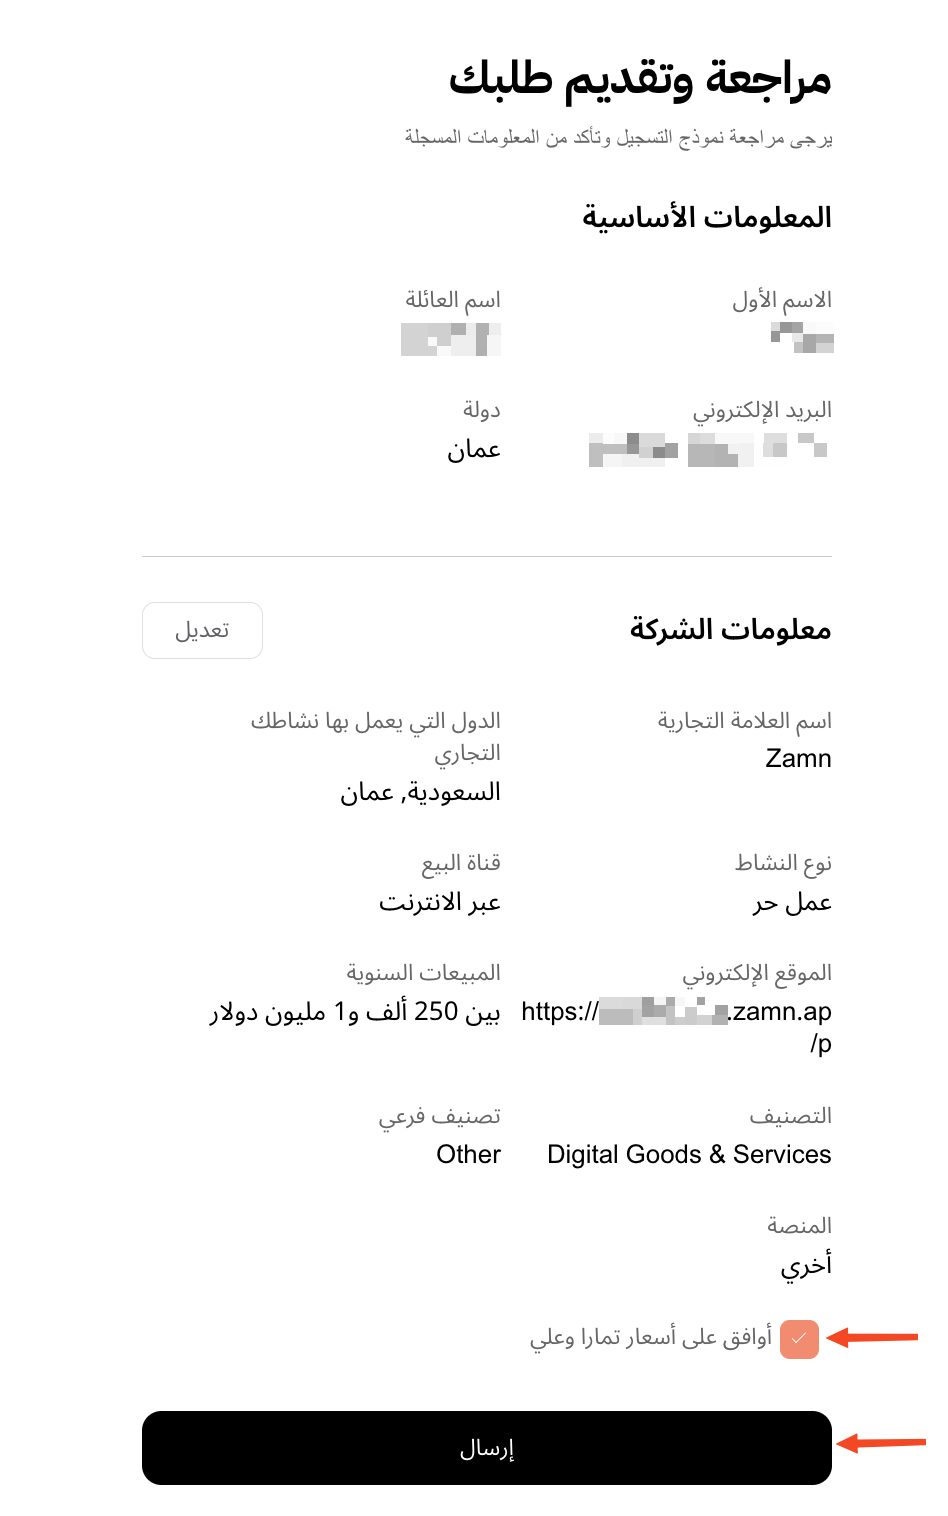
Check all the information you entered, then tick I agree to Tamara's pricing and click Submit.
2. Turn on the Tamara integration on your Zamn platform
After you submit the application, the Tamara team will contact you by email to complete it, and send you the details and the test integration keys.
Add the test integration keys
After you get the test integration keys, follow these steps in your platform dashboard:
-
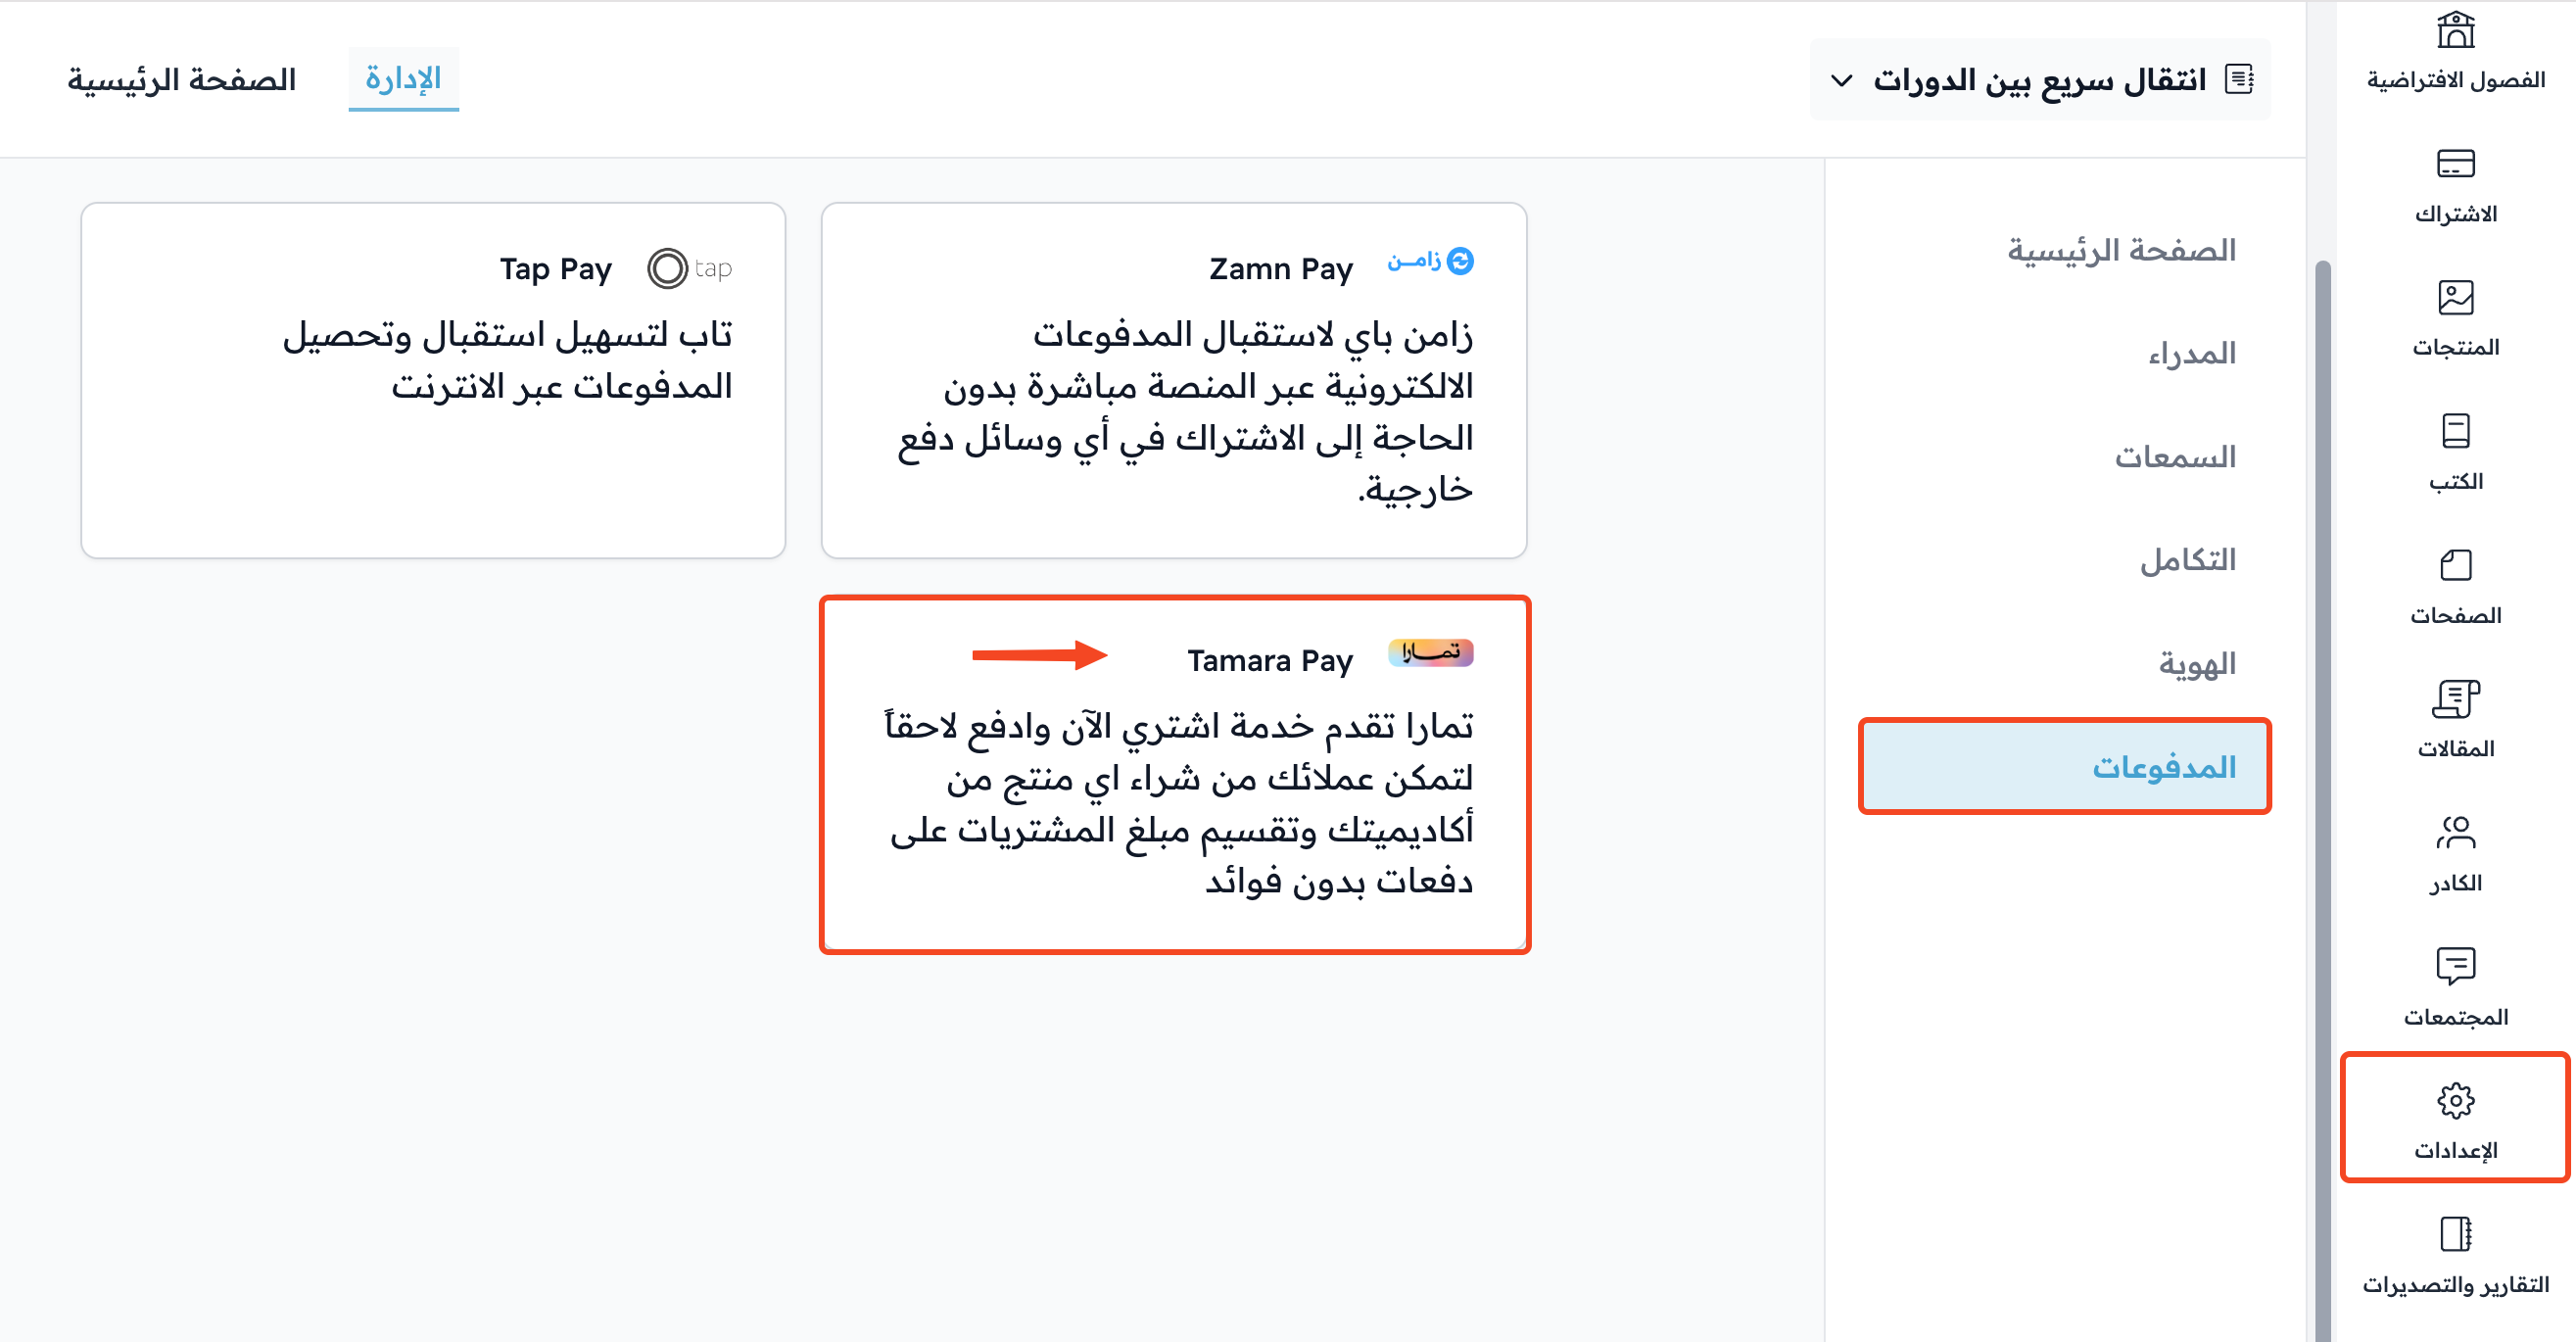
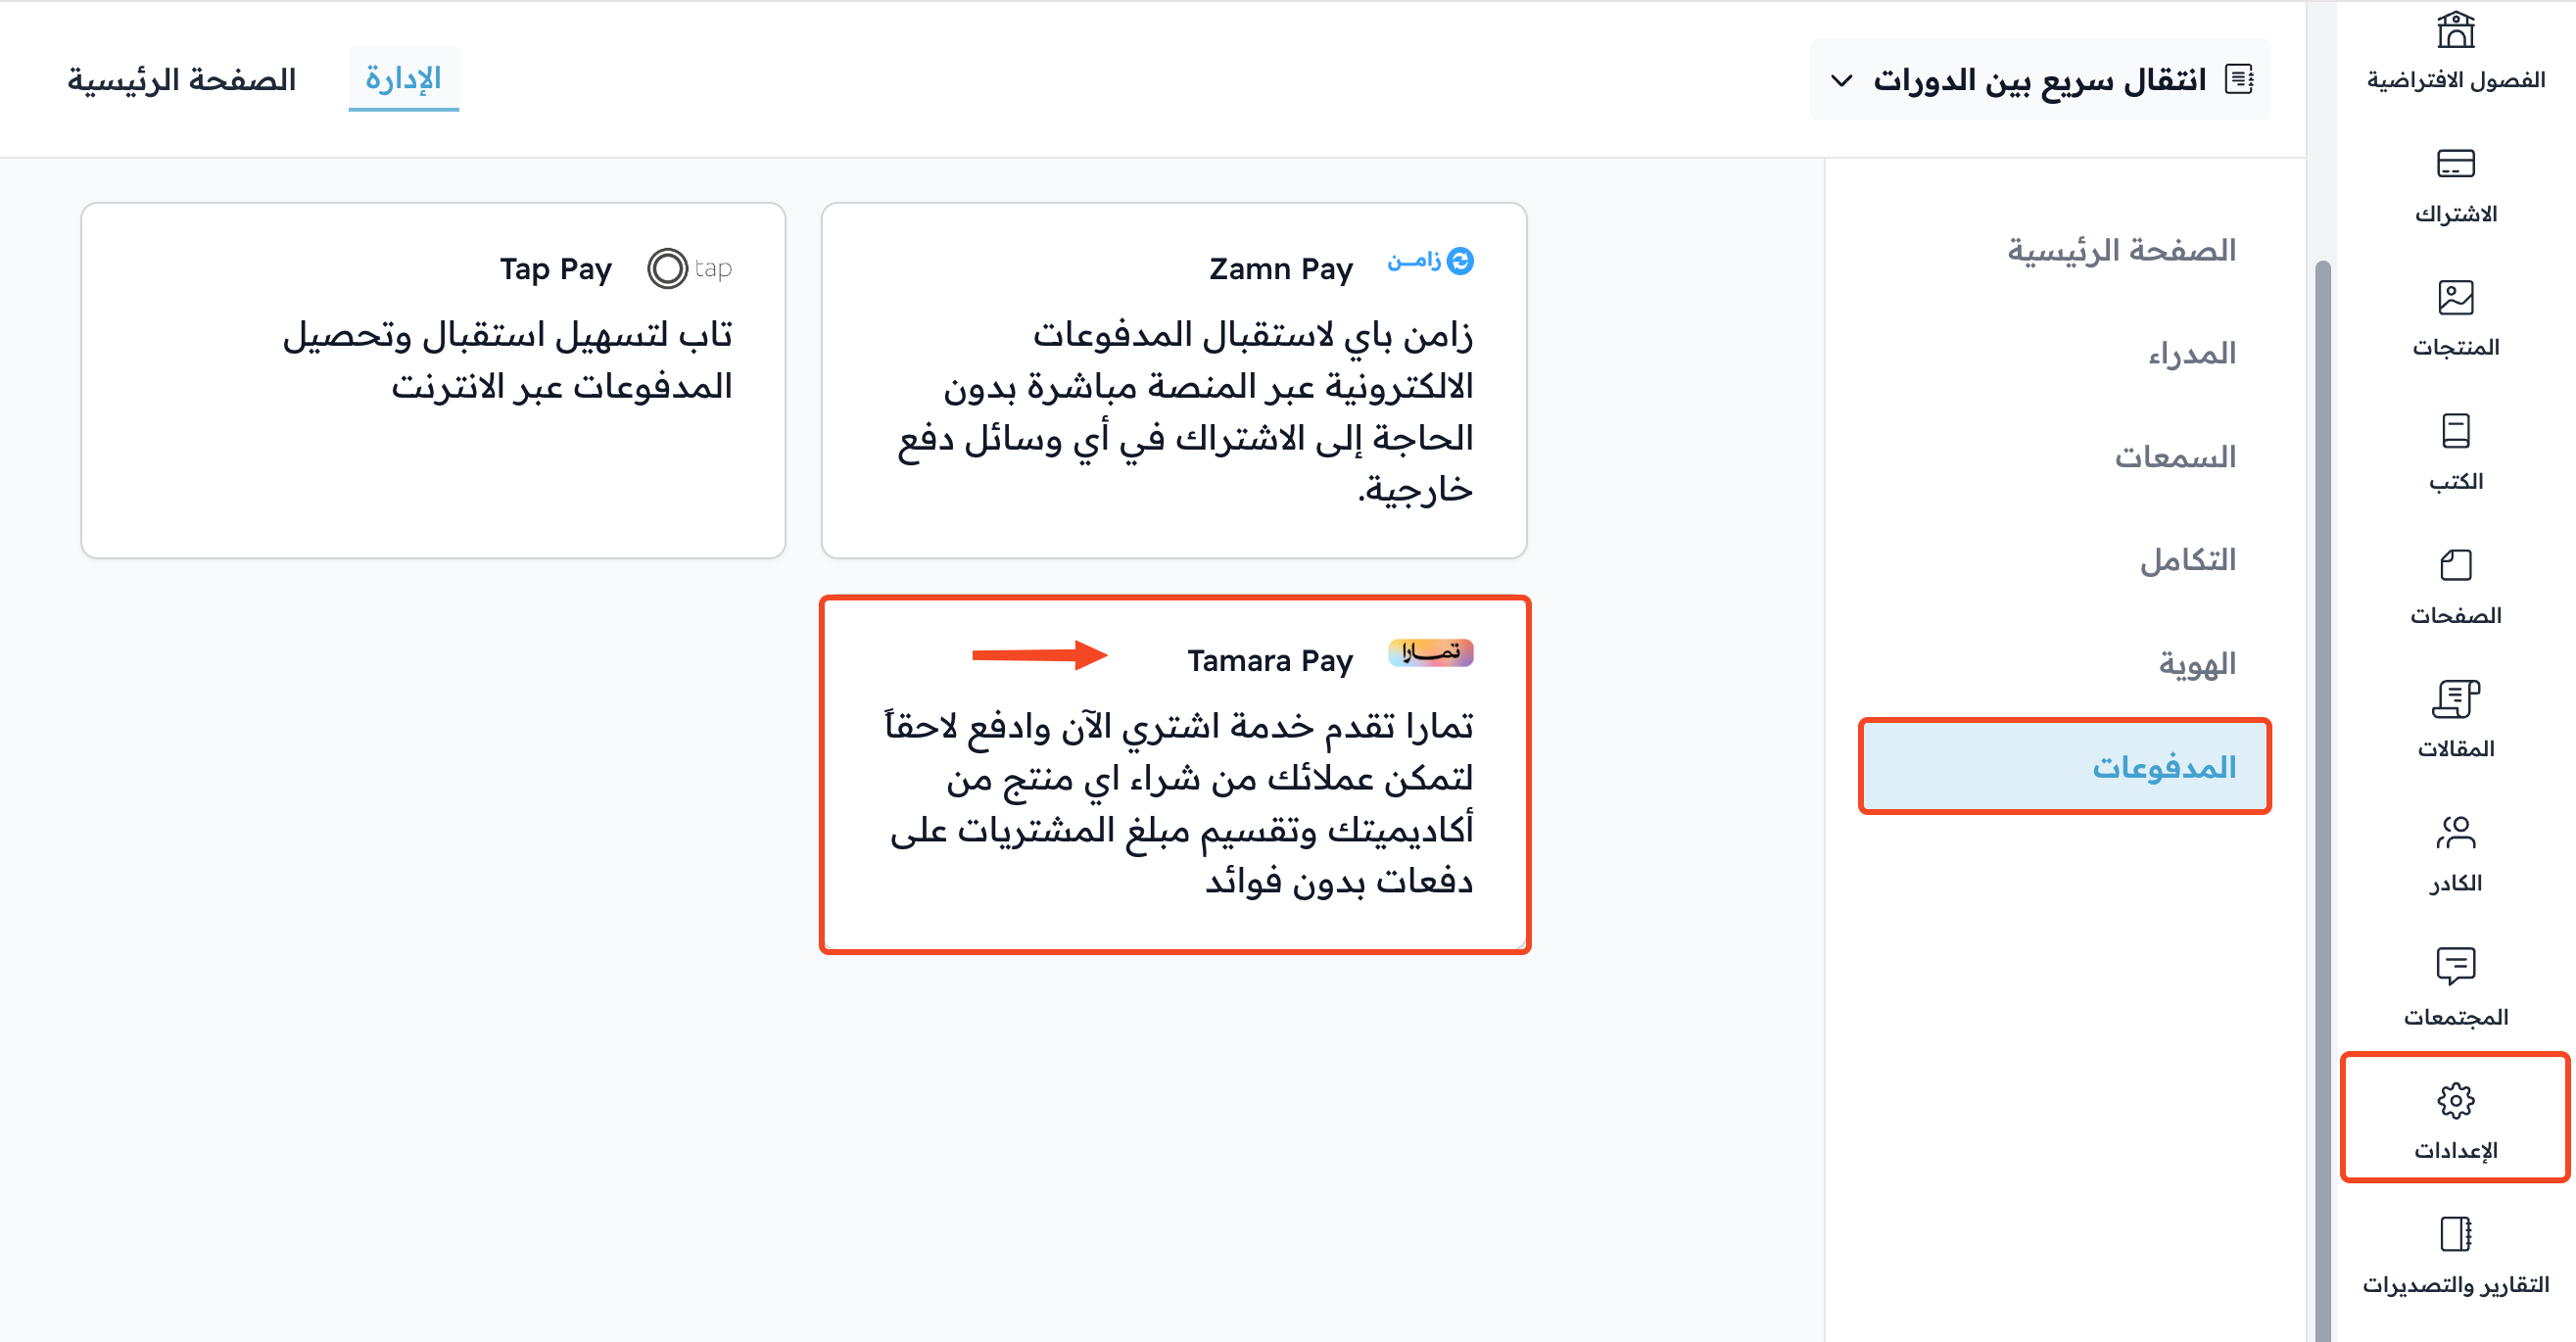
From the dashboard, choose Settings.
-
Go to the Payment Methods page.
-
Choose Tamara Pay.
-
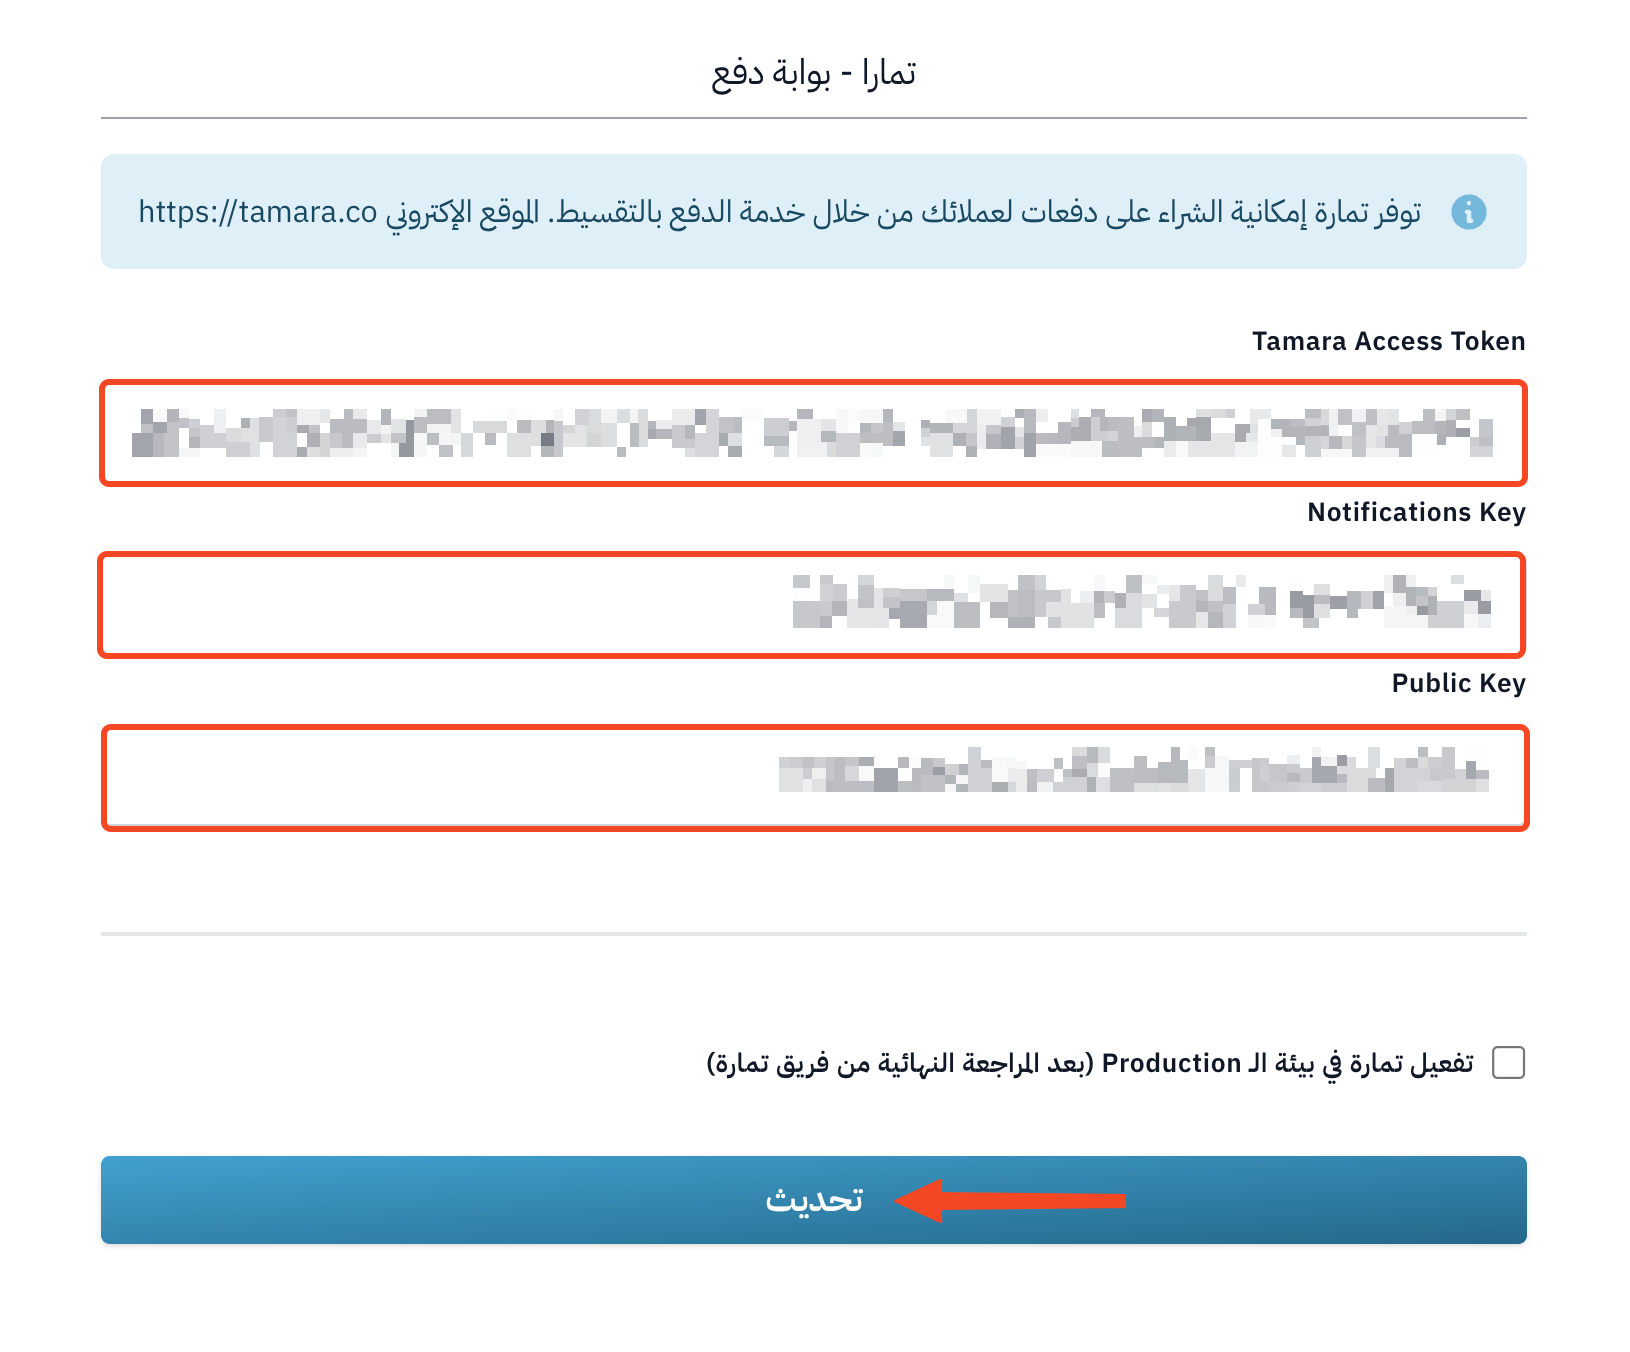
Enter the test integration keys sent to you by the Tamara team.
-
Click Create to save. If you saved Tamara settings before, the button shows Update.
Add a webhook on the Tamara partner portal
When you save the integration keys, Zamn adds the webhook to your Tamara account for you. Check that it shows on the webhook page of the Tamara partner portal, and follow the steps below only if you do not find it.
After you add the test integration keys:
-
Sign in to your account dashboard on the Tamara partner portal with the email address you registered with them (the same email address the Tamara team sent you). Reset your password with the link sent to you.
-
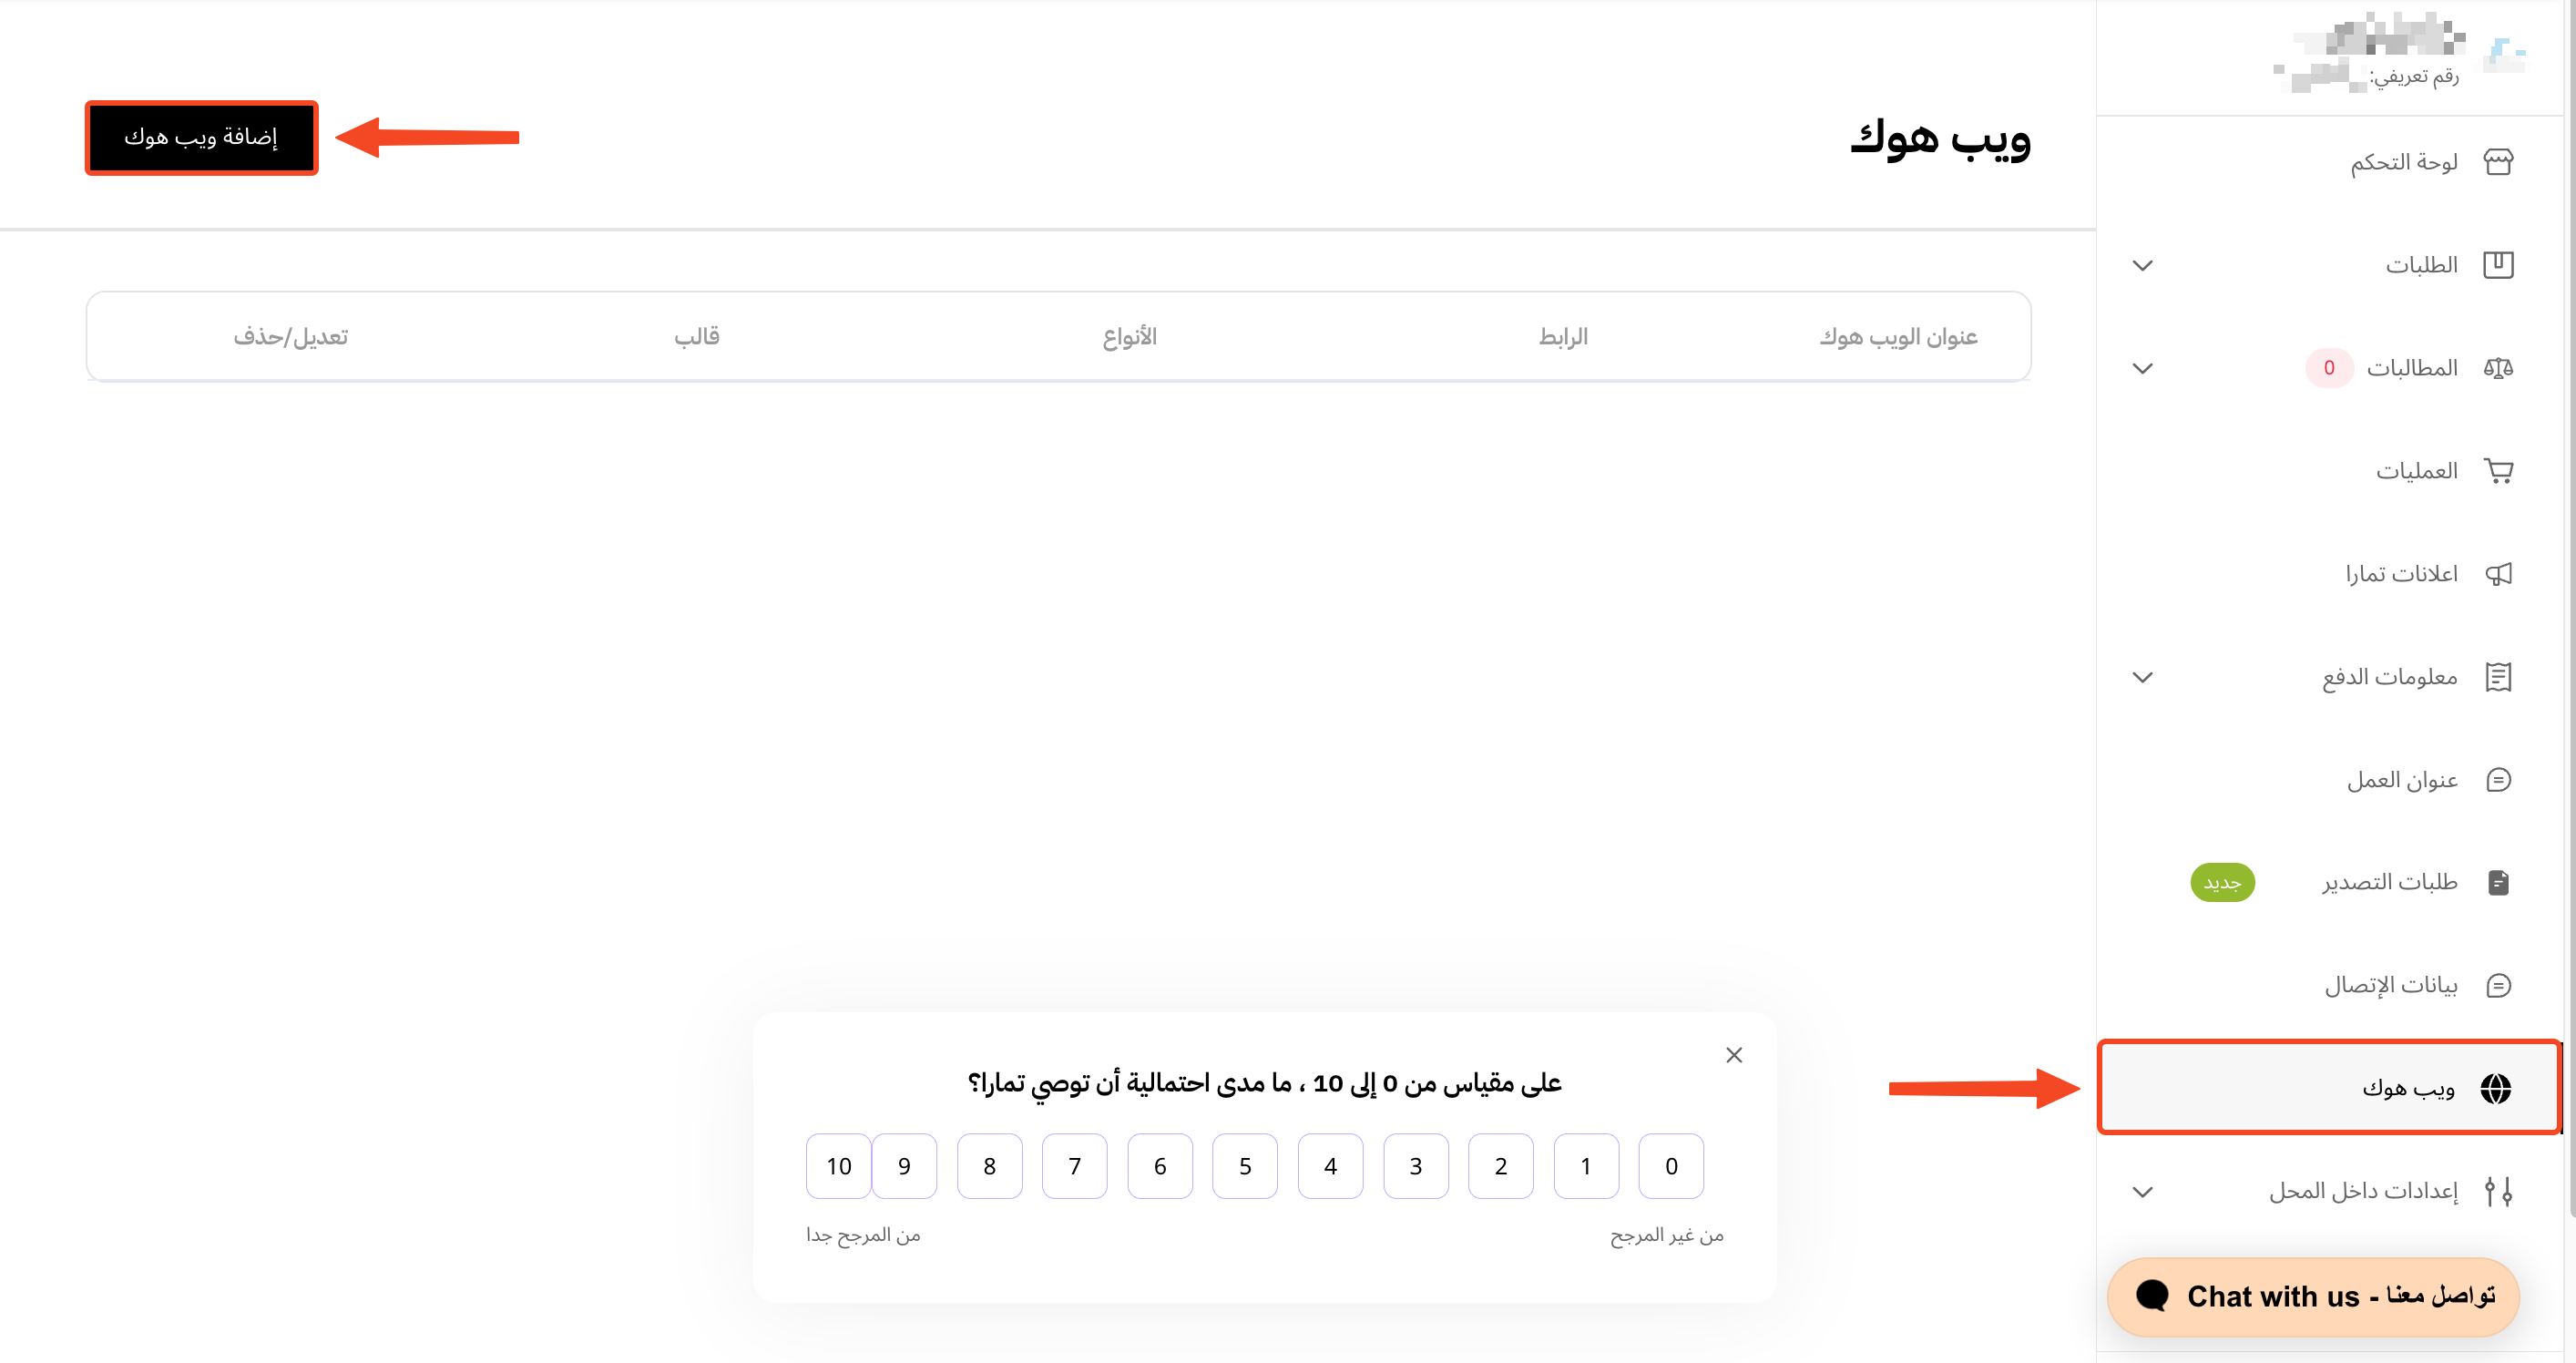
Click Add webhook.
-
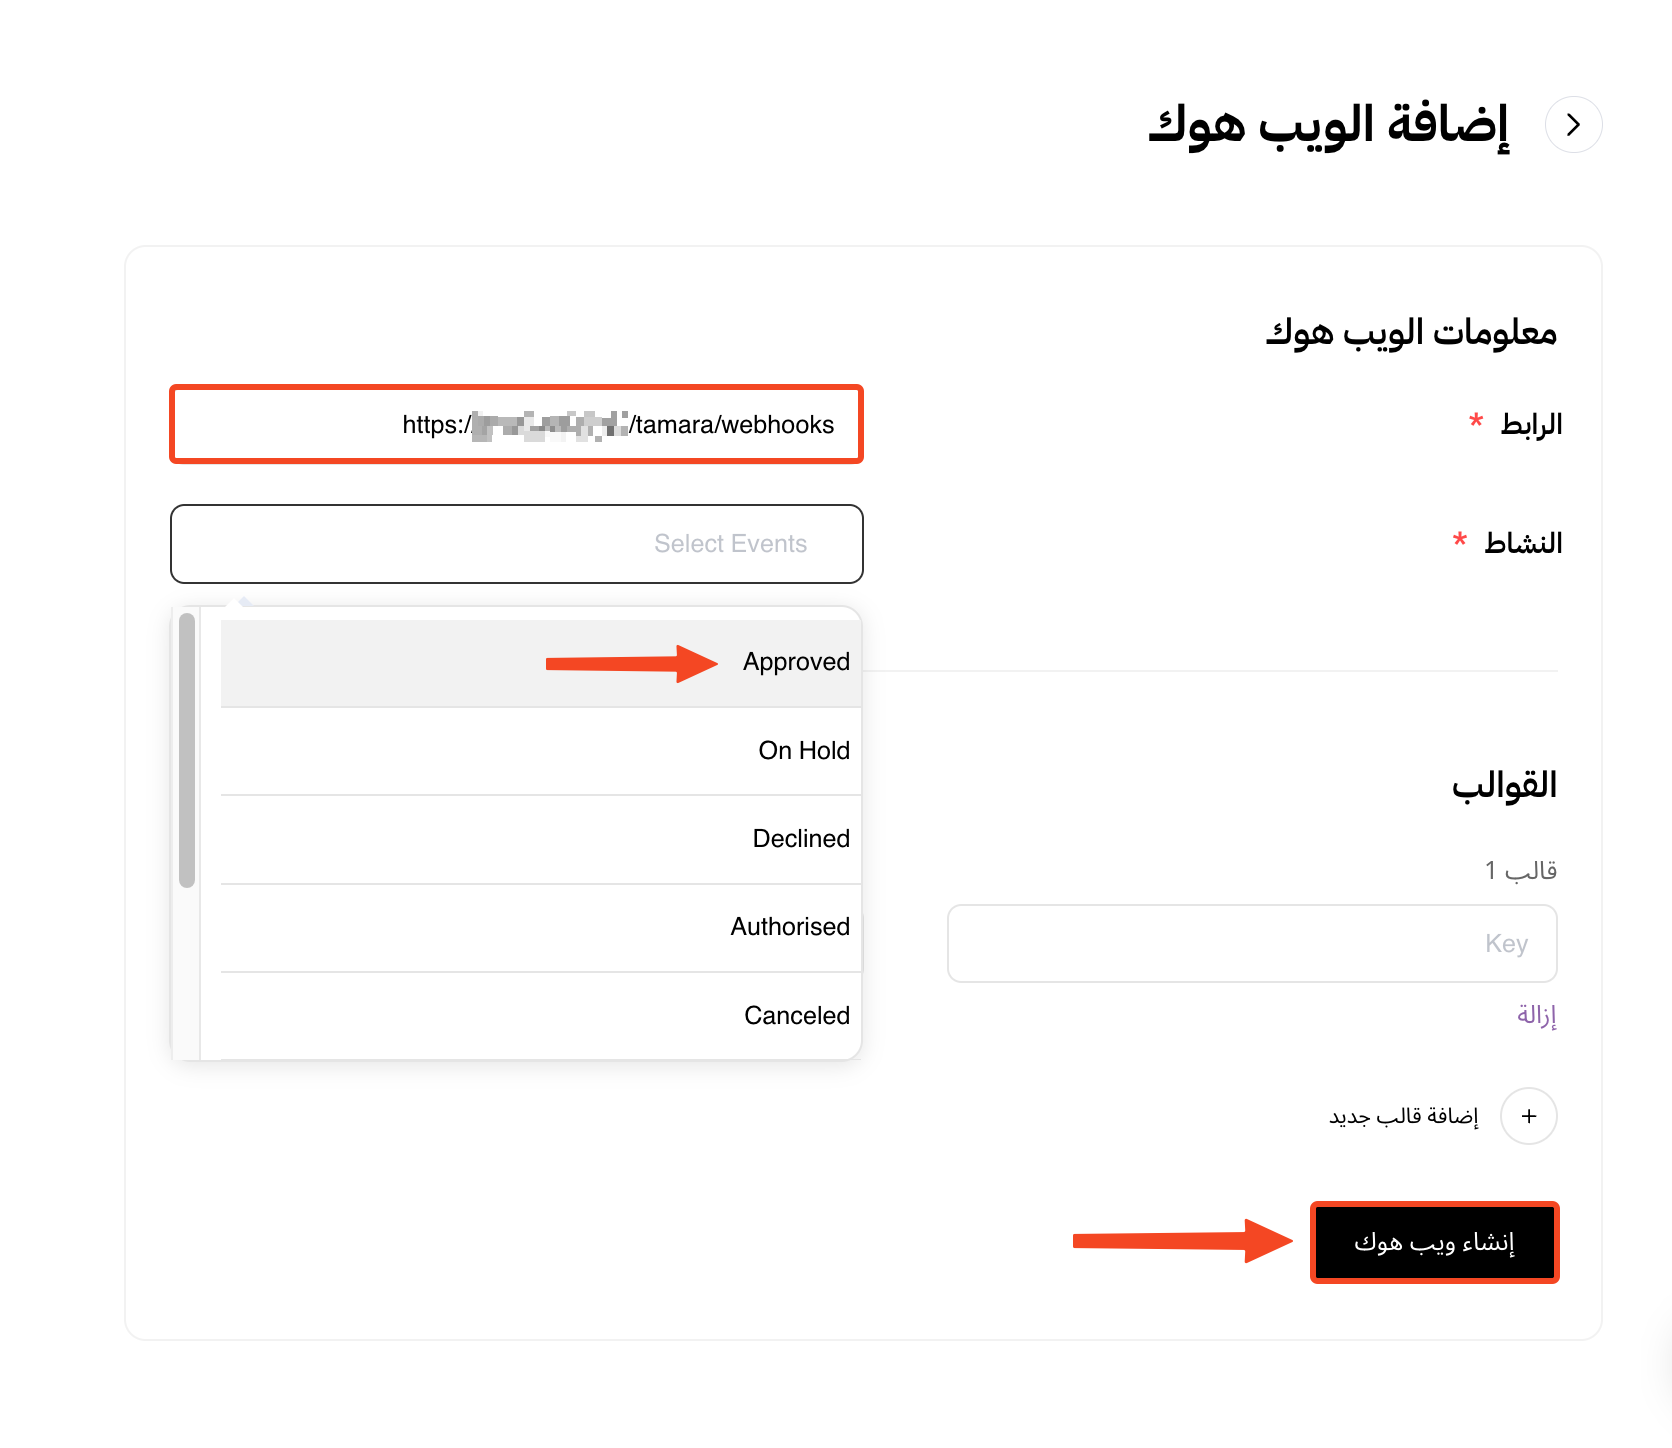
In the URL field, enter your link in this format: [your platform link]/tamara/webhooks
-
In the Events field, choose Approved.
-
Click Create webhook.
Make a test purchase
After you set up the test keys (Test Keys) and the webhook on the Tamara partner portal, you need to make a test purchase with the Tamara test cards.
- Sign in to your account on the partner portal to check the order statuses.
- Review the orders yourself, and approve or decline them to act as Tamara's decisions.
This step is needed to get the live integration keys (Production Keys) from the Tamara team, after you contact them and they finish the final review of your setup.
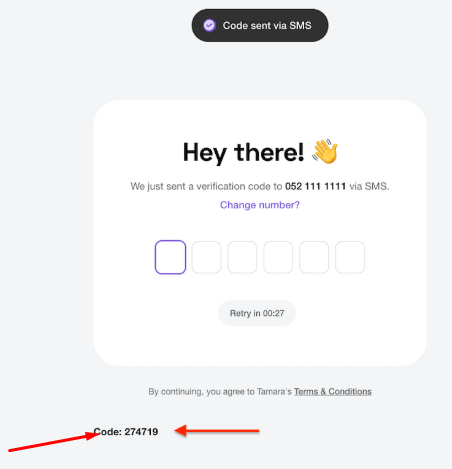
When you make a test purchase, after you enter the test phone number, the verification code (OTP) shows right below the payment form.
After you add the test integration keys and the webhook on Tamara, contact the Tamara team to do the final review and send you the live integration keys.
Turn on Tamara in the live environment (Production)
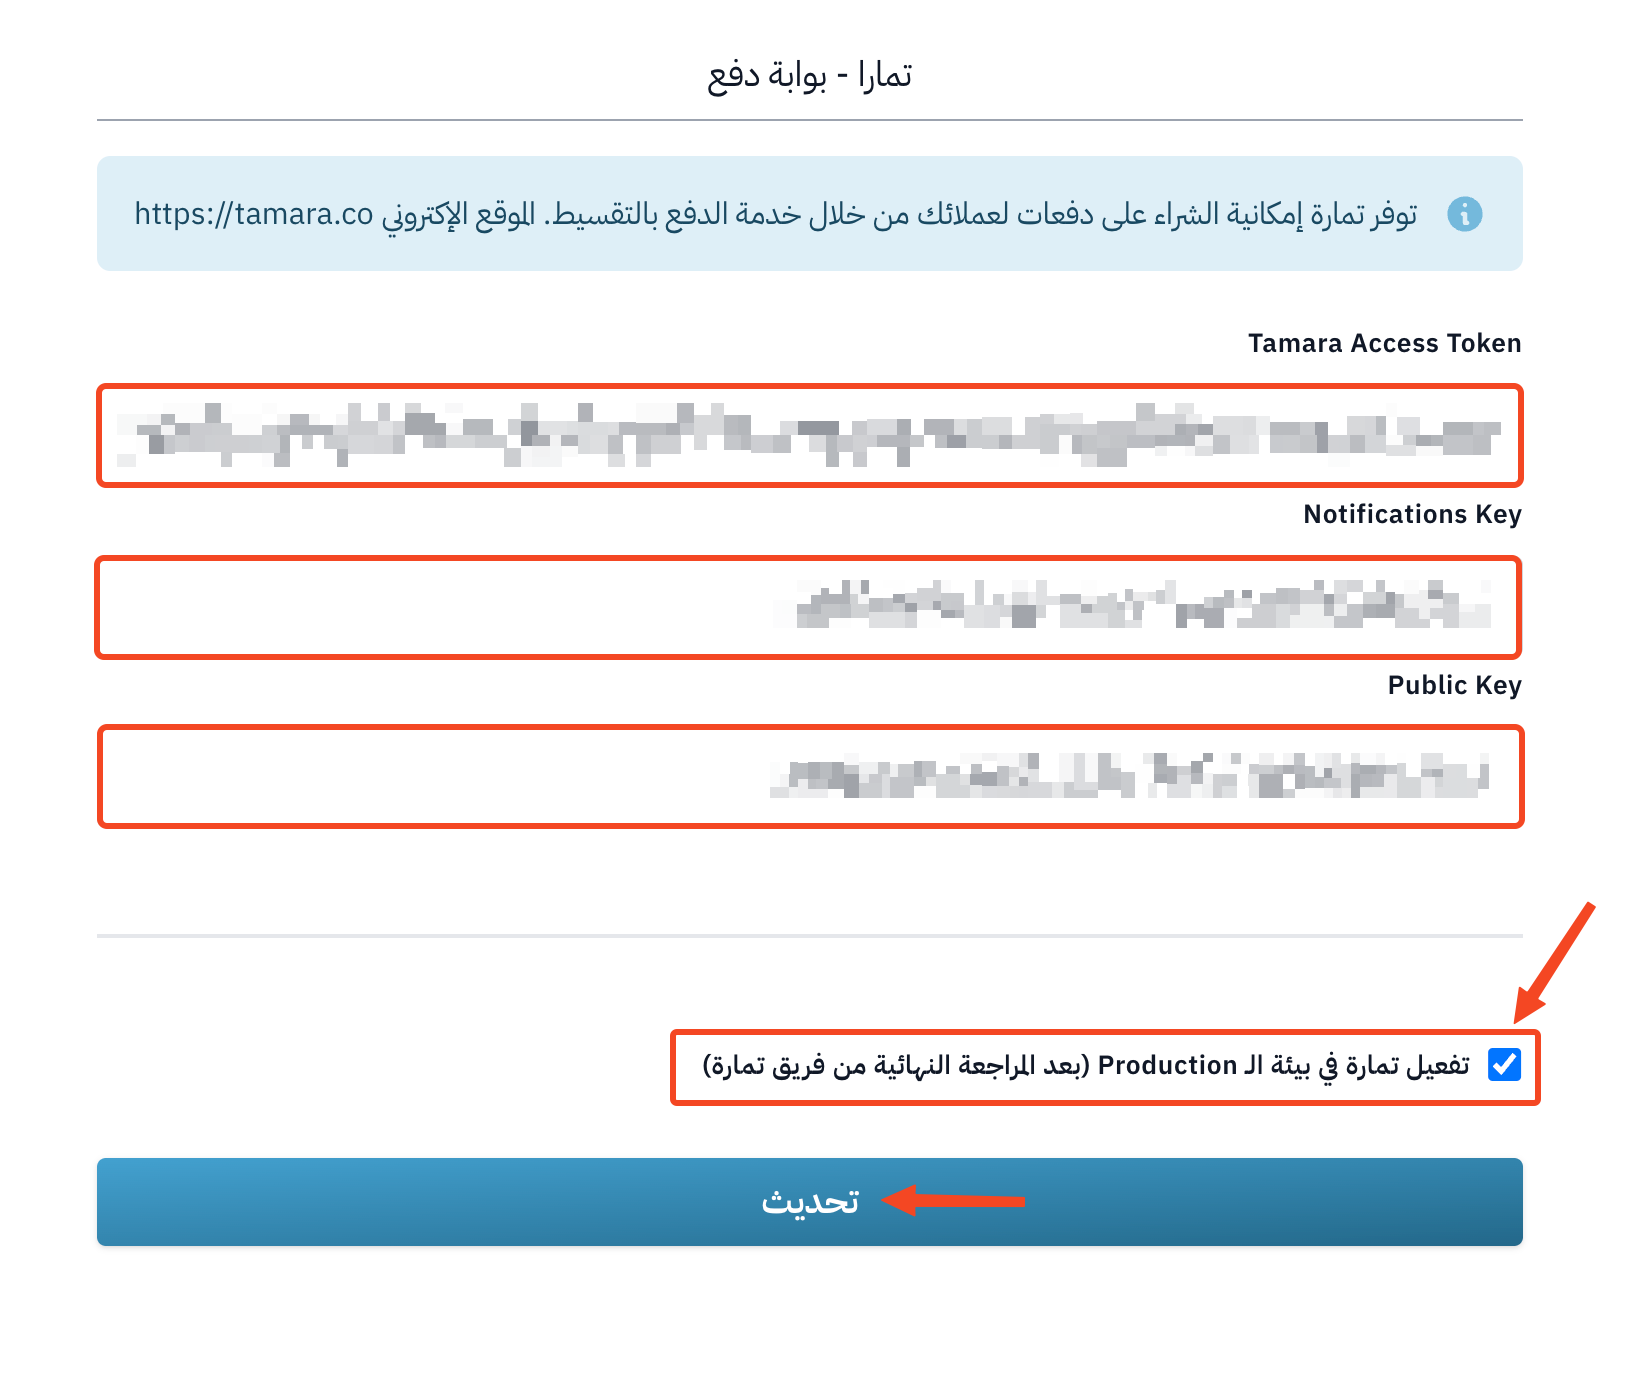
After you get the live integration keys (Production), follow these steps in your platform dashboard:
-
From Settings, go to the Payment Methods page, then choose Tamara Pay.
-
Enter the live integration keys (Production) sent to you by the Tamara team after the review.
-
Turn on Enable Tamara in Production (after Tamara configuration).
-
Click Update to save.
Manage orders on Tamara
- To manage test orders (Sandbox), use the Tamara dashboard at this link: https://partners-sandbox.tamara.co/
- To manage real orders in the live environment (Production), use the Tamara dashboard at this link: https://partners.tamara.co