Turn on bank transfer on your platform
Your customers can pay by bank transfer, so they have one more way to complete a purchase. This article shows how to turn on bank transfer on your platform, and how to review transfer requests.
How to turn on bank transfer
-
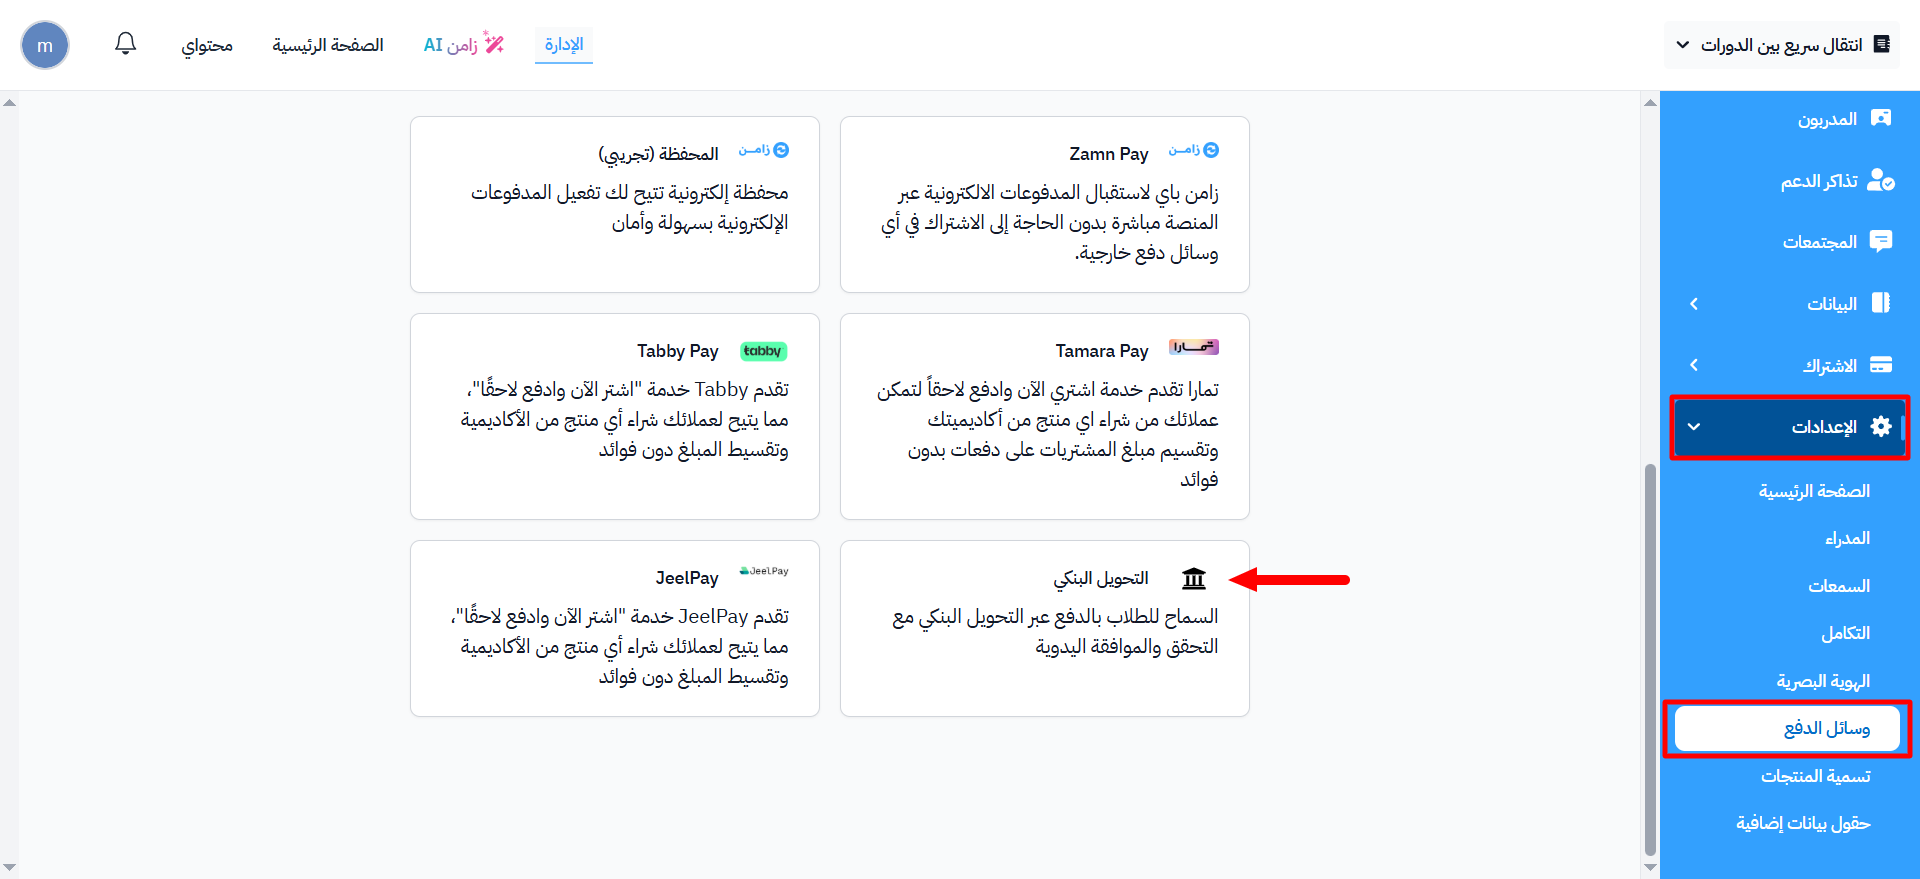
From the dashboard, choose Settings.
-
Choose the Payment Methods page.
-
Choose Bank Transfer.
Add a bank account to your platform
-
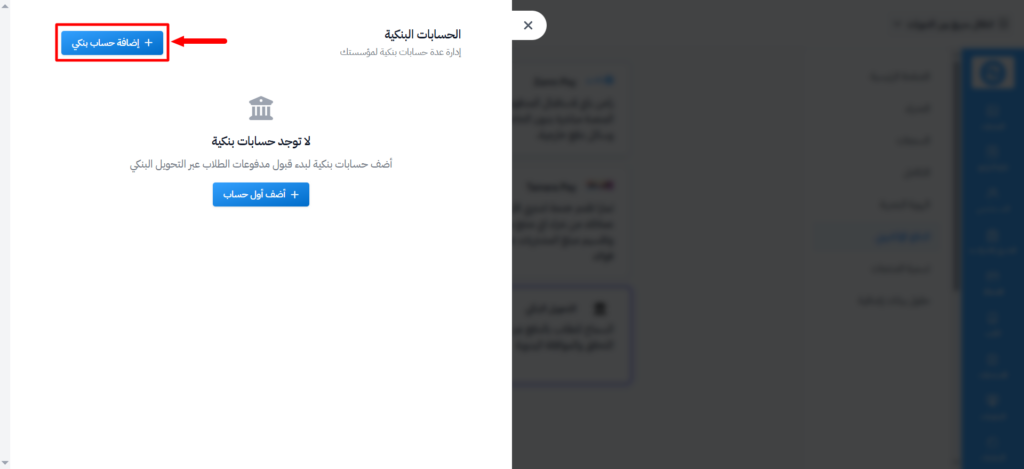
If you have not added any bank account yet, click Add First Account or Add Bank Account.
-
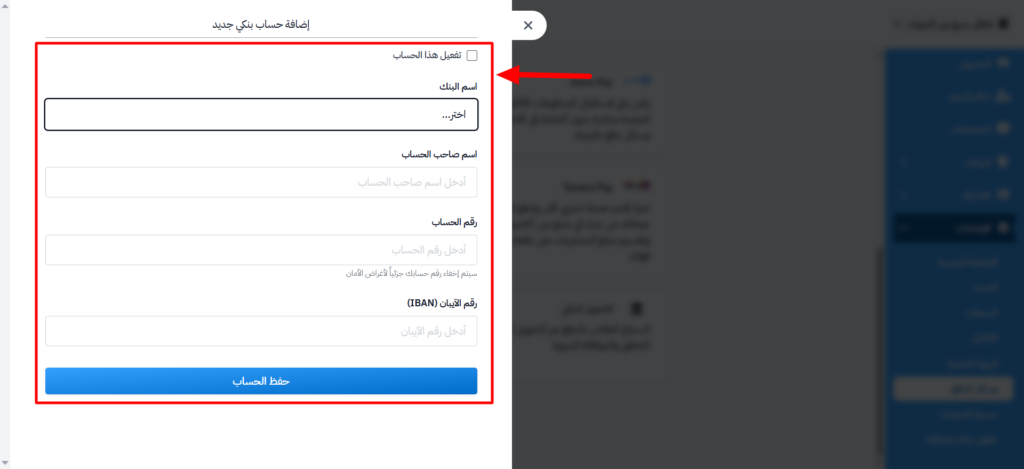
Enter the required details:
- Enable this account: controls whether this account can be used.
- Bank Name: choose the bank from the list.
- Account Holder Name: the official name registered with the bank.
- Account Number: part of the account number is hidden automatically for security.
- IBAN: enter the IBAN of the account.
-
Click Save Account.
Follow up on bank transfer requests
When a new bank transfer request arrives, an email is sent automatically to your platform admins to let them know, so they can review it.

-
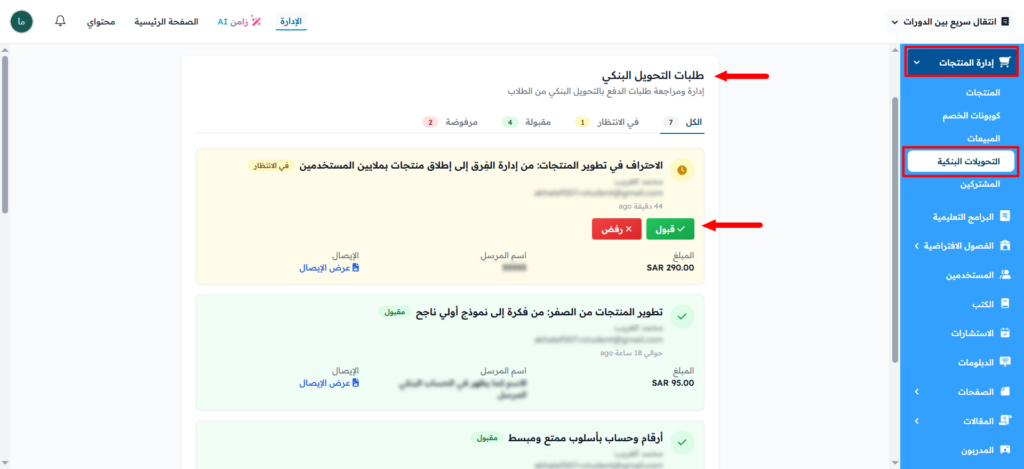
From the dashboard, choose Product Management.
-
Choose the Pending Transactions page.
-
Review the transfer details. You can open the receipt with View receipt in the Receipt column.
-
Click the ⋯ (Actions) button at the end of the request row.
-
Click Approve to accept the request, or Reject to refuse it.
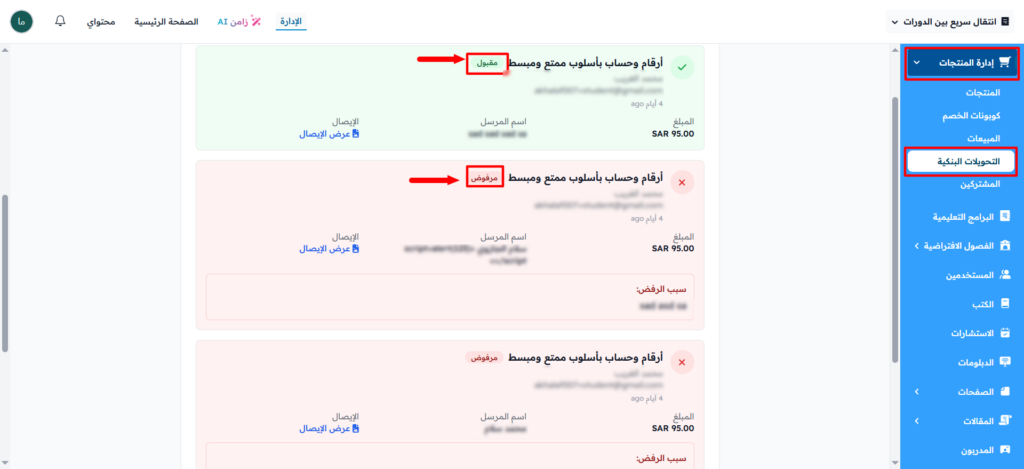
When you reject a request, you must write a Reason for Rejection and then click Reject Request. The student gets this reason by email, and you cannot undo the rejection.